Do-it-yourself decorative elements made from plastic bottles will help add bright colors to your summer cottage. Crafts vary in degree of complexity, but always become the subject of attention of others. Many birds made from plastic bottles are made using a similar algorithm, only the outlines and details differ. Options for their manufacture will be discussed further.
Available materials and nuances of the design process
The creative imagination of a master is capable of creating a masterpiece from ordinary things. In addition to bottles, other available materials are used to decorate birds:
- Plastic canisters make an excellent base for the bird's body.
- Polyurethane foam helps to add the required volume.
- Styrofoam will help make the bird's head as close to the original as possible.
- Self-tapping screws, wire or glue are used to connect the parts together.
- The finishing of the bird's legs is carried out with a corrugated pipe, twine, or parts are cut out from plastic containers.
- Small dairy bottles help give the bird's thighs the desired shape.
- Moisture-resistant acrylic paints and anchor varnish transform the nondescript silhouette of the bird beyond recognition.
To cut and connect all this, you will need scissors, a stationery knife, a stapler, and an awl. This is the main list, which changes depending on the selected bird model.
Comment! The beauty of a craft is largely determined by the quality of the plumage. If you want to decorate your area with a spectacular bird, be patient to make a large number of small and large feathers.
For novice craftsmen, we can offer a simple step-by-step guide, where a peacock acts as a bird made from plastic bottles:

Advice! Preliminary filling of the body with sand will help to give stability to the bird's figure.
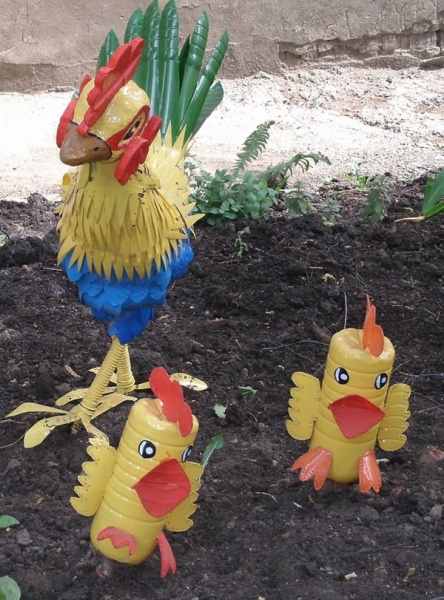
Making poultry using a rooster as an example
Having gained experience with easy crafts, you can move on to a more complex process. The proposed algorithm for making a rooster from plastic bottles will be an excellent guide for making other birds.
Available materials:
- plastic canister and 5 liter bottle;
- PVC pipe about 40 cm long;
- 1.5 liter containers for thighs - 2 pcs.;
- lots of fletching bottles.
Frame
Process of creation:
- The work begins with the formation of the bird's frame. The side of the plastic canister is cut and moved to the side.
- The pipe is given the desired shape, after which it is screwed with self-tapping screws to the body of the bird.
- The rooster's neck is made from a 5 liter plastic bottle rolled into a ball. Depending on the selected bird model, elements can be replaced with other parts. For example, another piece of plastic pipe would be perfect for the neck of a flamingo.
- The rooster's legs have a thickening at the top, bags made from 1.5 liter bottles will serve as thighs. For other birds, the volume of containers is selected in proportion to their figure. The elements put together represent a similar frame:

Head
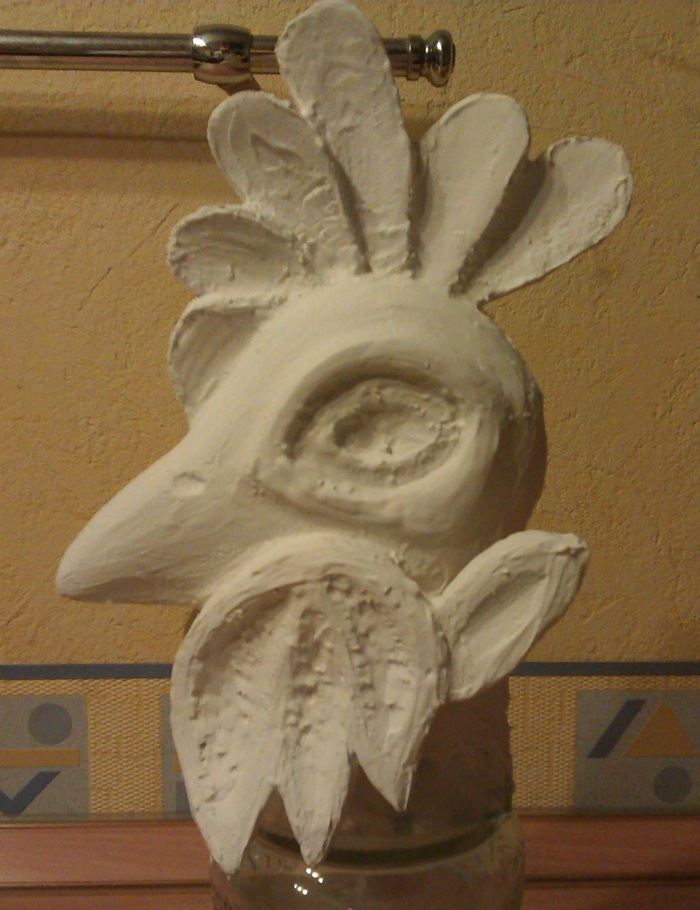
The rooster's head is cut out of foam plastic. If it is difficult to cut out a whole figure with a comb and beard, you can prepare all the elements separately and then connect them with glue. Sometimes this part is also formed from a plastic bottle. To ensure that the foam blank can be easily painted in the future, the following measures are carried out with it:
- carefully processed with sandpaper;
- covered with acrylic putty;
- after the composition has dried, sand it again to give a smooth surface;
- Apply a layer of PVA glue.
Elements of the bird's head are decorated at the discretion of the master. Eyes can be painted with paints or finished parts can be fixed. Various crests and scallops are cut out of plastic or foam. The beak is often made from a thick plastic container (usually a shampoo container).
Plumage
The size of feathers varies not only among different birds, but also on the same figure:
- The back, sides and breast are usually decorated with medium-sized feathers.
- Smaller elements are cut out for the neck.
- The wings and tail are most often formed from long feathers.
Comment! Feather bottles are supported in the same color, so that after dyeing you get a uniform shade over the entire figure.
They begin to form the plumage from the thighs, fixing each subsequent row in such a way that the attachment point of the previous one is not visible. The work is carried out using wire, threading it into holes prepared with an awl, or with self-tapping screws.
After the legs, they move on to the rest of the body, leaving the back free, where the bird’s wings will be attached. In order for a rooster made of plastic bottles to stand firmly on its feet, it needs to have its paws made. The frame is made of rigid wire, which is subsequently fixed to a plastic pipe. Then the base is processed with a corrugated tube or twine.
The most difficult stage for many may be the formation of the wings and tail of a bird using plastic bottles. For these purposes, reinforcing mesh is usually used. The size of the base for the wings and tail is selected depending on the species characteristics of the selected bird. For example, peacock tail feathers can be mounted on an oval piece of linoleum. But the mesh is a more common option. The elements are fixed with an overlap, each row covers the fastening of the previous parts.
The moment of complete assembly of all elements from plastic bottles can be carried out before or after applying paint. At the finish line they are painting. A bird with the same plumage throughout the body can be decorated after complete assembly. It is more convenient to paint the elements of the frame, tail and head separately, and then connect them using screws and wire.
Review of interesting ideas
The versatility of plastic bottles allows you to make crafts of varying degrees of complexity. The same bird can be presented in different variations, and its production is not always a labor-intensive process.
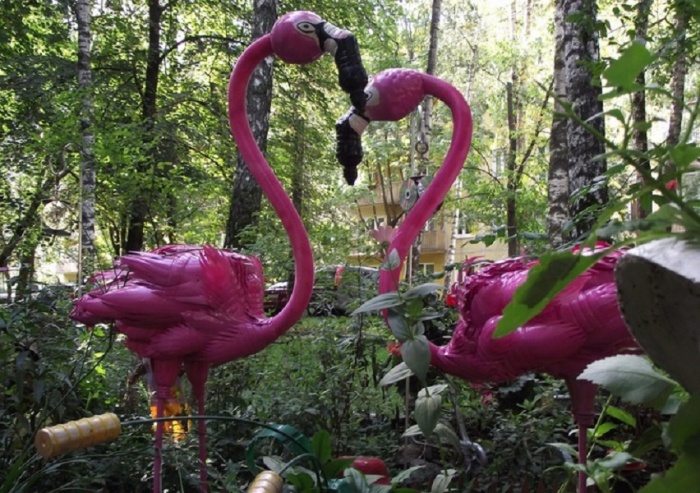
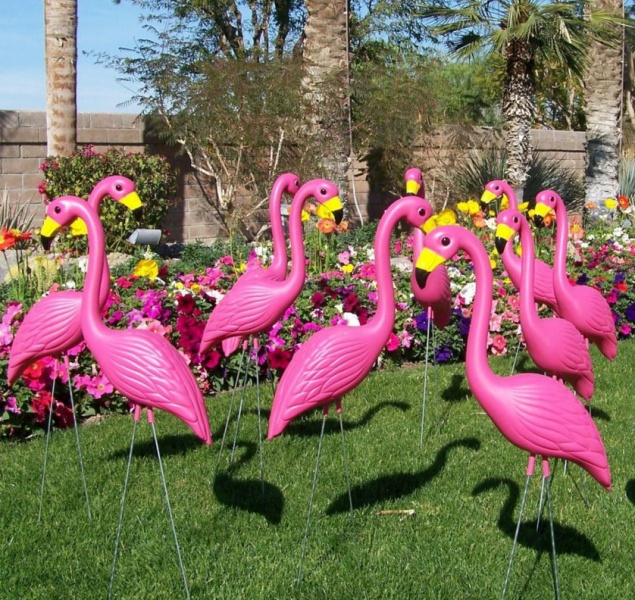
Bright pink handsome flamingos will help add exoticism to the area. Guided by the algorithm proposed above, you can make a bird in a short time thanks to its large plumage. A variety of options are shown in the photo:

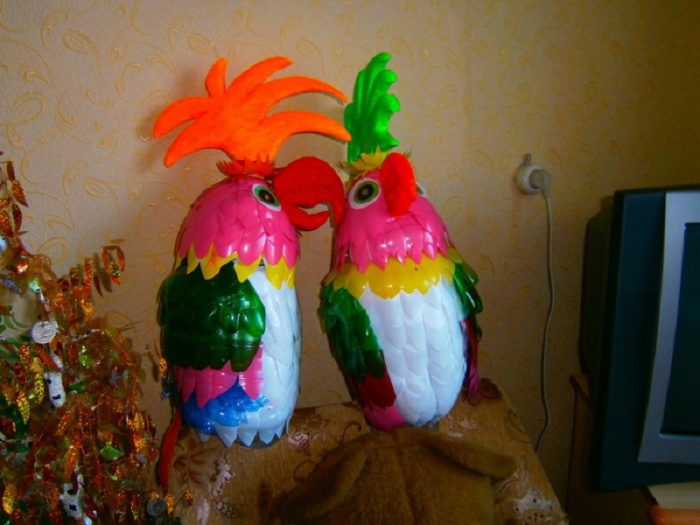
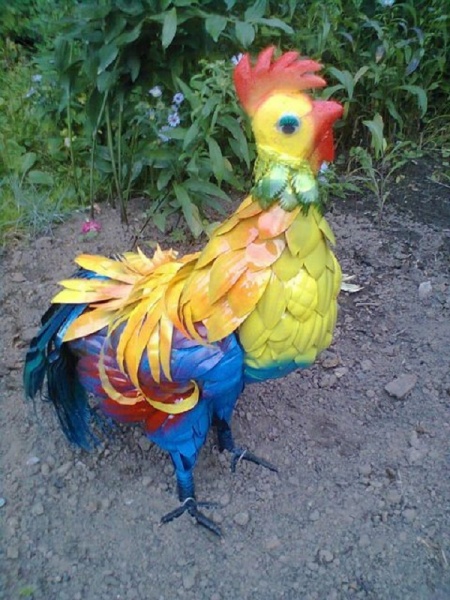
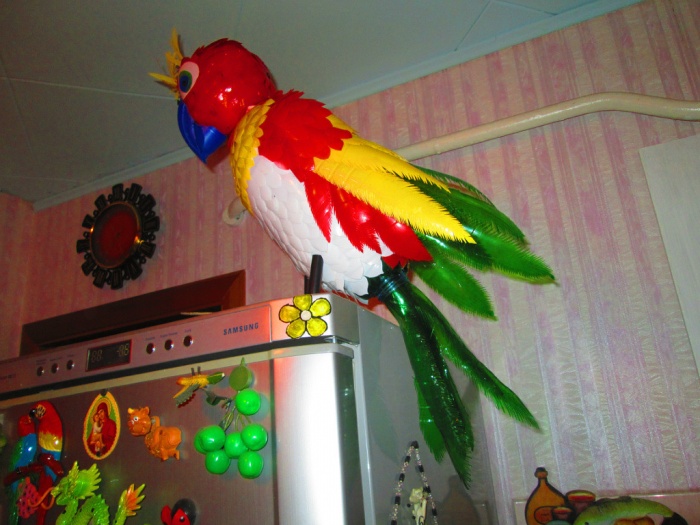
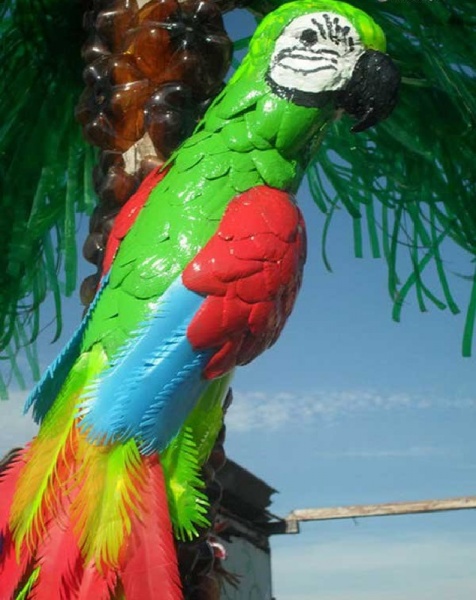
Another pretty bird of hot countries is the parrot. A lot here determines the originality of the coloring. The body made of plastic bottles can be trimmed with feathers or simply covered with paint. The complexity of feathers and tail is chosen at the discretion of the artist. Design methods are shown in the photo:

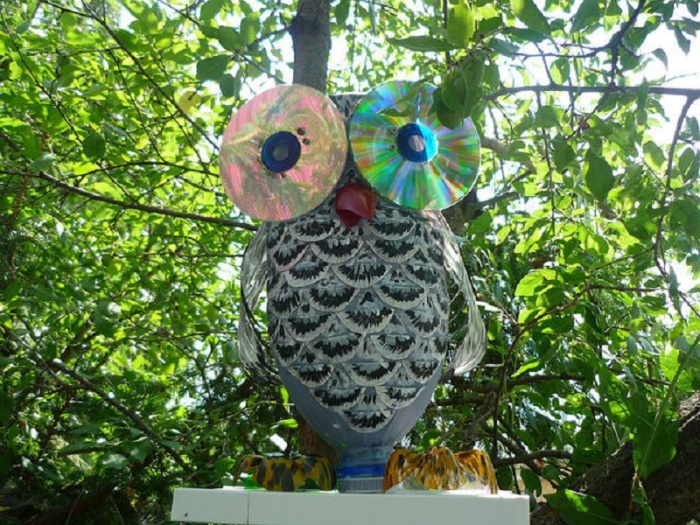
The owl or eagle owl, familiar to our regions, is another worthy garden decoration. An impressive beauty made from plastic bottles can take a lot of time.

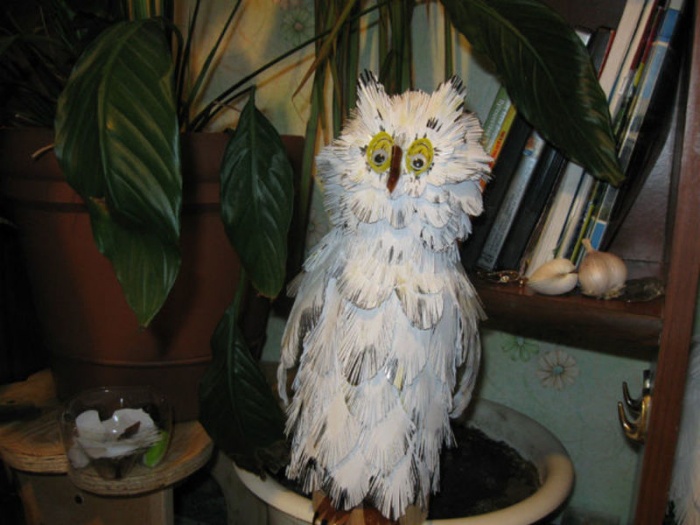
For busy people, there is a simplified version of the night bird.
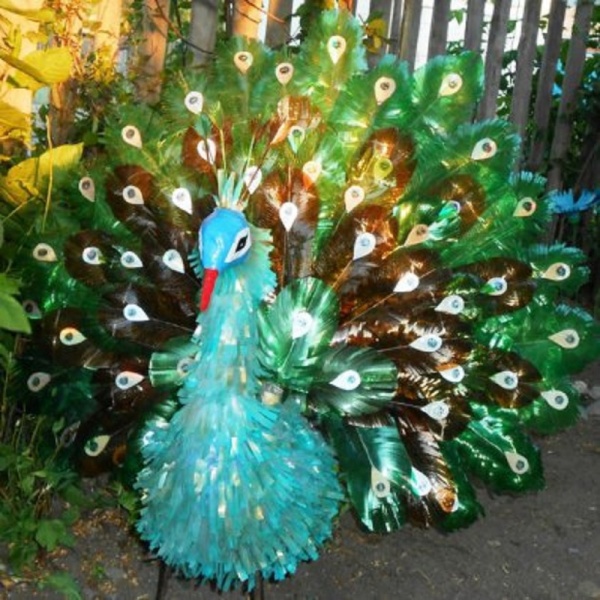
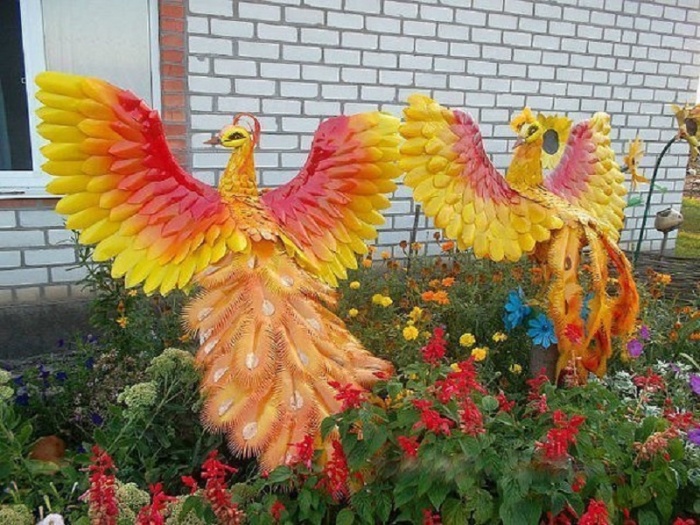
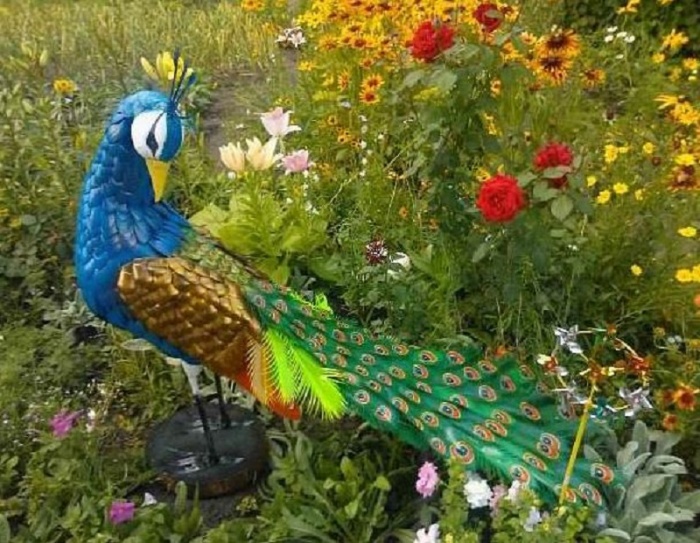
A peacock will help you get closer to the scenery of the royal court. The gorgeous tail of the bird will not leave anyone indifferent. It is up to the owner of the site to decide whether to make the peacock bright or white, to leave the tail folded or straightened. Or maybe you liked this firebird?

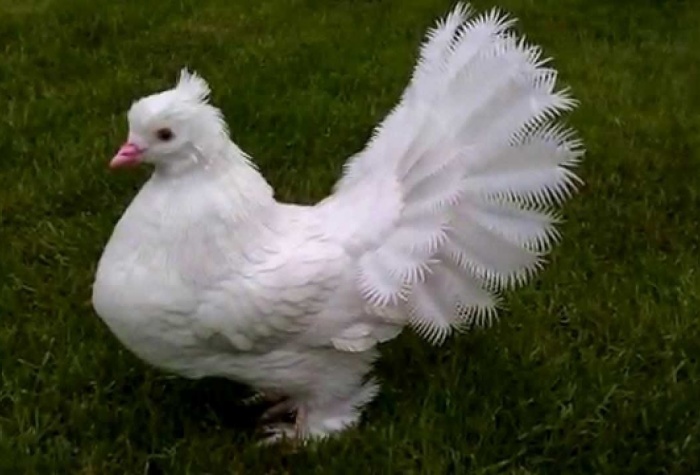
A chic dove will require perseverance and patience, for the production of which white plastic bottles will be useful. It is better to prepare the plumage on long winter evenings, when all work in the garden is suspended, so that by spring the area will be transformed with a new resident.

Which model of bird to choose is up to the craftsman to decide. The process of making any craft can be made easier by replacing jewelry-style parts with simpler elements made from plastic bottles.
1. Weld a frame of rods; if you make a smaller bird, you can tightly twist the rods with wire.
2. The body is made from a 10 liter canister, I cut out a strip on the top part and move it back - I attach it with self-tapping screws. I cut out feathers from 2 liter bottles and close the resulting hole.
3. I put “fingers” cut off from pipes and nails from bottles onto the wire.
4. The leg itself is a hose from a vacuum cleaner. I fasten it with self-tapping screws.
5. This is what the leg looks like.
6. I attach a bag from a bottle to the top of my leg, forming a thickening. I then attach long feathers to it, creating the necessary shaggy legs.
7. This is what it looks like up close.
8. For the head, I glue together two pieces of construction foam with Titan glue.
9. I remove excess with a hacksaw.
10. I highlight the beak.
11. Shaping.
12 Using sandpaper I sand until smooth, deepening the eye sockets.
13. I insert eyes - (For soft toys.)
14. I strengthen the beak with a piece from a bottle, and glue the eyelids to the eye.
15. I make the neck from a 5 liter bottle.
16. Neck front view.
17. I fasten the feathers to the neck with wires through punctures with an awl. I glue it to my head with Titan glue. In the recesses of the head I additionally tighten it with self-tapping screws.
18. I cut flight feathers from 3-liter bottles. The width of the feather is 6-7 cm. I attach it to a metal mesh using wire through punctures with an awl.
19. The second and subsequent rows are feathers from 2 liter bottles. 8 pcs. from one bottle.
20. Another row of feathers.
21. Finished wing from above.
22. I turn the wing over to attach the feathers from below.
23. At the bottom of the wing, the feathers should be straight; for this I use only the middle of the bottles (without curves.)
24. This is what the lower part of the wing looks like.
25. I attach the wings to the base,
I will then close the connection with feathers,
attached to the front side and bent to the lower part of the wing.
Alena we wish you good luck and creative success. Don't forget to share your new works with us.
Crane
1. For the head I use construction foam 10 cm thick. I use a hacksaw to saw off the required piece (about 30 cm on the long side).
2. I cut off unnecessary parts.
3. I round all the edges.
4. I divide the head into approximately three parts, where the lower two-thirds of the cheeks are.
5. I round out all the details, highlight the beak, cutting it off quite thinly. I cut out holes for the eyes.
6. I enlarge the eye sockets, narrowing the head towards the beak.
7. I sand the head with sandpaper, highlighting the details. I cut out the eyelids from thin foam plastic. The eyes are from a soft toy.
8. Everything is the same, but from the front.
9. I glue a strip from a bottle onto the beak until the glue dries, securing it with electrical tape.
10. Everything is the same, but from the front.
11. This is how I pierce and connect the feathers.
12. From the middle of a large bottle, cut out flight feathers (5 cm wide), 9-10 per wing.
13. A couple more rows of cover feathers.
14. We also cut the secondary flight feathers from a bottle, but shorter, screw them in a semicircle, slightly covering the first ones (the wing is slightly folded).
15. Wing.
16. For the tail, I cut the 30L bottle crosswise into strips of 5-7 cm and connect them with a fan.
17. I slightly lift the edge of the mesh from behind and screw on the tail. The next row is again made of 1.5 liter bottles.
18. Side view.
19. I cover my back with feathers from 0.5 liter bottles.
20. I will cover the bottom of the wings with feathers cut from the middle part of the bottles (they should not bend).
21. You will get two rows, the joints will be closed with feathers bent on the front side.
22. Finished wing.
23. Wings, bottom view.
24. I make the body. In this case, the frame is welded, but you can twist all the parts with wire.
25. On the neck is a hose from a vacuum cleaner, and on the body is a canister of machine oil.
26. I put plastic tubes on my legs and cut out paws from a 0.5 liter bottle.
27. I screw the hose to the head with a long self-tapping screw (lubricate it with glue).
28. I cut off the handle from the canister, remove the part on top (needed for work), and thicken the legs (“legs”) from the tops of 2 liter bottles.
29. Feathers for the body are also from 2 liter bottles. One will make six pieces. You need both short and long ones.
30. I cover my torso completely.
31. At the bottom of the neck there is a fringe of halves of 2l bottles that covers the connection of the feathers.
32. It remains to connect the parts.
33. I painted this crane with aerosol paints, I was pleased with the result.
Stork
To make storks we will need:
1. Two 5 l canisters
2. Metal mesh for wings
3. Strong wire
4. Plastic tubes for legs and neck
5. Foam for the head
6. White milk bottles
7. Dark beer 1.5 l
8. Hose from a vacuum cleaner (can be replaced with corrugated one)
1. For the head I use construction foam 10 cm wide
2. I cut out the blank, highlight the eye sockets, and make a flat beak.
3. I sand it smooth with sandpaper, insert eyes (or beads)
4. I glue the eyelids, strengthen the beak with a part from a plastic bottle, gluing it onto the “Titan”. I make the second stork’s beak open.
5. For the body I take a 5 liter canister.
6. I cut off the handle.
7. I bend the mesh to the shape of a canister - this STORK will have folded wings.
8. I round off the “wings”.
9. I bend the wire for the legs.
10. A liter milk bottle is cut into 6 feathers.
11. I cut feathers.
12. I begin to screw the feathers from the lower part of the body.
13. I strengthen the wire for the neck and put a hose on it.
14. I screw a number of feathers to the hose with self-tapping screws.
15. Side view.
16. I cut the halves of milk bottles into fringes and secure them around the neck with tape.
17. I start with the flight feathers at the edge of the wing.
18. The second row overlaps the first by one third.
19. The third and subsequent rows of white bottles.
20. Paws from 0.5 liter bottles.
21. Making the body for the second stork.
22. Like the first one, I cut off part of the canister from the top - it is needed for screwing on the feathers.
23. I cover the body with feathers, but, unlike the first one, I screw the feathers onto the entire canister.
24. This stork’s wings are slightly open. The first row of feathers is from 1.5 liter bottles (6 pieces from one)
25. I screw the second row only to round the wing.
26. Third - for the entire wing.
27. I make the tail - it is short, the feathers are slightly apart.
28. I turn the wings over to screw the feathers onto the underside.
29. I make the last row, covering the edge of the wing, from feathers bent in half, rounded on both sides.
30. This is approximately what it looks like.
31. Each of the subsequent feathers covers the junction of the previous one.
32. We screw the wings with self-tapping screws and paint the birds.
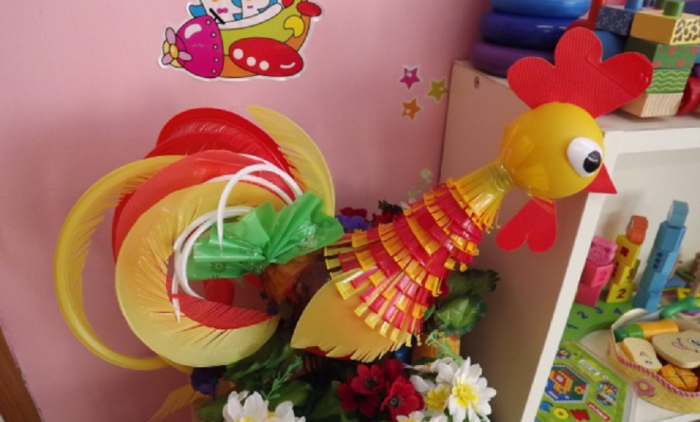
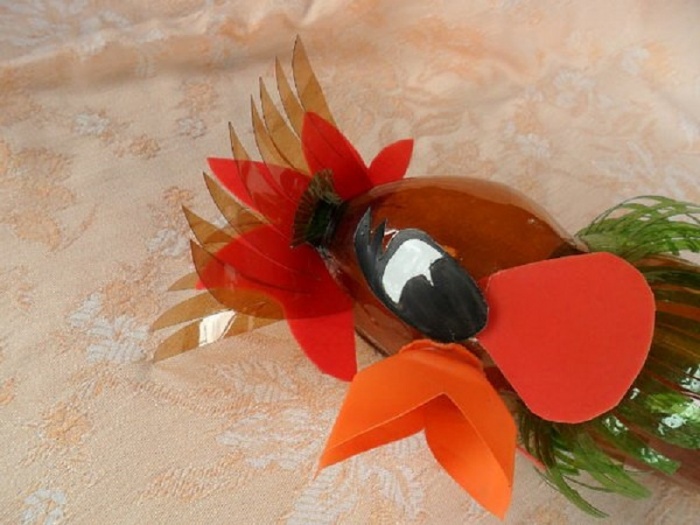
You can decorate your summer cottage with a bird of paradise (peacock) made from plastic bottles. This miracle bird will take its rightful place on your site. It’s not very difficult to make it, at no cost, the main thing is your desire.
I offer a master class on making a firebird.

You will need: a 10 liter canister for the body, strong wire and plastic tubes for the legs, a welded metal mesh 45 by 150 cm, thick foam for the head, plastic bottles of different shapes and sizes.
I cut off a strip of the canister and, moving it back, secure it with self-tapping screws.
I bend the wire for the frame, put on the tubes and place it on the stand.
I attach the canister to the base with wire, pulling it through the punctures with an awl to the legs
I cut bottles.
I cut out the feathers for the tail from green bottles. To do this, I bend the middle part lengthwise, round it and cut it into a fringe. Usually one large feather or two small ones come out of one bottle. For a beautiful tail you will need at least 60 pieces.
I screw the finished colored feathers from the bottom in a semicircle, each next row overlaps the previous one by half.
A few feathers from light green bottles will revive the bird


Elena Dyachenko
Every summer in our city of Severodvinsk there is a traditional “Stroller Parade” dedicated to City Day.

This is not the first time our family has participated in such a large-scale, spectacular and family-uniting event. This year we decided to make a stroller" Firebird"Based on the fairy tale by Pyotr Ershov "The Little Humpbacked Horse".

Firebird my husband and I made it from plastic bottles and covered it with bright spray paint.

And I sewed costumes for fairy tale heroes for all the members of our support group. My two-year-old granddaughter Alyonushka suited the role of “The Little Humpbacked Horse”

Mom became "Mare". A bright suit was made for my niece" Firebirds"Alyonushka's grandfather reincarnated as Ivan the Fool,"

and I'm in "The Tsar Maiden". The rest of our group also wore beautiful costumes corresponding to the fairy tale.

After the parade of strollers, I decided to plant " Firebird" to the flowerbed located on the territory of the "Children's House", which I create every year.
Together with the children we plant seedlings.

Kids enjoy caring for plants, watering them, loosening the soil, and watching the plants grow.


In addition, the children get acquainted with the types of plants and their structure (flowers, grass, bushes, trees, and become familiar with the world of beauty. Also, with our own hands, my husband and I made figurines of caterpillars, frogs, ladybugs, snails, bees, grasshoppers, butterflies and other insects that children become familiar with during walks.


The firebird was a worthy decoration for the flower bed, which I called “The Cheerful Flower Garden,” and evoked pleasant emotions not only in children, but also in adults. Thank you for your attention.

Publications on the topic:
For work we will need: 1. Plastic bottles of various configurations, the appearance of the doll depends on the configuration of the bottle; 2. Sculptural.
Dear colleagues! Many of us probably had to invent and make various aids and devices for.
Sakura is one of the most beautiful trees. Flowers fascinate with their tenderness, simplicity and beauty. In Japan, sakura is not grown for its fruit.
You will need: 60 empty plastic bottles of the same shape; foam rubber - 1.5 x 1.1 m; calico - 1.5 x 1.1 m; fabric ribbons - 7-8 wide.
A little about this flower. Lilies are very beautiful flowers, they belong to the Liliaceae family. The lily has large buds of various shades.
One of the popular garden decorations today is the heron, so for owners of suburban areas the question becomes very relevant: “How to make a heron for the garden with your own hands”? Buying special figurines for your own “hacienda” now, during a crisis, is an expensive business. Many people want to decorate their garden area on their own using improvised means. Here are some tips.
An unusual decoration for any dacha - a do-it-yourself heron made from scrap materials.
Heron made of plastic
The main material for garden crafts is plastic, or rather bottles made from it. To create a cute heron, any housewife should stock up on the following:
- The largest possible plastic container is approximately 5 liters (more if possible).
- Regular wire.
- Drill.
- A spatula and, accordingly, putty.
- A small wooden log.
- Glue and acrylic paint.
The method for creating such a miracle bird is quite simple. A mandatory requirement is accuracy, patience and minimal creativity. Sometimes it takes men's hands to work with the drill as efficiently as possible.

A beautiful bird for decorating a summer house can be made from several 1.5 liter plastic bottles, wire, glue and paints.
The sequence of actions when creating a heron is as follows:
- Take a bottle - the basis of the bird from which the body will be constructed. Create a neat beam from a wooden log. It should fit optimally into the body of the miracle bird, that is, not fall out of it.
- Insert the timber into the plastic base. The base for the garden figurine is ready.
- The next stage is men's work. A drill will be required. Use it to make holes in the wood, preferably non-through ones. They are designed to insert wire into them - the basis of the bird's legs and neck. In this case, the size of the holes should be less than the diameter of the wire. The latter must enter the beam with difficulty so that the heron does not fall apart.
- Now you need to carefully insert the wire and give it the shape of the heron's legs. To prevent your legs from accidentally falling out, you need to pour a solution of Moment glue into the holes. At this stage, the main thing is to give the legs a position in which the future bird will not fall into the flowerbed from the wind or rain. This is not always possible. Therefore, some summer residents place the bird on a small pedestal and support it with some kind of rod, preferably made of iron.
- Wrap the heron, or rather its frame, with pieces of fabric. To prevent the bird from appearing emaciated, you can put foam rubber in some places, for example, in the body area.
- The penultimate stage is wrapping the heron with a special mesh, onto which a glue solution has previously been applied. Finally, coat the figure again with glue, but not universal glue, but PVA. This is necessary for smoothness. To make the heron look good, it should be covered with acrylic paint.
Return to contents
Heron created on a frying pan
The purpose of creating figurines with your own hands is aesthetics. Such impressive garden accessories, and even created with your own hands, give a special coziness not only to the garden, but also to the apartment. Moreover, not only a drill and wood, but also an ordinary frying pan can become available tools.

The most difficult material for creating figures with your own hands is clay.
To create a bird this way you will need:
- several plastic bottles;
- fishing line, awl and metal rods.
First you need to collect the “feathers” of the heron. To do this, cut off the bottoms of the bottles. The containers must be the same size. Then ordinary sand is used, which any gardener has. Place it on a cast iron frying pan and heat it up, then put the bottle bottoms there, one after the other, thereby leveling them. This creates the foundation for the heron's plumage.
Then the “feathers” are collected onto the fishing line. First create two holes in the bottoms using a hot awl. They should be parallel to each slice. The result is a “feather garland”.
The third stage is the formation of the body of the figure. To do this, you need to take a large plastic container with a stopper. This is where the metal rod is inserted. This is the neck of the future bird, which is wrapped in polyethylene. Finally, a garland of bottoms is placed around the neck and base. The main thing is that the layers should fit as tightly as possible to each other. Here the heron is ready. What remains are the eyes, created from corks, and the beak, cut from plywood and painted. The legs are based on metal rods that pierce the lower part of the plastic body. Such legs are easy to stick into the ground, and the figure itself can be simply moved from one part of the garden to another.
Return to contents
Clay bird for the garden
A more complex option is a clay heron, which can decorate not only a dacha, but also an apartment, as it looks very stylish.

To create figures from cement, you need to make a strong frame.
You will need:
- clay;
- a mixture of clay and water, brought to the consistency of sour cream (experts call this “slip”);
- paints for ceramics.
The clay is shaped into a rope by rolling. They connect it. They create another version of it, only longer, and lay it on top of the first one. They connect again. This is repeated several times: for a heron you will need about 20 strands, each of which is longer than the other.
The second step is to make a tourniquet of shorter length than all previous ones and apply it to the formed head of the heron. Moreover, the head itself should be smaller than the body.
The third stage is the creation of a clay cake. This is the forehead of a bird. The flatbread is folded at the edges. Now you need to use a stacker and slip to level the surface. Next, you need to let the future figurine dry.
The fourth step is bird's claws. They are created from thin clay strands. The best option is to create a semicircular shape for them. This makes the claws look more voluminous.
At the fifth stage, bird wings are created from the bottoms of plastic bottles in the same order as described above. The main thing is to use a stacker to mark the places where the plumage will be located. Then the beak and eyes are created from bottle caps and plywood.
After which you should burn the bird, preferably in a specialized oven, and use paints intended for ceramics of the lightest tone, so that the product looks like a heron.


