Taking pictures is a unique activity that is not only popular these days, but also helps a person to open up and show himself. Modern technologies allow not only to take high-quality photographs by inventing and improving modern technologies, but also to share them instantly.
Every day, every second person shares their personal or other people's photos on social networks, by mail. However, it is much more pleasant to fit comfortably and look through the album. Especially if it is decorated with clippings, quotes and interesting thoughts. Undoubtedly, the second such will not be found.
A lot of articles have been written about how to make a photo album with your own hands, a lot of videos with master classes have been shot. It's quite difficult to make a choice. However, there are basic knowledge and invaluable tips that are worth learning before getting started.
Choosing a theme for the upcoming album
Of course, the idea of creating a unique photo album with your own hands does not arise just like that. Perhaps a person is driven by the idea of making money on such things. However, most often the decision comes suddenly, after a significant event in the desire to save every bright moment.
Creating an ordinary classic album is not difficult. It is enough to have a few hours of free time and a rich imagination. You can decorate an ordinary photo album, or you can create your own album from scratch.
The most popular photo albums are:
- wedding theme. A wedding is a wonderful moment to start a new family life. The mass of events on this day exhausts the newlyweds, depriving them of the opportunity to enjoy this day and just contemplate each other. A professional wedding photographer is no longer a novelty. Beautiful photographs that convey every emotion of this day simply must be framed accordingly.
- Photo album for the birth of a baby. The arrival of a child in a family is an important milestone. And every parent strives to remember everything and display it in the photo. However, even the most attentive mother is not able to remember every important moment, because there are so many of them. A photo album with quotes will help you remember the most important thing even after many years.
- Album with a school, educational plot. The first day of kindergarten, first grade, graduation party, institute are the stages of growing up, which are accompanied by wonderful memories.
- Capturing a bright moment in life. This is not only a vacation, or a trip. You can also create an album as a gift, for example, for an anniversary, or for a memorable date. Thematic albums for beloved, beloved are popular.
The reason for creating a photo album can be anything. The main thing is the creative inclinations and the availability of tools.
Tools and materials needed to create a photo album
The original handmade album is quite an expensive thing. Its cost will include not only the price of the materials used, but also the dignity of handicraft. But this does not make such a photo album inaccessible. On the contrary, everyone can make it with their own hands, using their talent and imagination.
In order to make a photo album yourself at home, you must have:
Required tool:
- miniature scissors;
- hole punch simple;
- knife-cutter;
- pencils;
- paints;
- markers;
- glue stick;
- curly scissors;
- figured hole puncher;
- Double-sided tape.
Necessary materials:
- paper. It should be tight enough. You will also need paper for substrates for photographs, its density should be lower than the density of the main sheet;
- thick cardboard (2 sheets). You need it to create a cover. You can use old unnecessary cardboard boxes;
- cover material. To do this, you can use completely different material. Old pieces of fabric, jeans, decorative colored paper, to create a soft cover you will need thin foam;
- decorative material (depending on the general idea: fur, leather, wood, iron, beads, buttons, ribbons and other decor). You can make small details of the decor yourself: knit, sew, dazzle, dry.

Interesting details for your creation can be found both at home and in the scrapbooking store.
Making an album cover
When all the materials and tools are prepared, you can get to work. When making a photo album with your own hands, they often start with the cover.
There are two options for creating a cover:
- Use a ready-made one: buy a new one, or remove it from an old album. This method is the easiest. All that is required from the master is to decorate beautifully using decorative material. You can sheathe such a cover with any fabric (depending on the idea), use colored paper, various decor. Often this option does not require gluing the inside.
- Create a new one. This option is already more complicated. Since it requires certain knowledge. In order to make a cover, you need to decide what form the future album will be, how many photos to fit on 1 page. Having decided, you need to cut out a page from cardboard that we need in size. Do the same with the second sheet of cardboard. Next, you need to draw 2 lines on each sheet (2.5 and 3.5 cm from the left edge of the sheet). After that, cut with scissors along 2 lines.
To decorate the top of the cover with colored paper, you need:
- take a sheet of colored paper, 4 cm more than a cardboard sheet on all sides;
- place the album sheet in the middle and circle with a pencil;
- it is good to cover with glue a sheet of colored paper, or both parts of the cover sheet;
- put the cut sheet of the cover in a drawn square on a colored sheet of paper so that its edges clearly coincide with the drawn lines;
- wrap the remaining edges of the colored paper onto the cover, gluing them tightly. It is important to try to do this carefully so that the waters come out as even and beautiful as possible;
- also needs to be done with the trim of the inside of the cover. Colored paper can cover poorly glued corners.
When making the first albums, you should pay attention to the already finished covers. Building new ones from scratch can be tricky.
To work less on the cover design, you can use designer cardboard instead of ordinary cardboard.
Useful page design tips: how to fill the page correctly
It will be easier to fill the pages of the album in a disassembled state. Having issued each sheet, you can begin to collect the album.
Making an album is a whole science. Therefore, when filling out the page, you should follow certain rules:
- Initially, the semantic center of the page should be determined.
- Choose the right colors that complement the photo without breaking out of the overall color scheme.
- Choose decor for pages that will match in color and meaning.
- Choose captions for photos that will definitely correspond to the general meaning. These can be quotes of famous people, aphorisms, or your own thoughts. You need to write down words in the album based on the harmony of color.
- Arrange large and small details on the page should be based on balanced proportions.
- Each album page should have a bright accent. However, you should make sure that the page is not reloaded. It's hard to watch this album.
- Each page should visually resemble a triangle "photo - title - caption".
It's good if the page has an odd amount of detail.
In order for the page to be balanced, one should try to follow the rule: a large item - several small ones. For example, in the upper corner you can place a large three-dimensional detail, and in the opposite corner below, several small ones.
Family Album Ideas
Creating a family album is quite an exciting undertaking that can be a great project for the whole family.
A family album is not only a collection of family pictures in one book. With this album, it is important to convey the history of the family, its spirit, having collected all the memorable moments in one photo album.
A family album can consist of named pages:
- Little dad with grandpa or little mom with grandma and vice versa. This is an interesting idea that will help determine the similarities between all generations.
- The birth of a new family or marriage. Here you can also place not only the wedding of mom and dad, but also grandparents. Scanned documents look original, their clippings, newspaper clippings made in vintage style.
- The birth of a baby in the family. How to design this page is up to each mother individually. After all, everyone has their own ideas about the importance of a particular moment in a child's life. However, experience shows that a couple of pages are not enough for this event. Sometimes one album is not enough. The creation of mini photo albums made in the style of diaries looks original. It can be a whole series from birth to the right moment. Such an album is filled not only with pictures, but also with important records.
- First year of life.
- First time in first grade and beyond.
Pages that are intended for the baby can be supplemented with envelopes that will help save the first curl, the tag from the hospital, the first fallen tooth of the child.

A mother can supplement a children's album with her thoughts and memories. Addresses to your child, which he will read with pleasure when he grows up. You can also write down all the memorable dates here: the first sound, laughter, the first word, the first step, the first tooth. Such records will be a great addition to the corresponding pictures.
Another great idea for a family album is to make a family tree.


When choosing the style of making a family album (any other too), it is important to maintain this style in the smallest detail. So old photos, baby pictures will go well with retro and vintage style. Decor for such an album can be found in grandmother's things.
Original do-it-yourself photo album design ideas
Before you start work, you need to complete its sketch. On a regular sheet of paper, outline everything, down to the smallest detail. So you can not only visually evaluate the final result, but also not forget anything. Do this with every sheet. Their number, by the way, must be calculated in advance at the rate of 1-2 photos per sheet.
The photo album page must have 5 elements:
- name of the picture;
- a caption for each photo: when, under what circumstances the photo was taken. Perhaps there is something important in the picture that you would not like to forget over time;
- page background;
- decorations;
- additions.
The blank pages of the album need to be marked with a simple pencil, so, after completing the design, it will not be difficult to erase the extra lines.
The page must be filled from top to bottom. The probability that paints, color works will be smeared will decrease to 0. To begin with, it is worth doing the work with a felt-tip pen and paints so that they have time to dry before the photo is pasted.
Inscriptions and quotes are written in the album with ink, felt-tip pen or helium pen. Ink color, font size, and letter tilt should also be considered in advance. You can use newspaper clippings to beautifully lay out the right words. Only after that the album is decorated with flat decorations. They are glued and sewn on. Volumetric parts of the decor are recommended to be fixed at the very end. Do this with glue, thread and needles, carnations.
It is better to glue the details of the album with a special glue gun.

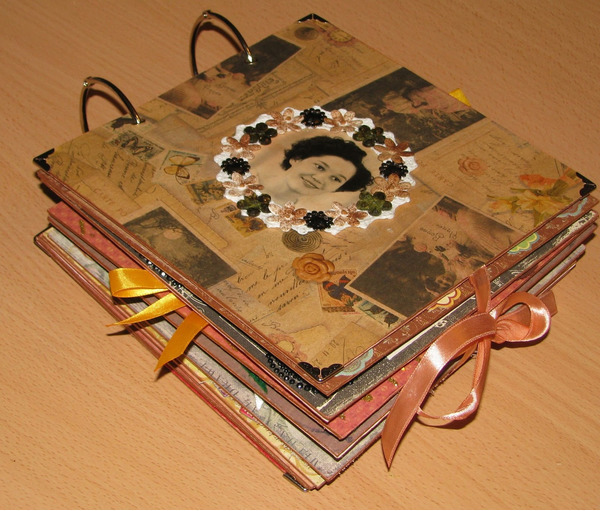
Regarding the decoration of the album cover, the cover design looks beautiful with the help of small photos collected in mini collages. The form of these collages can be given completely different from banal geometric shapes to more artistic ones.
You can fasten album pages in various convenient ways:
- using massive rings. Then each sheet of the album must be processed with a hole punch, making a hole in the right place;
- use the same hole punch to make holes on each page and fasten them together with beautiful ribbons. In this case, you can use different methods of interlacing: from the simplest, all in to more complex;
- album pages can be stitched;
- you can glue the album.
Today, in the world of digital technologies, it is much easier to save your life in pictures. No need to sit for hours waiting for the result. Just a second and the perfect shot is ready. Most people store their photos on their gadgets, on the Internet. It is much more pleasant to look at photos, to touch them with your fingers. It is even more pleasant if this is an album with a unique decor, where there is something to remember, something to touch. Such an album captures, and every detail evokes its own emotions.
If there is a great desire, but no imagination, you can use ready-made ideas, which are quite a lot on the Internet. A lot of articles have been written about how to make a photo album with your own hands, a lot of master classes with detailed instructions have been filmed.
Click Class
Tell VK
We live in a time when any product can be found in a store, it will be of a different price category, of different quality, but getting what you want, in general, is not a problem. Therefore, more and more often I want to make a gift to loved ones on significant dates and give something unusual, not typical. Such a gift causes more emotions and is more memorable. During my childhood, on the contrary, after the shortage, polyethylene photo albums seemed to be a novelty - they are so even and bright. But over time, they began to lack some kind of peculiarity, life. Such a gift thirty years ago was a joy, now it will be honored with a nod out of politeness. But this does not mean that no one prints photos and indulges in memories, you can also give photo albums. But only those in which part of the human presence is invested. For example, for the birth of my daughter, my sister gave me a wonderful gift - a photo album created by myself. She used the scrapbooking technique, but there are many more ideas and techniques that help create great designs.
How to make a photo album with your own hands
When we see the finished result, it seems impossible to repeat this. Yes, and there is no need to repeat, the main thing is to harmoniously combine all the elements and colors. This is what will be discussed.
The easiest way to create an album with your own hands is to go to a needlewomen store (and there is a special one for scrapbooking) and buy a ready-made set. Usually, it includes sheets with prints of the quantity you need, frames, stickers. You can buy cardboard that does not have ugly stiffeners. And at home, using fantasy, just assemble an album. But, it is more expensive than making such beauty from improvised means.
For example, a set of 6 sheets with decor will cost you from 400 rubles. The more filling in the set, the more expensive it will be.

But, after all, not everyone likes bright and colorful designs, so for a novice craftswoman, you can just take colored thick paper or print a drawing yourself on a printer if your apartment is equipped with such equipment.
For a needlewoman, before starting work, you need to understand what she needs, choose a place where there is a flat wide surface.
The paper on the front side can be replaced with a cloth. Before work, all segments must be carefully ironed - this will help to accurately and evenly cut the desired dimensions and maintain a beautiful appearance.
You will need an adhesive component: double-sided tape and Moment glue.
Also, it is beautiful and convenient when the photo album is on rings or with stand-alone pages. This can be beautifully done using the eyelet installer, which is sold in hardware stores for 150 rubles.
Another tip for choosing colors: where there is a lot of decor, choose the most unloaded and not colorful background. Otherwise, the effect of bad taste will turn out and the decor will be lost in variegation. Most often, this rule applies to the front side of the cover. All colors must be combined, they can be supported by a pattern, tones in the same color scheme or be companion colors. This may help.

The craftswomen also try to make the inner part very complete. They also use pockets and envelopes with closing elements for small photos or details dear to the heart. Everything is suitable for decor: wood shavings and saw cuts, twine, buttons and lace, ribbons, napkins, beads, twigs, artificial flowers and pompoms. In general, everything that you have in a sewing box, in the kitchen, in the children's room.

Glue the backing in place of the intended photo, this will add unusualness and zest to each spread.
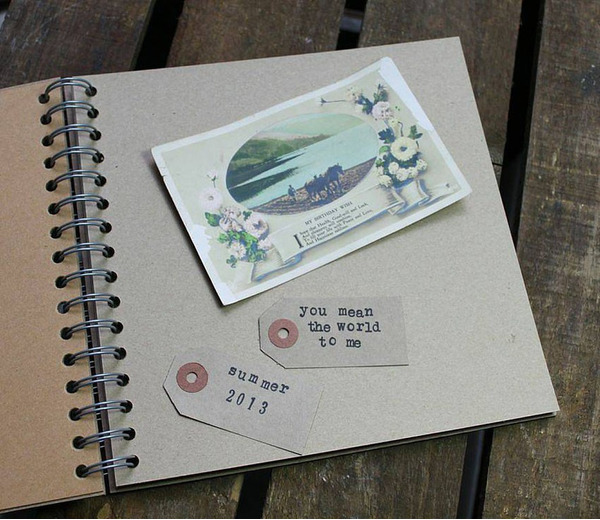
It's not a problem now to print different tags and places for records. Print in a regular copy center and paste in a photo album.
We figured out a little where to get materials, what you can use, now let's move on to a step-by-step master class for creating a photo album with your own hands.
We make a photo album with our own hands step by step with a photo, a detailed master class
I think that now most of the people who read this information are beginners who are just going to their own technique and manner of performance. Therefore, we will analyze a simple version of the album. By the way, have you noticed that the craftswomen who make such albums to order always have their own style? Some use unusual natural materials, some use a certain composition in decoration. Even, at first glance, similar albums made using the same technique will differ greatly in design and decor.
We will need:
- Two cardboard blanks for the cover
- Two small cardboard blanks for the end
- Clay Moment
- Double sided tape
- Beautiful fabric, preferably linen or cotton
- Eyelet installer, ruler, scissors and decor
You can change the sizes as you need. But, these dimensions should go for all blanks.
If you do not want to spend money on your first photo album, then you can replace the purchased cardboard with cardboard from a shoe box.
Before work, you need to cut all the workpieces to size. So the cover should be slightly larger than the inside pages, usually 0.5 -1 cm.
- We glue double-sided tape around the perimeter to the cardboard blank, iron the fabric for the cover and put it face down.

- We glue the cardboard blank to the fabric so that 1.5 cm allowances remain on the sides.

- We glue a small element at a distance of 4 ml from the main part - this will be the end of the album.

- We glue double-sided tape around the perimeter of the cardboard, capturing a small part.

- We cut off the fabric corners, but leave 1.2 mm so that the cardboard does not stick out.

- Glue the fabric allowances to the adhesive tape.

- Fabric corners can not be cut, but bent into a triangle and glued, as in the photo. Do what seems easier.

- We do the same with the second part of the back cover.
- We glue the decor

- Coat the workpiece from the wrong side with glue and decorate with cardboard.

- In the place where the spine should be bent, you need to push through (not tear) the cardboard and bend it.

- Now you need to make even cuts in the spine, for this we mark 1.5 cm from above and below.

- We take the eyelet installer and make a hole. We install a grommet in it.

- We make holes on all pages.

- It is necessary to make an even fold on all the leaves in the direction in which they will be flipped.

- We connect all the details with a cord.

When decorating the inside of the cover, the glue can be smoothed out with paper so that there are no waves.
Start decorating the pages using decorative elements. You can also make it close with an elastic band or tied with a ribbon.
The simplest scrapbooking photo album is ready.

For example, I will give a few already designed pages, but you can leave empty colored leaves, too beautiful.

Variants of inscriptions below in the photo.

I really like it when they design the first page as a title page.

Below is the layout of the page with an envelope.

More ideas for using design, pockets on the page.

I invite you to view another idea for making a beautiful photo album.
DIY photo album design ideas (family, wedding, newborn)
Scrapbooking products continue to win the love of the audience with their tenderness and abundance of details. There is a lot of volumetric design, which not everyone likes and is not always convenient. After digging around the Internet, I found some very interesting ideas using a different type of material. For example, the technique of burning, embroidery, wood carving, metal elements, etc. is used. Here are a few of the works that "fell on my soul."
Scrapbooking is more suitable for tender girls, young mothers and children. This technique allows you to create beautiful photo albums for newborns, for a wedding.

For a baby, you can create such beauty in the photo, here the highlight is that all the elements are sewn on. Imagine that you can even use technology, which will also add originality to the product.

Another very beautiful version of the cover design with lace and ribbons. Pay attention to how harmoniously all the shades and background for the decor are matched. This is what you should strive for. Such beauty can be presented to any family for any occasion.

Another version of the family album. Two colors are used, one basic calm, the other saturated, but in smaller quantities. And a padding polyester was applied to the base of the cover to give the appearance of volume and texture.

But, I think that for people of a more serious age, for an anniversary, as well as for people who appreciate natural charm, products with elements of wood and leather are suitable. See what wonderful and colorful products are obtained.

Another very interesting option.

Using the technique of burning, you can make an ornament and drawings. There are also many materials for adding color and revealing the wood texture, everything will come in handy here!


An interesting use of the rough texture of wood and lace.


There is a nautical theme here.

Another version of the family album in an aged technique using belts.

See how interesting the faux leather background looks on the product.

The use of embroidery distinguishes the craftswoman from the whole variety of handmade albums. Do you agree? Very unusual, and it's not difficult at all.

For children, a playful background is more suitable.

Or here's another kid's version.

For those who like to celebrate brightly and collect such moments, there is another option for designing a cover with embroidery.

See how all the shades and design details fit together. The little ones must love it.

Another gentle album for a child or a young mother. I think it will be nice to pick it up and look at it, and then read the inscription on the tags of the newborn and look at the first photos.

Photography is a unique thing. It's not just a picture, it's a whole segment of life. When looking at a picture, memory raises a whole heap of memories from the depths.
You can spend more than one pleasant evening looking at a photo album. You can never expect such warmth and impressions from electronic versions of photo collections. In addition, if the gadget breaks down, the pictures can be irretrievably lost. Isn't this a good reason to continue the traditions of our ancestors and make a photo album with your own hands?
Why own, if you can buy ready-made options? Lots of arguments:
1. Because it will be unique.
2. It can be made in various styles and themes.
3. A piece of your soul will fall into it.
4. And simply because it is an interesting activity.
Interested? Let's look at creating a photo album with your own hands step by step.
Scrapbooking Basics
Like any business, scrapbooking needs pre-planning. The problem is that it is not enough for a photo album to have an aesthetic appearance, it needs to carry a certain semantic load. To fulfill all the conditions, you need to find the best way to implement the idea. And here it is better to stick to already proven techniques and stylistic ideas for designing photo albums.
DIY photo album
It should be noted that scrapbooking is not a cheap hobby, so before you go to buy consumables, you need to think about for a future masterpiece:
- plot;
- composition;
- design style;
- implementation technique.
Plot
It is the plot that will give the idea of \u200b\u200bhow to make a photo album with your own hands. The design of the product will directly depend on the subject. The photo album can be family and gift.

The design of the photo album directly depends on the subject
Composition
For a do-it-yourself photo album, page design ideas must be correctly positioned. The photos themselves and the design elements should appear in visual unity. Here it is important to determine the semantic center of the composition and, in relation to it, select accents or decorations for the page. The subject of the image will help you choose a title and maybe even make a short description of the picture.

All pages of the photo album must be made in the same style.
Stylistic orientation
“Creating a photo album with your own hands, you are free to choose any style of its design”
Fans of opulent decor should focus on the American vision of a photo book. Connoisseurs of antiquity and lovers of immersing themselves in the days of the past will surely stop at shabby chic or vintage. Adherents of minimalism can take a closer look at the European style and one of the most popular ideas for designing photo albums - “clean and simple”.

Making a photo album in the style of "clean and simple".
Creating a photo album with your own hands, you are free to choose any style of its design. Other design options can be used, as long as they can present the theme of the album from the best side.
Technique
There are many options on how to make a photo album with your own hands. Implementation of ideas helps to carry out:
- stamping;
- decoupage;
- journaling;
- cropping;
- distressing.
There are about a hundred more entertaining techniques that allow you to create magnificent copies of photo albums.

Decoupage technique in photo album decor
The presented methods are distinguished by the relative ease of implementation. So stamping provides for the use of applicators and all kinds of prints. In decoupage, plot drawings and ornaments are used. In cropping, they work with the photo itself. It is cut so that only key moments are preserved. Journaling is characterized by supplementing images with original descriptions. Distressing is based on the aging of paper.

Stamping uses a wide variety of imprints.
DIY photo album: step by step
Stage I
In fact, it is preparation for work. At this stage, we focus on the selection of tools and the purchase of materials. What will be required?
Materials:
- thick (500 g / sq; m) cardboard;
- scrap paper;
- notebook;
- synthetic winterizer;
- adhesive fabric;
- ribbons.
Tools:
- awl;
- ruler;
- needle;
- mock-up knife;
- pencil.
Stage II
We sit down to plan the implementation of the ideas of designing a photo album with our own hands. The result will not disappoint if you clearly articulate what you want to see in the end. This is where the notebook comes into play. It is desirable that it be similar in size to the future original. It will become a kind of template for work. On its pages, you can experiment with the arrangement of pictures and decor elements. The most successful options are fixed.

Sketch of the location of pictures and decor elements
Let's start creating a photo album with our own hands by assembling the spines for the pages. To do this, you can use a less thick photo cardboard. Strips corresponding to the height of the sheets are cut from it. Band width may vary. On average, the indicator rarely exceeds 3 cm.

Stripes corresponding to sheets of height
Using a ruler, find the center of the narrow part. We set aside 2 mm on both sides of it if the landscape pages have convex decorations and 1 mm each in other cases. In the same way, we act on the opposite side. We connect the outlines with a ruler and draw a strip not with a pencil, but with a writing pen. This photo album design idea will help you bend the sheet strictly along the given lines. We cut off the corners of the workpiece. Now you can lay sheets in them and fix them with glue. The extreme sheets should not have "partners". The free part of the spine will be required for another.

Fix the leaves with glue
Stage IV
Page finishing. Their decor begins with pasting with scrap paper. Pick the right colors and create a general background, on which the rest of the composition will be located later. The decor for a self-assembled photo album can be:
- applications;
- vinyl stickers;
- newspaper clippings;
- beautiful cords;
- tapes;
- lace;
- beads.

Decorative materials for photo album design
In general, everything that draws your imagination. In the case of an abundance of volumetric details, they should be evenly placed on the pages, then the sheets do not deform, and the product as a whole does not lose its shape. This is another reason to work on a photo album with your own hands step by step.

Arrange the decor evenly on the pages
Stage V
We make binding and fasten the cover. We collect the sheets glued into the roots into a book and glue the first with a piece of bandage, gauze or adhesive fabric, so that one and a half centimeters of free matter remains along the edges of the binding.

Glue the spine with gauze
From cotton tape with finished edges, cut out two strips of the same length as the width of the binding. We bend the rest of the gauze and glue them exactly along the edge. This photo album design idea will help to hide the flaws in the assembly of the end of the cover and will become an additional fixation for the sheets, preventing them from coming off.

Glue two strips around the edge
While the gauze dries, work directly on the spine for binding. If the paper for work is not too thick, then the part can be made as a team. You will have to cut out two components: one strictly according to the size of the binding, the second - with an allowance of 3 cm in width. We lay the smaller strip on top of the larger one so that uniform allowances remain on both sides. We mark the borders and glue the details.

Binding spine
It would seem that everything? But at this stage there are secrets. They will help you make a high-quality photo album with your own hands, design ideas from scrapbooking professionals. What do they advise? A large thickness of the spine will prevent the album from opening. Can problems be avoided? Yes, if you draw longitudinal lines with a step distance of 1 cm along the inside of the spine with a sharp object (the same non-writing pen). This technique will allow the part to bend smoothly.
But the nuances of the topic “how to make a photo album with your own hands” do not end there.

The spine is fixed under the cover
The spine must not be glued to the binding. It is fixed on the cover. The structures are allowed to dry, after which the sheets assembled on gauze are placed in it. We fix the free ends of the fabric and the part of the leaf spine, prudently left when assembling the photo album with our own hands, to the inside of the cover. It is better to make it transparent "Moment". It holds stronger and traces are removed easier. Streaks are simply erased with an eraser.

Inside cover
The creation of the photo album is completed. It remains to decorate the cover and fill it with content.
Thematic photo album design ideas
Pleasant memories require a beautiful cut. The selfie that has become fashionable allows you to make photo albums with your own hands for almost every occasion, but still more often they are created for more global reasons.
family chronicle
She can get the look of a full-fledged photobook. Its content will be not only interesting and memorable pictures, but also newspaper clippings, postcards dear to the heart, things closely related to family history. On the title page it is good to write a motto reflecting the creed of the clan.

DIY family photo album
How to make a photo album about the family with your own hands? For example, in genealogical chronology. Dig into the family archive. There will surely be many pictures of ancestors that you remember and will be able to tell something to your descendants. These photos will form the first pages of the chronicle. History should continue up to the present day. In the future, your creativity can lay the foundation for a whole galaxy of similar photo albums.

Make a series of family photo albums
If the family leads an active lifestyle and does not forget to record everything that happens in it on camera, then it will be difficult to fit everything into one album. In this case, it is worth breaking all the photos into thematic groups and trying to assemble a photo album with your own hands for each case.
Love to travel - make a selection of pictures of the most memorable trips. An additional decor for such albums can be postcards depicting sightseeing places of countries or trophies obtained, like a dried leaf of an exotic plant. The epic of a sea holiday is perfectly decorated with sand, pebbles, shells from the beaches, gull feathers, twigs of algae.

DIY photo album about travel
Do not be lazy to describe what is depicted on the pages. It will be interesting to read about your adventures to posterity.
Start working on a photo album with your own hands, and design ideas will arise in your head. All relatives can be involved in the case. Give them a page and ask them to decorate it however you like. You can ask to compose a poem or write down a story from life, make a drawing with your own hands. In a family photo album, any illustration will be significant.

Make a photo album for the whole family
“Do not think that the time for making a child’s photo album with your own hands will be limited to one day - it will be a long process”
The appearance of a child is probably the most important event in the life of every family, overshadowing even the wedding, so the desire to perpetuate every minute of a child's life is quite natural. How to make a photo album of a child with your own hands so that what is reflected in it causes tenderness even years later? Pay attention to details and correctly plan the sequence of filling with photos. From a pile of pictures, try to select symbolic images that tell about a new milestone in a child's life.
DIY children's photo album
You can start the story from afar. Let a photo of the last days of pregnancy appear on the first page. An excellent addition to them will be printouts of ultrasound. The logical continuation will be shots from the discharge photo session in the celebration hall of the maternity hospital. Followed by pictures with relatives. Only later will they be pasted into the photo album with their own hands: the first smile, the first tooth, the first independent breakfast, the first steps. For every mother, these events simply stick in her memory, and a desire is born to share her happiness with the whole world.
Ultrasound printouts are a great addition.
Ideas for designing photo albums for kids are a lot. They can be made a repository of children's relics by gluing inside a strand of the first hair, ribbons from a bonnet, a piece of a bow with which a blanket was tied. Over time, it will be possible to add children's drawings and crafts and greeting cards brought from the garden and school. Then they will be replaced by artifacts of achievements in the form of diplomas and awards.
An example of the design of the pages of a children's photo album
Do not think that the time for making a child's photo album with your own hands will be limited to one day - it will be a long process. Replenishment of its contents will occur as the object grows.
One more thing. Children often delight us with pearls. Don't be lazy to record them in the same album. It will be a great occasion for fun years later and will decorate the pages well if it appears on them in color.
Wedding photoalbum
The wedding day is special for both newlyweds. Naturally, in the memory you want to save every moment of it. A huge number of pictures from the celebration will require system storage in a decent design. So how to make a DIY photo album as unusual as the event itself?
DIY wedding photo album
It is not trivial to decorate it. This will help the bride's accessories, lace, ribbons, elements of wedding paraphernalia. Photos can be decorated with dried flower buds from a young wedding bouquet. Over the years, such little things will become incredibly valuable and touching. Here are some more photo album design ideas.
1. Recreate the historical accuracy of the wedding celebration by grouping the photos according to the chronology of its course.
Recreate the chronology of events on album pages
2. Do not be afraid to put so-called reportage and staged pictures in the album. They can be quite funny.
3. Try to give the design of the photo album a specific stylistic direction. It can be retro or something more modern.
Give the album a general stylistic direction
4. Select personal pages for the portraits of the heroes of the occasion and VIP guests.
5. When making a photo album with your own hands, supplement it with images of landscapes that served as the backdrop for the wedding event.
Complete the album with images of landscapes
6. Multi-colored pages in the album will look original.
7. Bet on the originality of the pictures themselves. Let them be highlighted in sepia or decorated to look like a painting. Dilute your color shots with black and white.
Dilute your color shots with black and white.
8. In the wedding album, you can use several photos of the newlyweds taken on the eve of the wedding, as well as telling about the ups and downs of preparing for it.
9. Separate the official part and the party. Thus, you will have two albums with photos at once.
10. A photo collage of small format pictures is also interesting.
Photo collage of small format photos
The design ideas used when creating a photo album with your own hands can cause some imbalance in the perception of compositions due to overload of frames by actors. When placing close-up group shots in a self-made photo album, try to place them on a spread so that the eyes of the guests captured on them are directed in one direction. Then there will be no impression that they are looking at each other. Also, the U-turn is not perceived in the best way, literally “littered” with small photos. Use a compositional approach to their location, dilute the pictures with texts and decorative elements. Let your design talents make a splash!
Spice up your shots with text and decor
Conclusion
The proposed options for creating and filling photo albums are just the tip of the iceberg called scrapbooking. Knowing how to make a photo album, you will ensure that it excites memories of bygone days and helps to bring loved ones closer together.
Photo gallery - do-it-yourself photo album


Now it is fashionable to create various handmade things. Try it and you will make it. It will not just collect photographs, it will become an exclusive thing and decoration of your home. If you make such a gift to a child or newlyweds, it will always remind you not only of the most pleasant events in the life of the owner, but also of you, its creator.
Basic principles of work
To do this, you can use ready-made kits for creativity, which are sold in specialized and online stores. The kit usually contains everything you need for decoration: beautiful paper, stickers, voluminous decorations. Most often, the sets are made in a certain style and are dedicated to some topic: a gift for a newborn, newlyweds, romance, travel.

Picking up all the necessary elements is easy and on your own. But it is better to design photos, pages and cover in the same style.
Necessary materials
To create a beautiful DIY scrapbooking album, you will need the following:
- Thick cardboard for the manufacture of the base (covers and pages).
- A piece of fabric for decorating the workpiece.
- Sintepon, if you want to make the front and back of the cover soft and voluminous.
- Scissors.
- Pencil.
- Ruler.
- Glue.
- Figured hole punch (for decorating the edge or creating small template blanks for appliqué).
- Clippings from magazines or other pictures.
- satin ribbons.
- Flat or 3D stickers.
- Various decor (bows, flowers, beads).

Of course, the list depends on your desire, capabilities and design theme. Usually all of the above are used, but it is worth remembering that the photos should still be the main ones. Then you will get exactly a scrapbooking album with your own hands, and not just a collage using this technique. It is not necessary to stick all the elements on one page, it is better to limit their variety. See that the design looks harmonious, choose one central element, and let the rest just complement it.
How to make a cover
To make a scrapbooking album with your own hands, you first need to complete the base - the frame of the cover and pages. Decide what size the product will be, and prepare a sheet of cardboard of the appropriate size for the front, back and the required number of pages.

The sequence of execution of a beautiful cover is as follows:
- Take one cardboard blank and cut a piece of synthetic winterizer according to its size. Glue it to the base.
- Cut out a piece from a suitable fabric, such as canvas or any other, taking into account the gluing allowances (1.5-2 cm on each side).
- Apply glue to the free surface of the synthetic winterizer and attach the fabric evenly. Bend the allowances and glue to the cardboard.
- To prevent the folds from being visible, glue a sheet of beautiful paper or cardboard on top. The back cover is ready.
- The front part can be made in the same way or make another window for a photo. To do this, in the base of cardboard and synthetic winterizer, make a cut of the desired shape and size. The rest is done using the same technology as for the reverse side (there is no need to pre-cut a window in the fabric). After gluing the fabric and synthetic winterizer, the material is cut and folded.
- Insert a slightly larger photo into the window, gluing it along the allowances to the base. On the reverse side, as in the first case, a beautiful sheet of paper or cardboard is made.
- Make holes for the eyelets and install them in the front and back of the cover.
- Insert the rings into the eyelets.
The cover is ready. This option is good if you want to make a children's album with your own hands. A scrapbooking workshop on creating an album design, pages and various design options will help you choose the right solution.

You can do the cover in a different way. In order not to use the ring mechanism, you will also have to make the end of the cover, either at the same time with the front and back, or glued to the binding (stack of pages). Choose the method convenient for you.
Pages and binding
So, you are making a scrapbooking album with your own hands. The tutorial from the previous section showed you how to make a cover, but that's not enough. You also need to pin the pages. If your cover is supposed to be on the rings, you can install the sheets in the same way. Another option is to make a binding. The technology is like this:
- In addition to the blank pages, cut out strips of paper as long as the height of the album and 1.5-2 cm wide. In the middle of each part, draw a strip 2-4 mm wide with a knitting needle or other similar object. Cut the corners of the rectangle at a 45 degree angle.
- Using paper strips, glue the album sheets together. The groove left in the middle will be between the sheets.
- Glue on the end of the stack with glued sheets a piece of bandage with allowances on the sides of 1.5-2 cm and two pieces of tape along the width of the cover.
- Glue the tape to the top and bottom edges. This will give the binding strength and a neat appearance.
- Cut with a margin, like a bandage, a piece of decorative cardboard. Glue it over the bandage, and the protruding edges on the cover.
The structure is ready. Get started with the creative process.
DIY album for a newborn: scrapbooking
This technology allows you to create a gift or a souvenir for any holiday quite quickly and at no particular cost. Everyone will enjoy being creative, so decorating postcards, folders and other things will help you have a good time and become a new hobby.

If you are looking for information on how to make a scrapbooking album with your own hands, then you already have a certain idea or need. If you decide to create for your future baby, then you made the right choice. By the way, you can make such a thing for the birth of a baby to your friends or relatives. The main thing is to correctly determine the purpose of the pages, distribute information and leave space for photographs.
In the album for the newborn, do not forget to provide a page where the parents will write down the height and weight of the newborn. You can leave free fields for other important information, for example, the first day at home, the first step and the tooth. It is even worth devoting separate pages to these things.
You can make an album in a certain color scheme if you know the gender of the baby in advance. If not, then use neutral hues (white, green, yellow) and baby pictures. Suitable bears, bunnies, pyramids, crib, stroller, balloons. Lace and soft, soft-touch materials such as fleece will look good. Satin ribbons look very decorative and festive.
DIY wedding album (scrapbooking): master class
A married couple can make this memorable relic themselves, but at the same time, a spectacularly designed blank can be presented as a gift to the newlyweds.

When making, try to follow these tips:
- Decide on the format and size. Don't make it too big, but a small one won't work either. Focus on a regular A4 landscape sheet or a little more.
- Given the standard size of photos, you can choose the square format of the pages of the album, so that there is room for signatures and decor.
- Be sure to plan how many pages it is appropriate to make, and try to use a uniform design on them (the same arrangement of inscriptions, headings). Focus on how classic books are designed.
- Choose discreet pastel colors. Usually they use white, cream, golden, pale pink. They symbolize romance, and photographs against their background will look like the main objects.
- In the sequence of pages, it is better to follow the chronology of the event (first place a photo of the official ceremony from the registry office, then pictures in nature and in a restaurant, after photos from the second day).
If you decide to make a wedding album for scrapbooking, this is the most suitable design technology. Buy special paper, as well as a hole puncher with heart-shaped clichés and (preferably) to make a curly lace edge. This will help create a romantic memento that will become a family treasure. It will be a pleasure to see it for the newlyweds themselves, to show relatives and friends.
Gift for a child
Do you want to create a children's album with your own hands as a keepsake for your baby? A scrapbooking souvenir will always tell the baby about happy moments in life. Beautifully designed, it will keep your love for the little one. The matured "big man" will appreciate the efforts of his mother.

It makes sense to make such an album on rings in such a way that you can gradually add pages to it. You can also make separate "volumes", for example, "My baby is under a year old", "Life in the kindergarten", "1st grade", etc.
In this album, you are free to paste everything that seems relevant and important to you: information about the first step, tooth, words. It is interesting to make an imprint of the palm, legs, to keep the curl.
Original photographs combined with delicate fabric decoration, children's pictures and other decor will look great.
Family album
This product can be made in any style that matches your ideas of beauty and harmony. You make it as a memento for yourself. Choose a design on the rings if you want to add pages. In this case, individual sheets can be designed in different ways. It is worth providing separate children's pages dedicated to family holidays and travel.
As you can see, it is not so difficult to master a new technique of artistic mastery - scrapbooking. The do-it-yourself album will be made not just as an accessory for storing memorable pictures, but will become a real work of art.
We all cherish our favorite memories, whether we like to be photographed or not. That is why it is not very pleasant if photos dear to the heart are stored in dusty boxes, in paper folders. The fact would be much nicer if the photos were stored in a practical and beautiful photo album. In this article, we will tell you how to make a photo album with your own hands.
Basic design rules
The end result depends on the original idea. Therefore, before starting work, it is advisable to consider in detail every detail on the product. In addition, we must not forget what the composition of the work and its plot are, especially if you present such a product to someone. So, let's talk about the main points of the design of the work.
Plot
The plot is called the element of the realization of the idea. As a rule, they think about this component first of all. Usually they create albums dedicated to family life, a wedding, a newborn baby. Also, a self-made album can be presented to a relative, work colleague or loved one.
Composition
Visual unity plays an important role here. Before you make a photo album with your own hands, you need to correctly place all the stickers and photos on the pages, because this component cannot be neglected either.
Compiling a competent composition, you must be guided by the following rules:
- Determine where the center of the composition will be.
- Place bright accents.
- Make sure that the colors on the pages are in harmony with each other and there are places for the signature on them.
- Balance proportions.
- Pick up decor elements suitable for the photo.
- A certain triangle must be observed: “title - photo - description”.

Style
Particular attention should be paid to the style of work. Before you design the pages and cover of the photo album, you should decide which style represents your family or loved one.
The main styles include:
- Minimalism. This style involves a minimum of jewelry.
- The absence of decorative elements is also characteristic of the European style. Its main feature is the variety of forms of photographs that are cut out in the form of one or another object (for example, a heart or a star).
- Vintage style will suit history buffs.
- Shabby chic style involves the presence of various cute ribbons and lace. A photo album in this style would be the perfect gift for a little girl.
- American style is full of many decorative elements.
Techniques
The technique for making a photo album with your own hands can also be different, and you can come up with your own.
The main techniques are:
- Stamping. As the name implies, this technique involves the use of different applicator stamps.
- Decoupage. Drawings, stickers, pictures, ornaments play a special role here.
- Cropping. The main attention is paid to the photos themselves: they are cropped in such a way that the key points of the image remain.
- Journaling. Usually this is the name of a photo supplemented with original signatures.
- Distressing. The key point of this technique is the aging of paper.
Step-by-step production of a gift photo album
In this section, we will talk in detail about how to make a photo album with your own hands step by step for beginners.
Work materials
To carry out the work you will need the following materials:
- Scrap paper.
- Thick cardboard (300 g/m²).
- Single sided adhesive.
- Decorative fabric.
- A little synthetic winterizer.
- Satin ribbon.
- Notebook.
- Needle.
- Awl.
Making a photo album with your own hands - a step-by-step master class for beginners
So, let's move on to the production of the album. In order for the gift to be a success, the following algorithm must be observed:
- Album layout. To ensure that the end result only pleases the user, you need to accurately plan each landscape page. Before proceeding with the procedure, you need to plan everything correctly on a template - an ordinary school notebook in a cage of the appropriate size can play its role. There you can sketch out the approximate location of photographs and decorative elements.
- Now you are ready to bind your photo album. To do this, you need to take the cardboard prepared in advance and cut out three strips from it, exactly 24 cm high. The width should increase in proportion. After that, it is necessary to fold the sheets in such a way that roots are formed, which gradually increase in size (it is better to draw them before the procedure). The end result is a book with a spine. Along the line of this spine, all the details must be glued. Next comes the firmware with a waxed cord. The basis of the photo album with your own hands is ready.
- Now you should pay attention to the design of the pages. This procedure can be done using scrap paper. Additional parts can be glued with silicone glue or double-sided tape. The resulting backgrounds are glued onto the “bare” pages of the album.
Important! It should be borne in mind that the volumetric decor must be placed evenly over the sheet, at the same time, it should not deform the pages of the photo album.

Album's cover
The basis of the album is made, the pages are decorated, but what to do with the cover? The cover of the photo album is the face of the future gift, which means that it should look appropriate.
Important! The cover must be processed, observing the dimensions of the binding. Cardboard, 2-2.5 mm wide, is ideal.
Consider the following course of action:
- Prepare two blanks for cardboard covers with a spine.
- Cut pieces of adhesive fabric that fit the blanks.
- Position the spine between the blanks of the covers, while making an indent of 0.3 mm.
- Fasten the parts with adhesive cloth.
- Cut off the synthetic winterizer corresponding to the size of the workpiece, attach it from above.
- Such a design must be attached to the fabric that was chosen as an element of decor.
- Leave three centimeters of fabric on the sides. They will be attached to the workpiece with double-sided adhesive tape. Where there is none, fix the structure with glue.
The final stage
Making a photo album with your own hands is almost finished. It remains only to assemble:
- First of all, you need to alternately fasten the double sheets of the finished cover. The first sheet must be attached to the cover.
- When the design dries, go to its firmware: opening the album in the middle, you need to outline the places for the holes, then punch them with an awl and stitch them with a beautiful satin ribbon.
- Fix the corners with special decorative corners. Don't forget about additional cover decor.


 Coffee bean frame")


")