DIY snowflakes are the most affordable and simple New Year’s decoration for your home, school or workplace. You can make them from the most ordinary paper, cutting them out according to ready-made templates and diagrams, which can be found in large quantities on the Internet. You can also make a beautiful snowflake, large and voluminous, or using quilling or origami techniques. Moreover, as a source material, in addition to white paper, newspaper sheets, pages of an old book or an unnecessary music notebook are also suitable. Such non-standard material, especially if it is artificially aged with coffee, will give the finished craft a special charm. As for the manufacturing technique, most master classes for New Year's snowflakes are quite simple and can be reproduced even by children, for example, as part of a labor lesson at school. In our article today, we have collected for you a whole selection of original templates and patterns for cutting out beautiful paper snowflakes for adults and children. In addition, here you will find interesting step-by-step master classes with photos of snowflakes, as well as videos with lessons on how to make them yourself.
Simple DIY paper Christmas snowflake 2017 for children, master class
First, we invite you to master a very simple DIY paper Christmas snowflake master class for children. It is so affordable that it is suitable even for kindergarten. To make this simple DIY paper Christmas snowflake for kids, you can use either plain white paper or colored sheets. Thin corrugated paper also works well.

Necessary materials for a simple DIY paper snowflake for children
- sheet A4
- scissors
- felt-tip pens
- scotch
- stapler
- decor (sequins, rhinestones, buttons)
Instructions for a DIY New Year's snowflake master class for children
- We cut the sheet into strips 2-3 cm wide and about 15-20 cm long. The number of strips will determine how voluminous the craft will be in the end.

- We wrap each strip on a felt-tip pen or marker, securing the edges with paper tape.

- Leave the pieces for at least an hour so that they take on a wave-like shape.

- We remove the paper strips from the markers and connect them together using a star-shaped stapler.

- We decorate the ugly junction with bright sequins, beads or rhinestones. Also, if desired, you can add pieces of New Year's rain or glue confetti. Ready!


Do-it-yourself volumetric snowflake 2017 made of paper, master class with photo
Do-it-yourself voluminous paper snowflakes are considered one of the most complex in terms of technique. However, if you have detailed instructions with step-by-step photos at hand, as in our next master class, then you should not be afraid of difficulties. We assure you that after the first self-made voluminous snowflake made from paper with your own hands, the remaining copies will “go like clockwork.” See for yourself by following the instructions below.

Necessary materials for making a voluminous paper snowflake with your own hands
- sheet A4
- scissors
- tape or glue
Instructions for a master class on DIY 3D paper snowflakes
- For the next craft, you will need a rectangular sheet with the following parameters: length - 25 centimeters, width - 18 centimeters.

- We bend the lower left corner of the sheet inward, as in the photo below.

- Trim off the excess edge to create an isosceles triangle.

- Fold the triangle in half.


- Using scissors, make two shallow cuts on the tight side of the fold, as in the next photo.

- We unfold the workpiece so that we get a diamond with cuts. We connect the inner corners of the central cut together using tape or glue.

On a note! If you use glue, be sure to additionally secure the workpiece, for example, with a clothespin until it dries completely.
- We repeat the procedure with the next edges of the cut, fixing them in the opposite direction with the first workpiece.

- We will also fasten the edges of the last cut together, but in the opposite direction.

- The result should be the following design.

- For one volumetric snowflake you will need from 6 to 8 such blanks. They can be made in different colors to add color to the craft.

- Using tape or glue, secure all the blanks according to the template below.

Beautiful large snowflakes 2017 made from paper yourself - step by step with photos
You can make a beautiful paper snowflake with your own hands for decoration and in quite large sizes. Such decor will certainly attract everyone's attention and will become an interesting interior solution on the eve of the New Year. Learn how to make a beautiful large snowflake out of paper with your own hands step by step from our next master class.
Necessary materials for a large DIY paper snowflake
- sheet A4
- Ruler and pencil
- clothespins
- New Year's garland, glitter
Instructions for a step-by-step master class on a large beautiful snowflake with your own hands
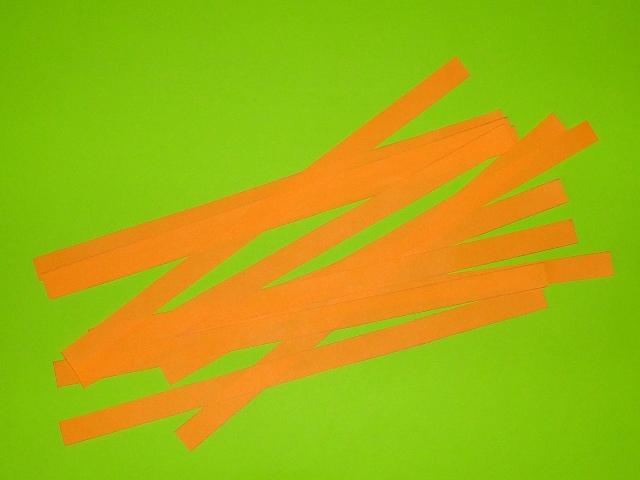
- First you need to cut thin paper strips in the amount of 20 pieces, 10 strips on each side. The longer they are, the larger the finished craft will be. Then we lay out five strips in a row at small intervals, and lay out five others on top using the braided principle.

- We turn the resulting workpiece so that it lies in front of us in the form of the letter “X”. Now we connect first the adjacent and then the outer strips and glue them. Secure the top with clothespins until completely dry.

- Repeat on each side. As a result, there should be one strip on each side, forming a thin cross.

- Leave the workpiece to dry completely for about half an hour. Then we remove the clothespins and move on to the second identical part of the craft.

- We connect both parts together by rotating the bottom part of the snowflake 45 degrees. Now the free strips can be secured with the ready-made beams.

- We glue them with glue and secure them with clothespins, leaving them to dry completely.
- All that remains is to decorate the finished snowflake. This can be done using pieces of New Year's garland and sparkles.
On a note! Instead of glitter from the store, you can use broken Christmas tree decorations. To do this, carefully crush the glass toy wrapped in thick fabric with a rolling pin. The resulting crumbs must be mixed with transparent glue and then used to decorate crafts.
DIY snowflake 2017 from a book for the New Year, step-by-step master class
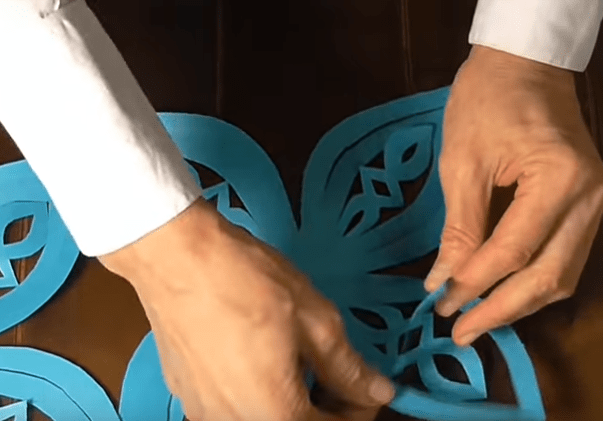
In the next step-by-step master class we will make snowflakes for the New Year with our own hands from an old book. This is a great way to breathe new life into its yellowed pages. You can’t call a snowflake from a book for the New Year with your own hands (step-by-step master class below) a simple children’s craft. Small children definitely cannot handle it. This is more of a master class for creative adults who do not perceive making New Year's decorations solely as child's play. On the contrary, they are happy to create beautiful and exclusive decorative elements.

Necessary materials for a snowflake from a book for the New Year
- book sheets
- glitter
- ruler and pencil
- scissors
- fishing line or thick thread
Instructions for a step-by-step master class on snowflakes from a book for the New Year
- First you need to draw book sheets into strips 2 centimeters wide.

- For one side you will need 7 such strips: 1 the full length of the page, two 2 centimeters shorter, two more 2 cm shorter than the previous ones, and two strips 6 centimeters shorter than the first.

- The longest strip should be folded in half to form a loop, gluing the bottom edges together. On the sides you need to fold the strips shorter, also gluing their lower parts, as in the photo below.

- Repeat similar manipulations with the remaining strips and fix them under heavy pressure, for example, a table lamp.

- When the workpiece dries, you should additionally secure its edges with thin fishing line. In general, you will need 6-8 such blanks for one snowflake.

- Again, cut the book sheet into strips of equal length. Cut and roll into a tight ring, tie with fishing line. The ring can also be additionally coated with transparent glue.

- After complete drying, you should proceed to joining the craft. To do this, coat the end of the workpiece tightly with glue and connect it to the ring.


- Repeat with each workpiece.

- To better fasten the snowflake, coat the outer loops of the adjacent rays of the snowflake with glue.

- Small sparkles are suitable as decoration and should be applied to the side edges of the snowflake. You can also use pieces of garland, sequins, and small beads.

- Then you need to make a loop from the fishing line so that you can attach the snowflake, for example, to a Christmas tree. Ready!

DIY paper snowflake for children using origami technique, master class
The art of origami is multifaceted and complex, but with the right instructions using this technique you can make a fairly simple craft with your own hands, for example, a children's snowflake. True, to be completely frank, the following master class with photos cannot be called made exclusively using the origami technique. In it, for a children's DIY paper snowflake, in addition to the origami technique, you will also use threads and scissors.

Necessary materials for origami children's snowflakes for the New Year
- thick colored sheet
- pencil and ruler
- needle and thread
- scissors
Instructions for a master class on children's snowflakes using the origami technique
- To begin, we cut out a strip 5-7 cm wide and about 20 cm long. Using a pencil and ruler, we make notes on every centimeter along the length. We cut out an imitation of a “fence” on top, as shown in the photo. In the middle of the resulting columns we draw small diamonds. Then we mark the middle of each centimeter with dots and pierce them with a thin needle.

- Now we take a ruler and place it on top of the first line dividing our “fence” section in half. Carefully bend the workpiece inward, and then remove the ruler and bend it in the opposite direction. We repeat the same with each section. The result should be an accordion, as in the photo below.

- We hold the accordion tightly with the fingers of one hand and use scissors to cut out the previously marked diamond shapes in the middle of each section.

- We take a needle and thread and carefully thread it through the small holes that we already pierced with the needle two steps ago.

On a note! The thread needs to be thick so that it holds the finished structure tightly!
- When the thread has already passed through all the points, we reinsert it into the first hole to close the structure.

- We remove the needle and begin to gradually tighten the thread until a tight ring is formed. We tie the thread into a knot, and place a spool on top of the snowflake to straighten it.

- We form a loop from the remaining thread and our children's snowflake is ready! And for those who want to master the pure origami technique for creating snowflakes, we have selected a video tutorial with a step-by-step diagram below.
Do-it-yourself openwork snowflake using the quilling technique, master class with photos
Quilling is the real art of weaving amazingly beautiful crafts and cards from simple strips of paper. Using the quilling technique, you can create truly unique openwork snowflakes with your own hands, a direct confirmation of which is our next master class with step-by-step photos. But the most amazing thing is that by swapping individual parts and adding new elements, you can create several different openwork snowflakes with your own hands using the quilling technique according to one general pattern.

Necessary materials for an openwork snowflake using the quilling technique
- pencil and ruler
- scissors
- glue and brush

Instructions for a master class on openwork snowflakes using quilling techniques
- Using a ruler and a simple pencil, you need to draw a sheet. To do this, make 0.5 cm marks along the width of the sheet and draw lines along the entire length. Then we cut out the strips with scissors.

- To form the rolls you will need an awl. We wind the strip onto it quite tightly, and then let the roll unravel a little and glue the edge to its base.

- The snowflake will be based on one round element and six drop-shaped rolls. To get an element in the form of a drop, you need to lightly squeeze one edge of the round roll with your fingers. We connect the structure with glue.

- Now add six eye-shaped rolls to the base. We will also make them from round rolls, but by flattening both edges with our fingers. Glue the “eyes” between the drops according to the template below.

- Now we need small rolls, so we fold the standard strip in half and cut it into two parts. From each small strip we twist a small round roll. To begin with, you will need six of these elements.

- We glue small rolls along the edges of the elements in the form of a cat's eye.

- We roll six standard large rolls.

- We glue them to the drop-shaped elements, as shown in the diagram below.

- Now we need six square rolls. We will form them from standard round ones, slightly flattening the sides into a square shape.

- We glue the squares to the large round elements, having first turned them into the shape of rhombuses.

- All that remains is to twist a large round roll according to the standard pattern and glue it to the top of our craft. Let the snowflake dry completely and thread the thread through the large roll. Ready!

How to cut a New Year's snowflake 2017 from paper with your own hands, diagrams and templates
The easiest way to make a New Year's snowflake with your own hands is to cut it out of paper according to a ready-made template or diagram. Such simple, but at the same time very beautiful DIY snowflakes are available primarily for children's creativity. However, there are quite complex patterns with which you can make even large and voluminous decorative snowflakes, which in their originality will not be inferior to crafts using the origami or quilling technique. Do you want to know how to cut a beautiful New Year's snowflake out of paper with your own hands? Then you will find a selection of photo templates and patterns for adults and children, as well as video tutorials below.
What is it difficult to imagine the New Year without? That's right, without the corresponding decorative elements, the main ones of which are snowflakes. And our collection of paper snowflakes is constantly growing! Surely you have all already seen and know how to make such light ones:
Winter is the most creative time of the year! Yes, yes, don't be surprised. If you count how many cards, various crafts, decorations, gifts and snowflakes are made in the world (this is not counting the production of snow in the clouds), then this entire huge set will more than cover other pre-holiday preparations! And every year I want to do something new, original and pleasing to the eye. If you are looking for such an idea, then you are on the right track. Moreover, 2019 is coming to an end.
We propose to make new voluminous paper snowflakes - many step-by-step master classes, step by step, diagrams and various photos of ideas for the New Year 2020! If you have your own original ideas for snowflakes, send them to our New Year’s party using the form at the bottom of this article.
New video on how to make beautiful voluminous openwork snowflakes:
Snowflakes from openwork napkins
Openwork paper napkins can be an excellent material for creating New Year's crafts. After all, you can make a variety of snowflakes from them. 2 MKs on openwork snowflakes from Marina.
We show one of the options for creating such New Year's decor in this new master class for 2019.


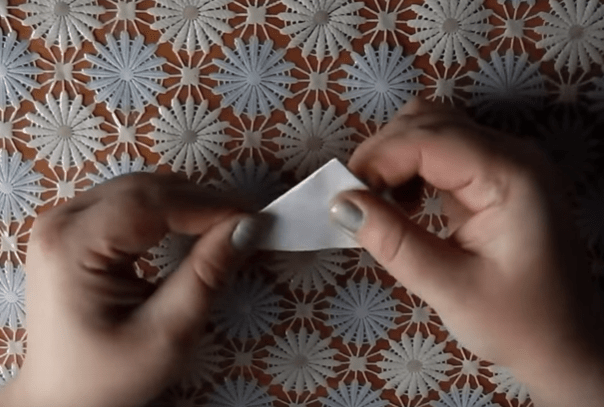
First, fold the white openwork napkin in half. Then cut along the marked fold line with scissors. Next, each half needs to be cut in half. As a result, we got an openwork napkin, cut into 4 equal parts.

Now from these quarters we will make rays for the future snowflake. To do this, first fold the workpiece in half, marking the fold line.

Focusing on this line, we bend half of the openwork part.

Then we bend the second openwork half symmetrically.


By bending both sides, we get a blank for the first ray of a snowflake.

This is what it looks like from the front.

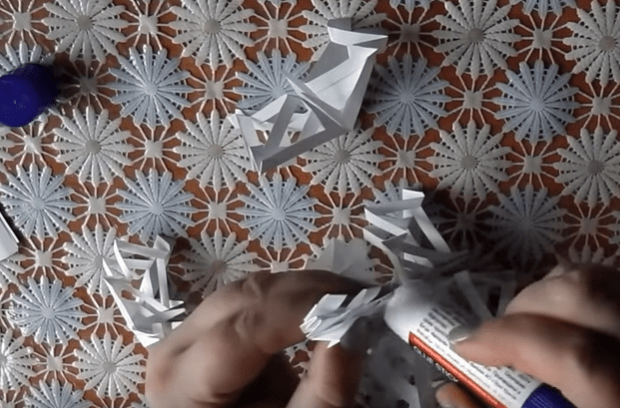
We continue to make other rays using the same principle.


And so we continue to work.

To make a snowflake, we needed 10 rays. If desired, the center can be decorated with a shiny rhinestone. We made such a New Year's snowflake from openwork napkins.

Now we propose to make a convex round snowflake from openwork napkins according to the 2018 master class. Very light and beautiful, suitable for children, see detailed instructions.

To create such a snowflake we prepared:
- openwork napkins (6 pieces are enough);
- scissors;
- glue;
- decorative rhinestone for the middle.

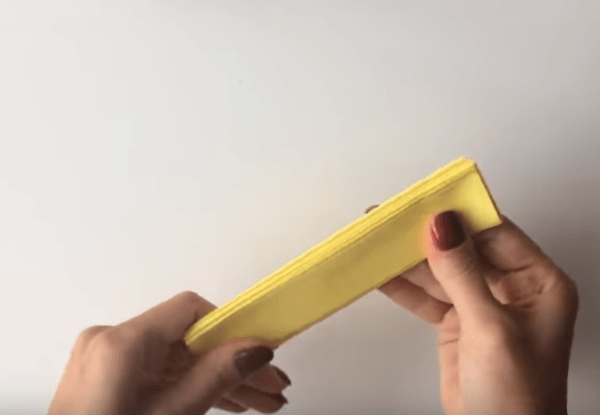
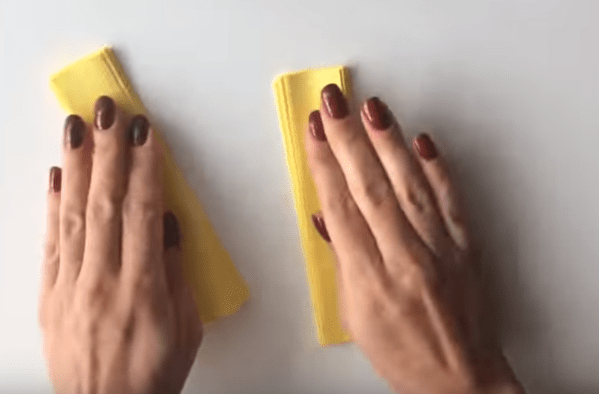
We will make the snowflake itself from peculiar little bags. To create them, we first need to bend the openwork napkin in half. After that, cut it with scissors along the fold line.

Then fold each half in half again and cut. As a result, we get 4 blanks from one napkin.

Now let's use glue and connect the edges of this workpiece so that we get a little bag.

In total, our snowflake will require 12 of these bags.
We take another napkin, it will serve as the basis for our snowflake. First glue 2 bags on it opposite each other.

Then we fix 2 more blanks in the other direction.

After this, evenly distribute the remaining bags and glue them onto an openwork napkin.

For the middle of the snowflake we will use other blanks. To create them, just cut a napkin in half.

After this, we immediately make small bags from the halves of openwork napkins.

In total we produce 4 such blanks.
We begin to glue them into the middle of the snowflake.

Fix all 4 bags evenly.

And we decorate the middle with decorative rhinestones. Our snowflake made from openwork napkins is ready.
Lush volumetric snowflake
Having 3 squares of paper, we can make the New Year's snowflake shown in this master class by Marina.
 To create it, let's take:
- 3 squares of blue paper;
- PVA glue;
- decorative rhinestone.
 Our craft consists of three elements, each of which will require one square blank. Let's start working on creating the first element. To do this, mark the transverse folds on the first blue square.
 After this, fold the side edges of the square to the middle line.
 Now let's fold the other sides.
 We unfold one side as follows, giving it the appearance of a trapezoid.
 We do the same on the other side.
 Now the corners of the resulting workpiece need to be carefully straightened so that they acquire a square shape.
 We do this with all four corners.

In place of these squares we make folds on both sides.
 Next, we will straighten these folds and give the workpiece itself the appearance of an elongated rhombus.
 We must make such diamonds from all four corners.
 The resulting diamonds need to be narrowed a little more; to do this, we make folds on the sides.
 The workpiece acquired this appearance after the folds were made.
 It remains to fold it as follows. To do this, you need to turn the workpiece over to the other side and make folds along the transverse folds.
 This is what this blank looks like from the other side.
 From the remaining two squares we make similar blanks, and then glue them together.
 And in the center of the craft we place a decorative rhinestone. It turned out to be such a voluminous snowflake.

Snowflakes curls


Simple strips of paper are used to create basic elements that can be glued together in any order. The number of options for such snowflakes tends to infinity, as in nature :)
A simple snowflake using the false quilling technique
Our master class on creating an openwork snowflake using the false quilling technique will help you make a decoration from strips of paper with minimal time and materials.

For the creative process you need to prepare the following materials:
- a sheet of white (or double-sided blue, silver) A4 paper;
- simple pencil;
- ruler;
- eraser;
- glue;
- scissors.
How to make an openwork snowflake using the unusual “false quilling” technique
The snowflake will consist of three types of elements, to create which you will need strips 1 cm wide. Each type of element must consist of six parts, so we need to draw a sheet of 18 stripes. The first 6 stripes should take up the length of the entire sheet. Draw the next 6 stripes perpendicular to the first. Draw the third type of stripes under the long ones, starting from the perpendicular stripes.
 Cut strips of paper and fold them into three rows, depending on their length. In places where pencil lines are very visible, use an eraser.
 To make it more convenient to work with strips, wrap them around a pencil and remove. Unlike the “” technique, our task is somewhat simplified, since we will not be working with dense curls, but with their similarity.
 Take a strip from the “short” row. To wrap the strip into a ring, twist it around your finger, close the edges and glue it. Make the next turn a little weaker and glue it again at the base. Make a third turn in this manner. Cut off excess paper with scissors.
Do this with the remaining five short strips, making sure they are the same size.
 Make exactly the same ring curls with stripes from the middle row.
 Bend the longest strips in half.
 Wind each end tightly onto a pencil and carefully remove the ring - you will get these double curls.

 Press the smallest curl rings on both sides with your fingers, giving them an almond shape.
 Press the middle curl rings from the ends to the center to form a figure of a four-pointed star (diamond).
 Let's start collecting snowflakes. Connect the six almond-shaped parts together with glue. You will get something like a flower.
 Glue double curls between the “petals”.
 For convenience, glue double curls across one petal.
 Then glue on the remaining double curls.
 Glue the “stars” where the double curls meet.
 That's all, the voluminous openwork snowflake is ready!
Look how twisted it is, like lace!
Thanks to the three-dimensional elements, folding such a snowflake is easier than when creating a quilling figure. Even small children can cope with such creative work if they are shown everything and helped, if necessary. Older children will figure out the intricacies of the work on their own. You can also come up with other elements and make several snowflakes to decorate a festive tree or interior. The main thing is desire, and everything will work out for you!
Snowflake made of paper squares

What to prepare to create snowflakes from paper squares:
- squares 8*8 cm, cut from decorative double-sided colored paper (scrap paper);
- scissors;
- pencil;
- glue;
- rhinestones, sparkles, sequins.

How to fold unusual snowflakes from ordinary paper squares
To work, you need two squares of the same size. If you want to make small snowflakes, use small squares and vice versa.

Cut squares of the required size from decorative paper. It is best to use paper that has a pattern on one side and a base color on the other, then the snowflake will look original.
Fold the squares in half twice.

Straighten the squares, the main lines will appear on them.

Fold the edges to the center line, pressing the folds with your finger.

Do exactly the same on the other side. When you straighten the squares, you will see that markings of small squares have appeared on them.

Using scissors, cut along the center folds to the length of one square.

Fold the corners at each edge as shown in the picture.

Tape the corners so that the patterned side is on top.

Glue one part of the snowflake onto the other so that the rays do not overlap each other.

Decorate the resulting snowflake with self-adhesive rhinestones, or stick on glitter with glue.

A beautiful figured snowflake made of squares is ready!
So, with very little effort, we got an unusual snowflake. Such beauty was created from two squares, it’s hard to believe! You are convinced that children can handle this kind of work, which means you can make a lot of wonderful snowflakes and use them to decorate rooms, gifts for loved ones and relatives, a festive tree or a Christmas wreath. And if you connect several snowflakes, you can make a garland, pendants or a crown decoration for the holiday.
Volumetric snowflake made of foamiran
Our regular author Marina will show you how to make a shiny three-dimensional snowflake in her new master class.
Snowflakes can be made from various materials. In this master class we propose to make such a craft for the New Year 2019 from shiny foamiran. But you can also choose colored paper; the folding technology is the same.

To make such a snowflake we prepared:
- shiny (glitter) foamiran of blue and silver color;
- scissors;
- toothpick;
- sharp knife;
- ruler;
- glue gun

Step-by-step instruction
We decided that our snowflake would be two-color, so we use foamiran in two colors - blue and silver. If desired, such a craft can be made in one color. The snowflake will consist of individual elements - rectangles. First, we cut out 3 rectangles measuring 2.5x14 cm from blue foamiran.

Now you need to make certain cuts on each rectangle. But first, let's use a ruler and a toothpick. On the wrong side, set aside 1 cm along the edges and draw small vertical lines with a toothpick. After this, the central part needs to be divided into 5 equal strips, the width of each of them will be 5 mm.

Next you will need a sharp utility knife. With its help, using a ruler, we carefully make cuts along the intended lines, not reaching 1 cm from each edge. This is best done under something hard (for example, a cutting board).

This is what our blue rectangle with cuts looks like, see photo:

We prepare other preparations in the same way. In total, 3 blue and 3 silver blanks will be used for our snowflake.

Now you can start creating the openwork rays of our snowflake. To do this, take one rectangle and carefully fold it in half, aligning the edges.


Using the same principle, using a glue gun we create the remaining shiny rays. There will be 6 of them in total.

For the base of the snowflake, cut out a small circle from silver foamiran. Glue the first blue ray to its wrong side.

We place the second (silver) ray opposite the first.

Now we fix the blue and silver rays between them using hot glue.

On the other side we also glue a couple of rays.

All that remains is to design the middle of our snowflake. To do this, cut out a small circle from silver foamiran and glue it.

Our volumetric snowflake made of shiny foamiran is ready.
Snowflake made from cardboard tubes
New Year's decor can be created even from scrap materials. An example would be a simple and interesting snowflake made from cardboard tubes, and the detailed process of its creation is shown in Marina’s master class. Such crafts can be done with children at home or in middle and senior groups of kindergarten.

To make such a snowflake we prepared:
- cardboard rolls from toilet paper or paper towels;
- ruler;
- pencil;
- brush;
- PVA glue;
- glitter;
- glue gun;
- scissors.

The first step is to make preparations for the future snowflake. We flatten the cardboard blank, and then make markings at a distance of 1 cm.


Then we need a glue gun, warm it up. He will help us connect 6 cardboard elements in a circle. This will be the base of our snowflake.

To create other elements of the snowflake, we must fold the cardboard strip in half.

In this way we add up the 12 remaining elements.


You should get 6 such blanks for a snowflake.

We begin to glue these blanks inside. We do this using a glue gun.

This is what our snowflake looks like at this stage.

All that remains is to decorate it and apply glitter. To do this, you first need to coat the top part of the craft with PVA glue; it is more convenient to do this with a brush.

Then pour glitter onto a sheet of paper.

Place the snowflake on this sheet with the coated side down. If necessary, glitter can be sprinkled on individual places. We made this snowflake from a cardboard tube.

Other options (photos and videos)
And more voluminous snowflakes from the Internet:


Original snowflakes made from strips of paper:
From voluminous snowflakes you can make beautiful garlands on the walls:
Form for submitting works to the competition
the best photos will be published in this article, their authors will receive diplomas for 1st, 2nd and 3rd place. The remaining authors (whose works have not been published) will receive diplomas from participants in the competition. Diplomas are sent for free, without payment or registration fees.
Before sending, please read and. Any questions you may have can be asked in the comments below the article.
Please carefully enter all the data that will be automatically inserted into the diplomas!
We suggest remembering your virginity and making a couple of beautiful paper snowflakes, or even better, not three, but about a dozen or two, and decorating your room and Christmas tree with them, as well as giving them as a gift. Do-it-yourself voluminous paper snowflakes, step-by-step instructions and photos in front of you, will become a good New Year's souvenir for acquaintances and friends.
In the article you will find a large selection of master classes for different snowflakes, as well as templates for cutting.

To cut out a snowflake, there is one important thing to do correctly: you must have a good stencil at hand. These are the templates that can be downloaded from this link.
- White volumetric snowflake
- Volumetric snowflake flower
- With 3D effect
Simple and beautiful volumetric snowflakes
New Year's preparations are no less magical time than the New Year itself. What pleasure do pre-holiday trips to the store bring, the shimmering street window decorations against the backdrop of falling snow, making a list of gifts and creating New Year's decor. If adults are so careful about preparation, then children are simply delighted with any opportunity to participate in such events. Let's please our kids and make together with them openwork volumetric snowflakes that can be used in decorating a Christmas tree, creating garlands, decorating windows or gift wrapping.
For work, prepare the following materials:
- sheets of white paper (it is better to use paper that is not too thick);
- a simple pencil or marker;
- glue or double-sided tape;
- scissors;
- office stapler.
How to make voluminous openwork snowflakes from plain paper
Take paper and necessary tools. When the necessary materials are at hand, the work goes smoothly. 
Divide the A4 sheet into two halves. 
Fold the strip from one edge to a small width (0.8-1.2 cm). 
Fold the edge again, this time in the other direction. Fold the edge over and over again, changing position from the wrong side to the right side. A very important condition - the more assemblies, the better the snowflake will turn out. But you shouldn’t make too narrow stripes - it will be inconvenient to cut out the pattern. If everything is done correctly, you will get paper assembled into an accordion. 
Do this with all the prepared papers. Divide part of the accordions in half with scissors. 
Bend each “accordion” in half in one direction and the other. 
Using a stapler, punch a hole in the middle of each accordion. 
Draw a pattern on each piece. 
Fold the accordion in half and cut out the pattern according to the intended design. 
The edges of the snowflakes can be joined using glue, but much faster and more durable - using tape. Cut strips of double-sided tape and stick on both sides. 
Remove the protective layer and connect the accordion on one side, pressing the edges. 
Connect the other side. Spread it over the entire surface and you will get voluminous snowflakes. 

The snowflakes will be openwork, of different sizes. 
Beauty! Working with your hands and scissors with regular paper you get extraordinary white snowflakes! 
Snowflakes will be a wonderful addition to New Year's decor. Also use children's creativity to decorate gifts, cards and invitations. Volumetric snowflakes can be used to decorate garlands, mobiles or hanging decorative decorations. And if you apply a little glue on top and sprinkle with glitter or shimmering dust, they will sparkle and sparkle with all the colors!
White volumetric snowflake
To create a voluminous paper snowflake you need to take:
- 6 paper squares measuring 10x10 cm;
- scissors;
- glue;
- ruler;
- pencil.
How to make a voluminous paper snowflake with your own hands
 1. Following our instructions, fold the paper square in half to form a triangle.


5. Glue the inner petals of the three-dimensional snowflake together, as shown in the photo. 


8. We proceed similarly to the steps described with the remaining paper squares. 
We assemble a three-dimensional snowflake from paper:


11. Glue all the blanks together in a similar way. A voluminous beautiful snowflake made by yourself is ready! 
Watch also the video on how to make a 3D paper snowflake:
Volumetric snowflake flower

You will need:
- A4 paper in two colors,
- scissors,
- pencil,
- glue.
How to make a three-dimensional paper snowflake step by step:
1. We fold the sheets of paper so that we get a triangle, and then a square. 

3. Fold the resulting triangles again. 
4. Draw lines on the triangles, as shown in the photo. 
5. We make cuts along the lines, cutting out a triangle in the middle and not cutting the middle lines to the end. 

6. Unfold the future snowflake. 
7. Apply glue to the corner of the middle strip. 
8. Glue snowflakes to the middle. 
9. We repeat the same thing with a parallel strip. 
10. And with two other strips, thereby connecting everything in the middle. 
11. Glue a yellow snowflake to a white snowflake. 
12. Now we glue the middle white stripes under the already glued yellow ones. 
13. Repeat on the other side. 
14. And with the others. The snowflake is ready. 

A beautiful three-dimensional snowflake is ready, we thread a thread through it and decorate our house. I hung it on the wall, where the snowflake blended harmoniously into the overall interior. I wish the same for you. By the way, snowflakes can be created not only from paper, but also made.
Do-it-yourself volumetric snowflake made from stripes

The most common materials and tools will be required:
- double-sided colored paper,
- ruler,
- scissors,
- glue.
And if you want more holiday, then add sparkles, sequins and something similar for decoration.
In this example, I took A4 printable sheets: one blue, one white and one purple. Since we need 20 strips in total, we draw centimeter wide strips along the long side of each sheet. 8 blue, 8 white and 4 purple. 
This voluminous paper snowflake consists of two identical parts. For one part, take 4 blue stripes, 4 white and 2 purple, weave them together as in the photo (plain weave). To prevent this structure from falling apart, secure it in several places with office glue. 
We glue the strips (blue) at the corners in pairs to form a right angle at the tip. If the glue does not set immediately, then temporarily, until the glue dries, use paper clips. 
Then we glue the white stripes on the back. This is one part of the future snowflake. 
We weave and glue the second, exactly the same part. 
We connect the two parts. The rays of the first should be between the rays of the second. We pull the remaining free strips (purple) into rays and glue them to the tip. The body of the snowflake is ready, now it is solid and can be hung. We cut off the excess sticking out on the rays so that the ends are pointed, and if there is a desire to complement the figure with something, then we complement it. I tried using pearlescent sequins. 
As a result, we get a rather large voluminous paper snowflake, about 25 cm in diameter. If you need a smaller one, then cut the A4 sheet crosswise, along the narrow side, and take the width of the strip to 0.5 cm. 
At any size, you get an original, airy home decoration, made by yourself. If the process still seems complicated to children, then they can participate in cutting strips of paper, and then watch the adults work and decorate upon completion by gluing shiny elements. 
Volumetric snowflake made of three colors of paper

To create snowflakes you will need:
- paper of three colors (one is possible),
- scissors,
- glue stick or PVA.
How to make a voluminous paper snowflake with your own hands:
In our work we will use the extra stripes that we cut off when making the previous snowflakes - white, blue and purple. First, cut out squares of the same size. Then we begin to fold each square in half, forming a triangle. 
Then fold it a second time. 
Next, you can use a pencil, or you can simply use scissors to make even cuts along the longest edge of the triangles. You need to start cutting not from the side of the last fold, but from the side of the connection of the sides of the triangle, as shown in the photo. 
We unfold each resulting cut square and begin gluing all the corners. First the middle. 
Then through one strip, two strips. 
Then we glue the remaining strips in the other direction. Thus forming the petal of a future snowflake. 

We do this with all other snowflake blanks. 
We begin to glue them together in three jokes. Selecting a certain combination of colors, we glue the bottom edge of the snowflake and touching strips together. 
Next, we glue the two blanks together in the middle and again with touching strips.
The snowflake is ready, you can hang it on the wall or even on the Christmas tree. Moreover, you remember the tradition for each New Year's Eve you need to hang a new toy on the Christmas tree. So let this be a paper snowflake you created. 

Paper snowflakes: templates for cutting, volumetric ones are shown step by step in this section of the material. These products with such a strange name are more voluminous in appearance and more complex in the cutting process. It is extremely important to fold the workpiece correctly at the very beginning, otherwise, when the cutting is completed, the product may simply fall apart into several parts.

To make a snowflake using this technique, you need thick paper. It can be white or any other color, everything depends on the specific creative idea of the person. You will also need to have sharp scissors and a stationery knife on hand (used for cutting out small parts, be sure to put something under the product so as not to cut through the table).

Before you start making such a snowflake, you must fold the workpiece correctly. To do this, fold a regular sheet of paper in half and draw a line on it along the bottom edge. Next, draw a perpendicular to it. On our sheet we will get two 90 degree angles. After this, you need to draw a line from the point where the lines intersect to create an angle of 60 degrees. Then you will need to draw two more lines reaching the edges of the sheet. If you are confused while reading all this, just look at the photo and it will become clear exactly how and what to do.
Now take a square sheet, fold it diagonally, it will turn out to be a triangle. Attach a stencil to it, checking that all corners match. The base of the triangle should coincide with the line that runs along the edge of the sheet (which was drawn first at the very beginning of the work, see the previous paragraph). The acute corners of this triangle are bent to opposite lines, which go to angles of 60 degrees.
The result is a rather beautifully shaped figure, reminiscent of a flower bud. That's it, the workpiece is ready. Yes, it will be difficult to make and, perhaps, it won’t work out the first time, but the voluminous snowflake turns out delicious and very original.
Next is how to make snowflakes out of paper: templates for cutting, voluminous, you need to check the photo. If everything is done correctly, apply a drawing to the template, then, when the cutting work is completed, you should erase all the lines that could remain on the surface of the festive snowflake.
Advice! To make cutting a snowflake easier, you can fold the blank in half. But then you need to understand that the template pattern is applied in such a situation only to one half of the workpiece.
When the snowflake is cut out, you will need to bend the small parts, after this step the product will have a cute and attractive volume. Additionally, such a snowflake can be painted, decorated with sparkles and beads.
You can also watch a video of how to make a voluminous snowflake out of paper with your own hands for the New Year:
The next quite interesting option is how snowflakes are made from paper using templates for cutting, its voluminous variants. To make this snowflake you need three regular paper snowflakes, you will also need glue, thread and a needle. Other options, how to do it.

First, you should choose any snowflake template that you like and print it. Next, simply circle this stencil and cut it out on three sheets of paper. It is most convenient to cut such a template not with scissors, but with a stationery knife, only you need to place a cutting board under the product to avoid damaging the table.

Next, you will need to bend the product along the dotted line, it is also marked on the template. Now all that remains is to glue or sew the snowflakes together along the fold line. Of course, such an elegant three-dimensional snowflake must hang somewhere, and this cannot be done without organizing an additional loop. To make it, it will be enough to pass a thread or a thin satin ribbon through the upper rays and tie it in a knot.
I would like to consider another option for creating a three-dimensional snowflake from paper Snowflakes from paper without using a cutting template. This snowflake will be made from two blanks, each with four corners. To make a snowflake, you need to have two sheets of paper on hand and cut them into squares of equal size.

Then fold each square to form a triangle. This triangle will need to be folded again. This stage of work is simple, it is used for almost all snowflakes. Next, you need to arm yourself with a simple pencil and draw the lines along which the snowflake will be cut out. You must first remove the excess part of the triangle: you will get a figure similar in shape to a mermaid’s tail (see photo).
Draw two lines from each edge, making a small indent between them. Leave the top corner as it is. The lines should not reach the top corner and end somewhere a centimeter before it. All that remains is to make the cuts and unfold the parts. You will get two beautiful snowflakes with four corners, resembling color in appearance.

Now we need to make a snowflake out of flowers: we are talking about New Year's decor. It is better to bend the middle strips on each to the center and fasten them together. Place one workpiece on top of another, the rays should not coincide. The end result is a snowflake with 8 corners that looks great from any angle. The details remain to be glued together, and the snowflake can be decorated at your own request with beads, sparkles, or whatever your creative soul desires.
With 3D effect
It seems to many, judging by the photo, that such a voluminous snowflake made of paper with your own hands for the New Year is easier to make than the previous option that was considered. In fact, it depends on who. It seems that the second option for making a snowflake is actually simpler and easier, but, on the other hand, if you make it together with the kids, you will still need to spend both time and effort.
The advantage of this option for making a snowflake is that you can use a variety of ornaments for it. This means that people who constantly complain that master classes do not allow them to express their imagination to the fullest, will finally be able to give free rein to their imagination.

What you need for work:
One sheet of paper of any color;
Pencil and scissors;
A stapler with staples for fastening parts of a snowflake.
Paper is needed in the form of squares with a side of 10 cm. To make a large enough snowflake according to this master class, you will need ten such paper squares. First of all, you need to cut out a snowflake using any method from one square of paper. To do this, bend the square in half to create a diagonal. Now bend everything again and draw the pattern according to which the snowflake will be cut.
Important! The patterns can be very different, but it is important to repeat it several more times. Therefore, you can simply print out a ready-made template from a thematic article on our website (or transfer it onto paper through the screen), which you can use to ultimately make a three-dimensional snowflake.

You will need to cut the triangle along the outlined lines; in other words, in the usual way, using sharp nail scissors, cut out the snowflake and lay it out. Make the same blanks from those nine square leaves that were prepared for work, but have not yet been used. Let us remind you once again that the pattern of all snowflakes should be the same.

Now the time comes to make a large figure out of ordinary flat snowflakes. First you need to take five flat snowflakes and use a stapler to fasten them together.
Next, again take five blanks and follow exactly the same principle as the first five,
fasten together. This remains the most difficult part of the process, which requires the most precision. The two halves of one large snowflake also need to be fastened together. The large voluminous snowflake is ready and to hang it, you just need to tie a ribbon or thread to it in any area.
Do you want to decorate your home with voluminous snowflakes made from paper with your own hands for the New Year? No problem! Our photo tutorials will guide you step-by-step through beautiful holiday decorations.
Now on sale you can find any decorations for the Christmas tree, bright balls, multi-colored garlands. However, if you make toys with your own hands, you can also get aesthetic pleasure from the process.
A simple option for making a three-dimensional snowflake
Despite the fact that paper tears and wrinkles easily, it has many advantages. One of them is that it easily takes any shape. It’s not for nothing that the Japanese believe that the whole world is hidden in a paper square. Psychologists advise doing paper crafts with children, as this has a beneficial effect on their nervous system.
First, let's make the simplest, but such a beautiful three-dimensional snowflake. Let's prepare the following materials: A4 paper, glue and scissors.
Step-by-step making of a volumetric snowflake with your own hands:

- Fold the sheet in half lengthwise and cut it, then make a diagonal fold and cut off the excess, resulting in 2 squares.

- Then we bend them 2 more times diagonally and cut out rounded petals on the side where the ordinary sheets are located.

- In each of them we will cut two more rounded cuts, without finishing it.

- We lay out the blank and bend the middle petals and glue them to the middle, do this on 4 sides.

- We will perform the same actions with the second figure.
 Step-by-step photos of creating a snowflake
 - We glue the parts together, with the reverse sides, and turn the bottom one 45 degrees, we get a lovely decoration.
 Photo: Beautiful New Year's snowflake made of paper
 Team snowflake for New Year 2019
New Year's voluminous paper snowflakes look gorgeous if they are made from several types of colored paper. You can take the shiny wrapper that tea is usually sold in.

Let's prepare the following materials:
- colored paper - 6 squares;
- scissors;
- stapler;
- Ruler and pencil;
- glue.
 Scheme for cutting out a volumetric snowflake
 - Take the first square and draw a line connecting the two corners. Then on one side we draw three triangles, at a distance of 1 cm from each other, without connecting the lines. You can see this more clearly in the diagram.

- Fold the square in half and make 3 cuts on each side, without finishing them.
 Step by step photo
 - Let's expand the figure and first connect the corners of the smallest, inner square and glue them together.


- Turn the square over and fasten the ends of the next square. We repeat the whole process 2 more times. We received only one detail of the future snowflake.

- We repeat all the steps from the remaining 5 squares.


- Then we fasten three parts together, and then from two large parts we make one whole figure.
You can attach a string to a snowflake and hang it on the Christmas tree. If you attach voluminous snowflakes to the ceiling in your office, then at the slightest air movement they will spin, creating the feeling of a snow waltz.
Snowflake in the form of a ball for the New Year 2019

The product looks very beautiful if you make it from wrapping paper on a paper base, you just need to glue it together first. But first, it’s better to practice on plain white paper; scissors and glue will also come in handy during the manufacturing process.
Let's look at the whole process step by step:
- We cut out 6 squares with a side of 9 cm from a sheet of paper, A4 format, the entire snowflake consists of six identical modules.

- We take one square and fold it in half, unfold it and make a narrower fold, on the other hand, if you take all 4 sides of the figure with your fingers, you will get a folding bud.

- We bend each corner of the part by about 8 mm, make 4 notches on the square bent in half, up to the limit line on one side, turn it over and do the same on the other.

- Having unfolded the part, we will see two triangles with transverse cuts; we bend the outermost and third stripes in the opposite direction. If you fold it again into a triangle, then two strips will protrude, we try to ensure that they are parallel to each other.
- Now we bend the triangle to the outer side at the very top, and bend it in half, first in one direction, then in the other, holding it by the corner, we put it back.


- We repeat the process on the other side.

- Having unfolded the figure, we see that there are two whole triangles left; carefully, stepping back 6 mm, we make a cut, not reaching the end 1.5 cm on both sides.


- Then, starting from the center, we make cuts to two points, that is, there is a tick in the middle, we divide it in half. We repeat the same steps on the other side.

- The result was a rather delicate detail.

- It is necessary to make 6 such parts, then glue them together.
The result is a gorgeous snowflake ball. You can make it in gold or silver color. It can become the main decoration on the New Year tree.
Video of making a snowflake:
Snowflake star

A beautiful voluminous paper snowflake for the New Year 2019 is easy and simple to make! You can make this product with your own hands and together with children.
Necessary materials:
- colored paper – 4 sheets;
- glue;
- scissors.
Step-by-step manufacturing process:
- Let's take a sheet of A4 paper and cut it in half lengthwise, do the same with the rest, we will get 8 blanks.

- Take the first rectangle and fold it in half, then each half in half again. We unfold it, there are 4 long rectangles, first we fold the outer ones in half, and in this form we bend the entire rectangle along its length. Let's repeat the whole process with the remaining blanks.

- Take a ruler and a pencil and from the center of the narrower side draw lines that form a triangle, but not all the way to the base. On the one hand, it will be about 4 cm from the base, on the other – 7 cm and cut it out.

- Let's apply the resulting figure to the rest of the blanks and cut out the remaining 7 pieces.
- We unfold the figure and bend it along its length, coat the outer strip with glue, bend it and glue it together. Let's repeat the process with the remaining parts.

- Then we glue all the parts, placing them in a stack. Now we coat the last edge with glue, unfold the stack and glue it to the first.
The result was a beautiful and airy snowflake star.
Wicker paper snowflakes
In Soviet times, children enjoyed making snowflakes; flat ones were glued to glass, and three-dimensional ones were hung from the ceiling. Then, for some reason, the fashion for this passed, and purchased products became more popular. How wonderful it is when the well-forgotten old things come back.
Let's make voluminous paper snowflakes with our own hands for the New Year 2019 to decorate your home with original toys.

Schemes and description of the process:
- Take a piece of colored paper, for example blue, A4 size, cut it into strips half a centimeter wide, along the long side. One craft requires 20 strips.
- We take 10 strips, divide them in half and weave a loose mesh. You should get a figure with a lattice in the center and free ends. Add a little glue to the grille to secure it. Let's do the same with the remaining strips.
- Now let's place one figure straight, and the second on it, but with an offset of 45 degrees
- Take the 2 outer strips of the lower part, bring them to the top and fasten them with a stapler, above the upper part. Let's repeat this process with all the strips. Turn the workpiece over and repeat all steps. This needs to be done 4 times.


It turns out to be a beautiful three-dimensional snowflake with a wicker square on top.
Corrugated snowflake

Create one for New Year 2019 with your child. When a baby works with paper, he does the same actions with both hands, and this is very useful for the brain and fine motor skills. In addition, it develops hard work and perseverance in the child. You don't need any complicated materials, just paper, scissors, glue and a stapler.
And the diagrams will facilitate the manufacturing process step by step:
- Take a standard sheet of paper and cut it in half lengthwise. One half is enough to create 1 snowflake. Fold the sheet like an accordion and staple it in the middle.
- We will make cutouts on both sides with scissors; their shape depends on your imagination; these can be openwork petals or geometric shapes.
- Then coat one side with glue and glue it to the other. Unfold the snowflake and glue the remaining sides together.

 Scheme
 By making different cuts on the sides each time, you can make a whole set of snowflakes that are different from each other. The manufacturing process is very simple, but quite exciting.
Fantasy snowflake for New Year 2019
Interestingly, many centuries ago, Japanese monks were fluent in the origami technique. When they needed to convey a secret message, they wrote it down on a piece of paper and then put it in some kind of figurine. So, only the one to whom the message was addressed was able to unfold it without tearing it.

Let's make a three-dimensional snowflake out of paper, showing your imagination; it depends on it what the future work will look like.
Necessary materials:
- paper;
- scissors;
- paints and brush;
- pencil;
- large button;
- decorative cord;
- gypsy needle;
- sequins, sparkles.
Step-by-step process for making a volumetric snowflake:
- Take a white sheet of paper and draw 8 petals on it, 6.5 cm wide and 11 cm high. We cut them out and paint them with paints, one or different colors. Since this is a fantasy snowflake, you can make it from old newspapers or wrapping paper.

- Now, in the same manner, we will make 8 more petals, but only from a different color of paper; we will also need a circle that will serve as the base. You can make it from thick cardboard.

- Glue the denser petals, in wide parts, to the base of the circle. There should be an eight-pointed, still flat snowflake.

- Then we roll the thin paper petals into a little bag and glue them into the gaps between the cardboard petals, with the narrow part towards the center.

- In the middle of the snowflake we sew a button onto a decorative cord, leave its long ends and tie it with a bow.
Decorate the snowflake with sequins and sparkles.
Airy paper snowflake
It is interesting that in the East paper is given a special meaning; it is believed that good paper can only be made from November to December. In addition, the Japanese characters for paper and deity, despite the fact that they are written differently, sound exactly the same.

Let's make a light and ethereal snowflake from colored paper, prepare glue, scissors and a pencil for this. Incomprehensible moments can be seen in the photo. Let's look at the sequence of actions in more detail:
- Take a sheet of colored paper and fold it in half along its length, then make an accordion along its width, 1 cm thick.

- To do this, fold the strip in one direction, turn the sheet over, bend it in the other direction, and so on until the end.
- Then we unfold and cut the sheet to length.

- It turned out to be two accordions.

- We take the first one and, using a simple pencil, draw a pattern, a future snowflake, for example, thin leaves. Repeat the pattern on the second accordion.

- Cut out the drawn pattern with scissors.


- We lay out the halves and glue them together, first on one side, then on the other, as if looping it.


- Unfold and assemble in the center.
You can glue the center or leave it as is, so the snowflake will be more airy. Lying on the table, it folds easily, and when you take it in your hands, it turns into a garland.
Transparent snowflake
Invite your child to make a simple three-dimensional snowflake for the New Year out of paper with their own hands; time will fly by with this exciting activity.

Necessary materials:
- A4 colored paper;
- scissors;
- a simple pencil;
- glue;
- bead.
Step-by-step manufacturing process:
- Take a sheet of paper and fold it so that you get a square, cut off what you don’t need with scissors. Fold it diagonally, a triangle comes out, which we fold in half 2 more times.

- At the end where the ordinary leaves are located, draw a semi-oval with a simple pencil and cut it out, but not completely.

- Then, at a distance of 1 cm, we cut the same oval line and also do not complete it. And another similar line. Then, on the last line we cut out small triangles, so the snowflake will look more elegant.

- Then we make curly cuts on the side where the double leaves are located.

- We unfold the structure, we need to make another one of the same kind. Or you can immediately take 2 sheets of paper and perform all the steps at once. However, you should be aware that the thickness of the paper will increase, and cutting will be a little more difficult. If the procedure is performed for the first time, then it is better not to experiment and perform it 2 times on one sheet.

- Take the middle petals, bend them towards the center and glue them, you get a small flower in the middle. We repeat the procedure with the second part of the snowflake.

- Then we glue one part onto the second, with an offset of 45 degrees. Attach a bead to the center of the craft to match the color of the paper.

Such snowflakes can be glued to the walls of the apartment using double-sided tape.
Do-it-yourself volumetric snowflake made from stripes
Working with paper is incredibly calming, so if a person feels twitchy and irritated, then it’s time to start making decorations for the New Year 2019. This helps to put your thoughts in order, focusing on the process of creating a home masterpiece. We will need any paper, scissors, ruler and glue.
 Photos of beautiful snowflakes
 Step-by-step manufacturing process:
- Take paper and cut 25 strips 1 cm wide and A4 long. To make the snowflake more colorful, use several colors of paper, for example, white, light blue and dark blue.
- First take 5 white strips, put them together, measure 21 cm and cut them. Then we will make loops out of them by gluing the ends of each strip together.
- Now we take 10 blue stripes, also put them together, measure 17 cm and cut them off. We take one white loop and on the sides of it we make blue loops on both sides, gluing them slightly at an angle. Therefore, for 5 white stripes we need 10 blue stripes.
- Let's take 10 blue rays, measure 14.5 cm, and cut off the excess. We take the part with the blue and white loops and now make blue loops on the sides, also slightly inclined.
- Now we begin to connect, to do it correctly, you need to take a white sheet of paper and draw on it the lines of a regular five-pointed star. We take the first part, place it on the center line of the beam, lubricate the end with glue, apply the second, combining it with the second beam drawn on paper. We do the same with all the details. It will be impossible to maintain the correct tilt of all parts on your own.

Glue shiny sequins on both sides in the center of the snowflake, the New Year's toy is ready.
By deciding to make voluminous paper snowflakes with your own hands for the New Year 2019, you can not only decorate your apartment, but also have a good time. And if you also call the children for help, you will get a fun, family game that will lift your spirits.
Hello everyone! Today I want to continue the theme of crafts and show you how you can easily and quickly create wonderful toys in the form of paper snowflakes at home. The other day my sons and I made such a beauty that now this wonderful creation makes us happy. Watch and do with us.
I remember how I sat and cut out snowflakes as a child; it brought me so much joy and pleasure. And then she ran and glued it to the window. Time has passed, but nothing has changed until now, I still love this activity, only now I do them with my kids.
As always, I’ll start with the simplest manufacturing options, and along the way there will be more and more complex options.
In order to create a snowflake, you only need one tool - scissors and a sheet of paper and a great mood.

Then you need to correctly fold the paper into a triangle, and then draw a suitable pattern and cut it out. You will also need a simple pencil))).
The main thing is to take a square-shaped sheet, fold it in half (1), then in half again (2), repeat steps (3, 4), almost done! Draw with a pencil what you will cut out, for example like this in this photo:

So, from this triangular blank I propose to make these magically beautiful and light versions of winter snowflakes, which you can use everywhere, even bring them to kindergarten, school and decorate rooms in your apartment, in the entrance and windows with them.
If you like everything openwork, then this look is just for you:

If you prefer classic options, then choose these wonderful snowflakes:

The following layouts and diagrams will be a little more complicated:

In general, I really liked this selection of all kinds of decorations on snowflakes, which I saw on the Internet:

Look how picturesque and patterned they are, it’s just super beautiful, and most importantly, it’s accessible to everyone, even a preschool child, a schoolchild, and even us adults.


For the little ones, you can offer this craft in the form of curls made from stripes.

Cutting snowflakes from napkins or paper
Have you ever seen those, such that the cutest snowflakes appear from napkins that absolutely everyone would like? I found these and am sharing them with you, the method is simple and easy, and also budget-friendly, you will need glue, napkins, scissors, a pencil or pen and cardboard.
Interesting! Napkins can be replaced with any other type of paper, such as corrugated paper.
The stages of work themselves are not complicated, but these pictures outline the entire sequence, so watch and repeat.
 The final result of the work will be incredibly beautiful and will be remembered by everyone, and if you decorate it with colored sequins or something like that, it will be absolutely cool.

Or this way, depending on how someone decides to decorate the original sample.

Well, now I’ll show you a rather primitive, old method; before, such cute snowflakes were used to do everything in labor lessons or in art kindergartens. You will need paper and a good mood, and of course, scissors and glue. You will need to cut long strips of paper from a regular A4 sheet, the width of the strip should be 1.5 cm and the length approximately 30 cm.

You can make these multi-colored stripes and you should get 12 plain stripes.

This is how you glue these strips together step by step.

It turned out incredibly original, you can hang it on a Christmas tree, on a window or on a chandelier))).

Another similar option made from paper strips.

I saw a friend’s snowflake made from ordinary newspaper, then you can cover it with shiny varnish or glue sackcloth.

Or you can roll cones out of paper and glue them in a circle, alternating colors.

Do-it-yourself volumetric snowflake with step-by-step descriptions
To begin with, I want to offer you this way of working, maybe you will like it better than the following:
This type of work is a little more complicated, but it is the most interesting in my opinion, because it looks Such a snowflake appears as if in 3D form. Of course, it’s time-consuming, but it’s worth it, my child and I made such a masterpiece in 1 hour. We are happy to share our step-by-step master class with you.

Stages of work:
1. You will need 6 squares of paper (blue and 6 of another white color), we took ordinary squares that we already had, they are sold as notes for notes. If you don't have these, then make your own.
Fold each square in half from one end to the other.

It will turn out something like this, and the last figure lies on the table, this is the result of the work.

2. Then fold the two ends of the paper to the fold line on both sides.

Turn the finished templates over to the wrong side.


Now turn the craft over to the other side again and push out the parts that stick out.

4. This is how it should work out, absolutely not difficult.

The next step will be to prepare 6 white squares, from which we will make the following blanks.

5. So let's start, this work is even easier than the previous one, let's make origami out of paper again.

This is how it should turn out, there should be 6 blue blanks, and also 6 white ones.

6. Well, after you have cut the white squares, fold each leaf in half by taking one end and placing it on the other.

Do it after the envelope.

7. Now turn all the envelopes over to the other side.

My youngest son also helped, and the eldest joined a little later.

8. Fold the sides.

Turn it over and fold out the sides, then fold them towards the center. Cut out a small circle from paper and attach all the modules.

9. Now start gluing.

Take your time, do everything carefully. Use a napkin.

10. Almost everything is ready, all that remains is to decorate and cheer up yourself and those around you.

So I called my eldest son for help, and this is what we did to him.

11. We glued a photo in the middle, it turned out to be such a funny and mischievous modular paper snowflake. Tomorrow we will hang this beauty on a booth in the kindergarten. It looks simply amazing and much brighter live). So be sure that absolutely everyone will like this miracle!

In fact, there are quite a lot of three-dimensional options; they can be made using the origami technique, or in the most ordinary way.
I found these on the Internet, I hope you find them useful, take paper, scissors and glue:

Here is another similar option.

If you have a lot of time, then you can make more complex voluminous snowflakes; I know that the halls of kindergartens, schools, universities, universities and even shops are usually decorated like this.
Interesting! You don’t have to glue the parts together, but use a stapler to do it faster.


Video on how to cut out a New Year's paper snowflake for children
First I wanted to show you a primitive video, and then I thought that you can easily do the most ordinary thing yourself. So I thought, I thought and... I propose to cut out an unusual snowflake in the form of an angel:
Simple snowflake patterns for beginners in origami technique
As far as I know, origami is also divided into subtypes, for example, modular paper origami. Which one do you love the most? I have some interesting ideas.
Or the simplest and easiest to do, even school-age children can figure it out:

Modular origami is already more difficult; here you initially need to learn how to fold the modules correctly, and then everything will go like clockwork.

You will need to make quite a lot of modules to put together such a composition, but you will develop fine motor skills)))

Each such module is easily inserted one after another, so you can come up with any options on the go.

All I can do is wish you good luck and creative success.

Schemes and templates for cutting snowflakes from paper for the New Year
As for the various ready-made patterns, I offer you these types of snowflakes. The main thing is to remember that first you need to fold the sheet correctly, as I showed you at the very beginning
Now outline what you want to see and cut out along the contours.

If you want to make the snowflake more voluminous, use ready-made templates, like this one:

Then for this purpose you will need to cut out 3-4 templates, and then stitch or glue them in the center, and press them down with a stapler. Who needs such ready-made blanks and diagrams, write a comment below, I will send it to you by email absolutely free, I have quite a lot of them in my piggy bank, I will be happy to share a whole bunch.


By the way, you can create your own pattern, look how it looks, try it, it’s a creative activity:


I once thought it was last year, and I imagined such beauty:

For those who like openwork and very complex options, although there is nothing complicated, I can suggest watching this video, by the way, in it, paper is folded differently, take a look, there is something to learn:
Master class on snowflakes in quilling style for beginners
This type of toy is quite difficult if you have never made it using such a well-known quilling technique before. But this is at first glance, because the main thing is to understand the essence.
Even a beginner or a child can get the simplest diagram and snowflake:

And also this video will help you with this, everything is accessible and described and shown step by step. All you have to do is repeat all the actions after the presenter and you will get a masterpiece.
Snowflakes using the quilling technique, this one is stunningly beautiful and charming. Try it.
Well, I gave you a whole bunch of ideas for realizing the festive mood, decorate your house, apartment. It will look simply great, especially with your own hands, such crafts will always bring warmth and comfort to every heart))).

See you! Have a great day everyone, sunny mood! Come visit more often, join my contact group, write reviews and comments. Bye everyone!
Sincerely, Ekaterina Mantsurova


