As promised, a photo of glue for homemade porcelain. The main glue markings are in the upper corners of the photo (D2). Only this PVA glue adds plasticizers, which are so necessary for cold porcelain. Using the left glue, the mass turns out to be plastic, while the right glue is tighter and stronger (the difference is visible in the photo).
The recipe is classic (it is on this site), I just add 5 drops of formaldehyde (optional). Comments on the glue: if you take 3 parts of the glue in the photo on the left and one in the photo on the right, the mass will be elastic, and the product after drying will be very durable. If you use glue one to one, the mass remains elastic and the product retains a slight flexibility after drying. Nivea cream is only for final kneading of the mass, and Vaseline is only for lubricating the bag where the mass will be stored, that is, I do not add either one during cooking.

I hope the photo shows the elasticity of the mass. Due to numerous requests, I am writing in a personal message my recipe for cooking HF. Here is the recipe: I take 2 identical mugs with a capacity of 350 ml (if you just pour water into it). I pour corn starch into one and glue into the other: I take one to one, i.e. half a mug from the left bottle and half a mug from the right bottle. I pour the glue into the pan and add there: 2 dessert spoons of glycerin, 2 dessert spoons of Johnson Baby oil and one dessert spoon of lemon juice (sometimes I add 3-5 drops of formaldehyde, but this is not necessary, once I forgot to add it to the mass had no effect). I mix everything well, pour in the starch and mix well again until smooth. Then I let the starch swell, i.e. Leave for 15-20 minutes, stirring occasionally. Then I put it in the microwave (at 800 power) and heat it the first 3 times for 30 seconds (stirring after each time), 3 times for 20 seconds, stirring the same way each time. I didn’t count further, but I stirred every 10-15 seconds. until fully cooked (the mass turns into one lump, but soft). I put it on the table, pre-lubricated with two teaspoons of Nivea cream, and knead it well with my hands (it’s hot, but tolerable and it quickly becomes warm). I knead for 3 to 5 minutes. Then I put the mixture in a plastic bag, pre-greased with Vaseline. I let it sit for a day (sometimes less) and sculpt what I want. I hope I explained it clearly, but if not, then don’t hesitate to ask, I’ll explain any unclear points. I wish you success!

I sculpted these flowers from the materials next to which they lie.

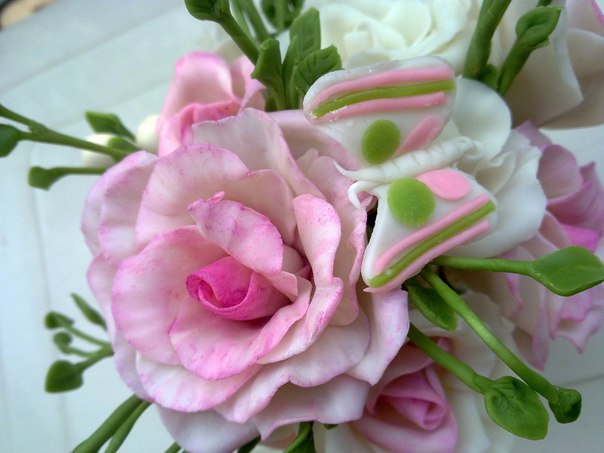
And these flowers are from my homemade porcelain. This is what is left for today (I gave everything away to friends for the holidays).
Externally, cold porcelain is similar to plasticine or clay, but unlike them, it does not require cooking, firing or baking. It hardens within 2 days and becomes quite dense and durable. You can combine this material with any decor: buttons, lace, shells, and sprinkle the surface with sand, beads, and paint it with any paints and varnishes.
The first such products date back to the 19th century; the exact country of origin is unknown, but it is attributed to the Argentines.
Products made from cold porcelain are extremely beautiful, but require special care. Moisture can soften them, causing them to become limp, and sunlight can discolor them. The influence of high temperatures can lead to drying out, and too low temperatures can lead to destruction.

It is possible to extend the service life of cold porcelain crafts by applying several protective layers of varnish. This will not only protect them from environmental influences, but also add shine and color.

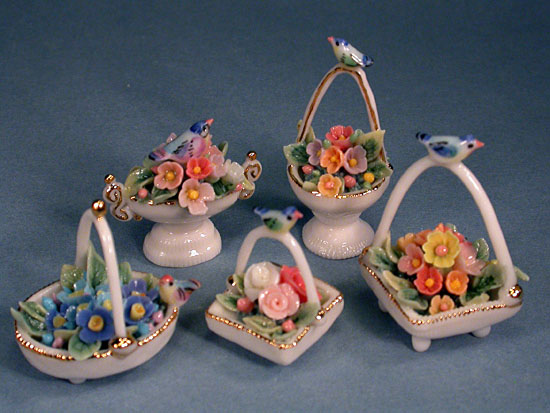
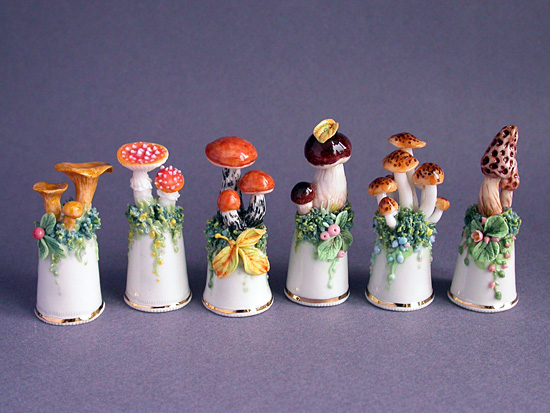
You can mold anything from cold porcelain at home: from small jewelry to small decorative accessories. Many people use this technology to decorate flower pots and dishes, and the most valuable are decorative garlands in the form of flowers, leaves, greenery and figurines of animals and cartoon characters.


How to make cold porcelain with your own hands?
To do this, you need to acquire the following materials:
- 200 grams of PVA glue;
- Rice starch (if you don’t have it, you can use corn starch) in the amount of 1 cup;
- 2 tbsp. spoons of glycerin;
- Any non-greasy cream.

The ingredients need to be mixed and set aside for 10-20 minutes. The mixture should not be left for a long time; work should begin immediately and, if possible, use all the material. Sometimes citric acid is added to the composition to increase the shelf life of the product.

If you add water, the products will become fragile. To color porcelain, use any food coloring or chalk. It is recommended to refine the surface no earlier than 2 days after the product has dried.


Where to begin?
To work, first of all you will need materials and the following tools:
- Any object that can be used to roll out material;
- Scissors, tweezers and toothpicks;
- Brushes and various paints;
- cutting surface;
- Glue for shaping the craft;
- Gloves and wet wipes;

If you are planning such an activity for the first time, before starting the main work you need to watch the master class and read the detailed step-by-step instructions for beginners, otherwise you risk spoiling the material and not getting the desired result.

You can take the first examples for your masterpieces on the Internet from photographs and videos of crafts using cold porcelain. It's better to start by creating flowers.

Sakura made using cold porcelain technique
Some of the required material needs to be made white, and the other painted pink. Two layers of different shades need to be fastened together and cut into rectangles - blanks for petals.

Using tools, you need to shape the petals so that the base is pink and the edges are white. Using glue, fasten the petals, and in the middle, using a toothpick, make a hole for the wire, which will serve as a stem. After drying, the flowers need to be collected into branches to naturally replicate the structure of a real flower.

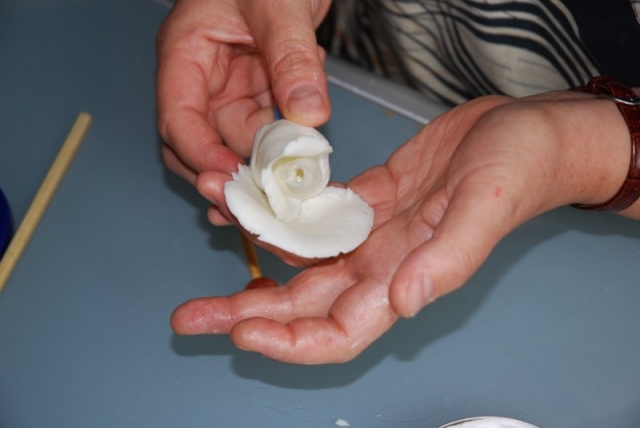
Making roses using the cold porcelain technique
To form this flower, a small piece of porcelain is taken and transformed into the shape of a ball, from which it is necessary to obtain a drop-shaped figure.

Next, the end of the toothpick is dipped in PVA glue, then the drop with the wide side is placed on the end moistened with glue. For the convenience of further work, it is worth fixing the toothpicks on a piece of sponge or foam rubber. It is better to make the pistils in advance so that they have time to dry by the time the bud is combined.

To make petals, you need to prepare the balls again and form drops. Using your fingers, flatten the drops and get the finished petals.


Using glue, we fix the resulting petals in a circle with an overlap, as if hugging the core, and bend them a little to create a natural effect.

From these flowers you can make a whole topiarium, which will decorate the room and delight you with its unusual appearance.

conclusions
Cold porcelain can be used to make not only flowers, but also various souvenirs that can be presented to loved ones - keychains, personalized hand-decorated cups, figurines, panels and entire paintings. Such a gift will not leave anyone indifferent.


Photos of cold porcelain crafts


Content
In Europe, cold porcelain appeared quite recently, but the Japanese have been using it for 5 thousand years. It has nothing in common with ordinary porcelain, but it is visually fragile, translucent and weightless in the finished product.
Each master who is interested in sculpting from cold porcelain has his own recipe, which he developed after much experimentation. But a beginner in this business can try to make cold porcelain without cooking from known components. And over time, develop your own recipe, which will be individual.
From corn starch
To prepare the material you will need:
- Corn starch - 200g;
- Construction PVA glue - 150g;
- Water - 100g;
- Glycerin - 1 tsp;
- Any cream - 1 tsp.
Cold porcelain made from corn starch at home will have a yellow tint, while its appearance is more transparent and it looks weightless in products. This material is ideal for making delicate flowers and leaves.
Step-by-step production
Mix glue, water, glycerin in an old saucepan and put on low heat, stirring without stopping. Starch is added at the moment when the mass in the container becomes homogeneous, without stopping stirring. It is worth noting that the mass will boil only at the edges of the pan, and if you do not stir constantly it will burn. As soon as the contents of the pan begin to lag behind the pan and form a lump, it can be removed.
Another method by which porcelain will turn out to be of higher quality is cooking in a water bath. Using this method, you can remove the pan from the water and mix the mass well.

Important! Be sure to fill all tools and pans used in cooking with water.
While the mixture is hot, you need to knead it in a towel until it cools. After the porcelain has cooled, remove the towel and begin kneading with your hands, which you periodically dip in starch.
During the kneading process, the raw materials are colored.
As soon as the mass stops sticking to your hands, it is ready for use, but it is better to put it in a plastic bag and put it in the refrigerator for a day.
Microwave recipe
An indispensable attribute of almost any kitchen is a microwave oven. And it is well suited for preparing cold porcelain. It is better to cook in glass containers. There is practically no difference in preparation, you just need to set the timer for 30 seconds and stir the mixture. After complete thickening, the mass is laid out and kneaded well with hands. This is a fairly simple recipe for making cold porcelain.

No cooking
Without heat treatment, it is possible to produce cold porcelain from potato starch.
We take petroleum jelly and potato starch in a 1:2 ratio. Mix the mixture well and add a pinch of baking soda during the process. With continuous stirring, add PVA glue to the desired thickness. After this, knead with your hands. For comfortable kneading, lubricate your hands with any rich cream. To prevent porcelain from sticking to the surface, it can be sprinkled with starch or lubricated with cream. Any beginner can make cold porcelain without cooking.
After kneading, you need to let the porcelain sit and then it can be used for modeling. A master class on cold porcelain without heat treatment can be viewed below.
Improved recipe
As mentioned earlier, masters who have been practicing cold porcelain sculpting for a long time constantly experiment with ingredients. And thanks to this research, a composition of impeccable material for modeling was created. There is no big secret about this - it is the addition of citric acid to the mixture. Let's figure out how to prepare cold porcelain at home - another, refined recipe.
Ingredients we will need:
- 150 g - corn starch;
- 150 g - “Moment” glue;
- 3 tsp - glycerin;
- 1.5 tsp. - massage oil;
- 1.5 tsp - lemon juice.
Preparation:
Take a pan with thick walls, pour glue into it, mix it with glycerin, massage oil, and lemon juice. Stir until smooth. Starch is introduced into the mixture in very small portions. As soon as the starch is introduced, you need to mix well and leave to swell for 4 hours.

Then transfer the mixture into a microwave cup and heat it three times for 30 seconds at a power of 80 0C, then three times for 20 seconds, and three times for 15 seconds. Don't forget to stir the mixture after each heating. The resulting mass will be sticky, and you need to knead it with your hands coated with any cream. The surface on which kneading will be done can be spread with cream or starch. As soon as the finished material stops sticking to your hands, transfer it to a bag and place it in the refrigerator. The recipe for transparent porcelain differs little from the preparation of this material from corn flour.
Conclusion
It is worth noting that cold porcelain prepared at home is the cheapest option to bring your creative imagination to life. Thanks to this material, it is possible to produce magnificent works of art of extraordinary beauty.
The homogeneous, plastic structure of the material allows you to create not only flower arrangements, but also the smallest details for any crafts. In a duet with cold porcelain you can use:
- ropes,
- pebbles,
- shells,
- beads,
- sequins,
- beads,
- textile,
- accessories.
If you are just starting to make cold porcelain and don’t know what ingredients are needed, what kind of glue, or how to prepare it correctly, then watch the training video:
Do not take on complex and small items right away. Start with something big, large and uncomplicated. As soon as you start to get simple elements, you can complicate your task.
Cold porcelain is the most comfortable and practical material for creativity at home.
Post Views: 244
Cold porcelain is a mixture of starch, glue, oil and glycerin used for artistic modeling. There are several recipes for making cold porcelain with your own hands, suitable for beginners. Before making cold porcelain, it is important to know that the shade will depend on the composition of the products and the recipe itself. Products made from corn porcelain are transparent and airy, have a slightly yellowish tint, while products made from potato porcelain are denser and grayish.
How to make cold porcelain?
Recipe No. 1 - DIY cold porcelain
You will need:
- 150 ml PVA glue;
- 100 ml water;
- 1 tsp white hand cream;
- 1 tsp glycerin (vaseline);
- 150 g (1 cup) cornstarch and a little for kneading.

Preparation:


Often craftsmen change the composition and improve the recipe for cold porcelain in the process of work.
Recipe No. 2 - Improved cold porcelain recipe
The ingredients are taken from recipe No. 1.

Preparation:

This porcelain is more uniform and smooth. In the picture on the left is a mass made according to the second recipe, and on the right - according to the first.

Recipe No. 3 - Making cold porcelain from potato starch without cooking
You will need:
- potato starch;
- petroleum jelly or petroleum jelly;
- baking soda;
- PVA glue.

Preparation:

How to paint cold porcelain?
You can paint cold porcelain using various paints (oil, acrylic, butter, etc.) and food coloring; to do this, you need to add the color to the finished mass and knead so that the color is distributed evenly.

To paint a finished frozen product, apply dry food paint to the element with a brush, then hold it over the steam from the kettle. In this case, the porcelain will absorb the dye and you will get a more natural color.
How to work with cold porcelain?
- after kneading, the mass should lie for at least a day;
- before work, lubricate your hands with cream;
- use special tools (stack sticks, rolling pin, etc.);
- store in sealed containers.
How long does it take for cold porcelain to dry?
The drying time of cold porcelain depends on the thickness of the product and varies from one to several days, while the size of the product decreases. When drying, flat figures need to be turned over so that they do not become deformed. You can speed up the drying process by using an oven, where the products are baked at a minimum temperature.
Cold porcelain appeared in Europe quite recently, although it has been known in Japan for more than five thousand years. Cold porcelain products have nothing in common with real porcelain. It is named so only due to the visual fragility and seemingly weightless translucency of the finished product, which is very reminiscent of real porcelain.
Each craftsman who makes products from cold porcelain with his own hands has his own recipe, not passed on to anyone, developed by himself after a long search. But a novice sculptor can try making cold porcelain with his own hands from generally accepted components, and then develop his own individual method that is most convenient for him.
To create material for modeling you need: For work, you can also take potato starch in the same amount. Only corn porcelain looks more transparent and weightless, and has a yellowish tint. It is an ideal material for sculpting delicate flower petals. Potato starch produces greyish, visually heavier objects. It is better suited for figurines, jewelry, and interior items. Combine all ingredients except starch in a saucepan (it’s better to use an old one, the mass turns out too sticky), put on low heat, stirring constantly. When the contents of the saucepan become homogeneous, add starch without stopping stirring. The mass boils only in places with the highest temperature, along the burner contour. Therefore, without stirring, it will burn there, but in other places it will not be ready yet. You can remove it from the heat when the porcelain begins to clump together and pull away from the walls of the dish. A more gentle cooking method for dishes and nerves is in a water bath. Without having time to stir, you can periodically remove the saucepan with the brew from the water and thoroughly mix its contents. The result of this method is a more homogeneous mass, without pellets and compactions. Place the finished raw materials for modeling on a towel moistened with cold water, wrap it, and immediately pour water into the used pan and immerse all the tools used for cooking there. While the porcelain is hot, you need to knead it in a towel so as not to burn your hands. When the mass has cooled, you can get rid of the towel and continue kneading with your hands, periodically sprinkling them with starch. During this period, you need to do coloring, adding pigment while kneading. Ready-to-use porcelain is soft, elastic, and does not stick to your hands. You can put it in the refrigerator for half an hour, after wrapping it in a plastic bag, and start washing the dishes. If the remaining mixture dries on the walls of the pan, it will be much more difficult to wash them off. It is better not to start sculpting right away; the porcelain should be allowed to sit for a day. Cooking cold porcelain using a microwave The microwave oven is now an indispensable attribute of more modern kitchens. Therefore, you can use it to prepare cold porcelain with your own hands. For these purposes, it is better to take glassware. The principle of preparing the mixture is no different from the previous one. It is also necessary to stir it, periodically setting a timer for thirty seconds. After removing the container with porcelain, mix it thoroughly and return it to the microwave for the next thirty seconds. The thickened mass must be placed on a surface convenient for kneading and brought to the required consistency with your hands. From potato starch you can make a mass that does not require cooking and does not differ from boiled in its plastic qualities. To do this, you need to take a glass of starch and thoroughly grind it with Vaseline in a 2:1 ratio. While mixing, add a pinch of baking soda on the tip of a knife. Without stopping stirring, gradually pour in PVA construction adhesive, achieving the required thickness. When the mixture reaches the required concentration, you need to knead it with your hands. When kneading in any of the above methods, it is advisable to pre-lubricate your hands with any hand cream. The surface on which the porcelain is kneaded can also be greased with cream or sprinkled with dry starch. There is no need to run to a specialty store to purchase a beginner's cold porcelain sculptor's kit. Moreover, such a set, most likely, is not there. And the professional tools needed for work, assembled separately, may turn out to be too expensive. Therefore, it is better to start working with available tools that can successfully replace the stacks, balls, knives and scissors that are so necessary for work. Metal rulers, knitting needles, toothpicks and nail files can handle the duties of stacks. Instead of a cast ball on a stem, which is necessary for rolling porcelain to the desired thickness, you can take an ordinary bead rigidly attached to a toothpick. Texture molds, necessary when working with flowers and plants, can be replaced at certain times of the year with leaves and petals from fresh flowers and trees.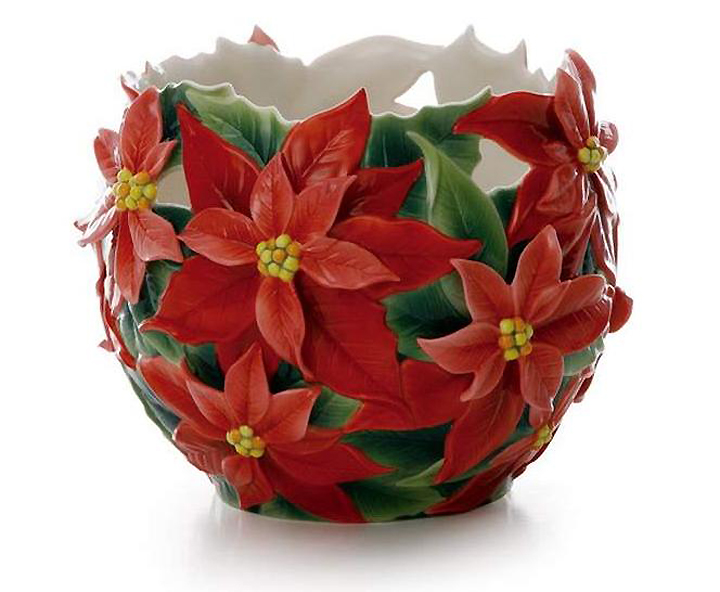
Porcelain recipe that does not require heat treatment
What tools are needed for the job?


