This is not just a horse, it is a horse with moving parts, a twitching horse. You pull a thread, and it seems to run, raise its legs high and lift its fluffy tail. Making such a craft is included in the Perspective program, a technology notebook for grade 2. But not every second grade student will figure out without detailed instructions how to make such a craft, where to thread the threads so that the horse runs. Now we’ll figure it all out: what and how to cut it out of, how to fasten it, how to give the horse movement. At the end of the instructions there is a detailed video on how to correctly connect the moving parts of the figure.
What will you need to make a horse for a technology lesson?
Horse template (from a technology workbook for grade 2), colored cardboard, colored paper, pencil, scissors, glue, thread, needle.
How to make a horse out of cardboard
We cut out the template from a notebook using technology. If you are not making a horse for a lesson, you can print and cut out this template:

When the template details are cut out, we transfer them to colored cardboard. To make it more accurate, we will trace from the inside out. We make the body and legs of the horse from brown cardboard, and the tail from yellow cardboard.

We cut out the details along the contour. On colored paper we draw a separate template for the horse’s mane and hooves and cut it out too.

Glue the mane to the head and the hooves to the legs using glue.

Now you need to attach the moving parts - legs and tail - to the body. Please note that the template is marked with crosses and dots. We mark them on the reverse side of our parts. Use an awl or needle to make holes in the center of the crosses and dots. Crosses both on the body and on moving parts. We will need to connect them so that the crosses on the body and parts match, and we will do this as follows:
Take a needle and thread and tie a large knot at the end of the thread. We see a cross under the horse’s chest (the horse is turned to us with its colored side). We stick a needle and thread into it. We put the front legs on the same needle, also hitting the middle of the cross. Pull the thread until the knot touches the cross.

We turn the horse inside out towards us and stick the needle into a point on the leg. There is no need to insert a needle into the body in this place, the point is only on the parts of the legs. We thread the needle and thread all the way through this point, then remove the needle from the thread and leave the thread hanging. Don’t cut it, we need it, we will pull on it to make the horse move.

Similarly, we attach the second pair of legs and tail. We lower the threads down, connect them to each other and tie a knot at the bottom. From the inside out, a correctly fastened craft will look like this:

We pull the strings, and the horse seems to run, raising its legs high and lifting its wonderful tail :)
Video on how to make a twitch horse
If you wish, you can decorate the horse by gluing sparkles and stars on it. The twitch horse is ready. Let's go get an A!
Such a cute horse can be made not only for a technology lesson, but also just so that you can have an interesting and useful time and please your parents or younger brothers and sisters with your craft. And if you get creative, you can come up with a whole sea of different twitching animals, drawing instead of a horse’s head, for example, a dog or cat’s face and changing the tail.
How to make a paper horse: step-by-step master classes for children. A paper horse on clothespins, a jumping rope horse, a bookmark horse and a paper horse using the origami technique, simply and quickly.

How to make a paper horse
Today we will make a horse together with the children. In this article you will find four master classes on making this fun toy with children:
- Paper horse on a clothespin x: making a horse with preschool children.
- Horse - jump rope. We make a toy for playing with children.
- Horse - bookmark. Master class for children of senior preschool and primary school age.
- Horse - mask made of paper using the origami technique.
Master class 1. Paper horse on clothespins
Materials and tools for making toys - horses
To make a toy you need:
- thick white cardboard,
- acrylic paint stamps,
- yarn,
- bamboo clothespins,
- hole puncher.
How to make a horse with children: step-by-step description
Step 1. Cut out the horse detail from cardboard according to the template.

Step 2. Use stamp paint to paint the part on both sides. Move the stamp from top to bottom abruptly, imitating wool fibers.

Step 3. Draw an eye, a point on the nose (nostril) and a bridle.

Step 4. Using a hole punch, make several 2-3 holes in the mane area and one in the tail area.
Useful idea.

I have a homemade hole punch - a part of a nail is welded to one side of the inside of the pliers, and a hole to size is drilled on the other side. You see this tool in the photo. Step 5.

Cut yarn for mane and tail. Step 6.

And at this stage we will learn how to tie knots. Using a hook, pull the yarn through the holes and tie knots.

Now the mane is ready! Step 7
Tie the tail in the same way. Step 8
And the last step - the horse needs legs! Let's take clothespins. They can be painted the same color as the horse itself. Or you can leave them as they are. Attach clothespins to the horse's body. And the toy is ready!

Clothespins allow our paper horses to stand on their own.


These are the horses the children got.

This is the kind of hippodrome we have!
When making a paper horse craft with your children, remember the poems that describe its appearance, stroke the mane and tail, and tap the clothespins with its hooves. The following poems will help you in making crafts with children:
Skok-skok, skok-skok,
Tail and mane on the side.
How smooth is it?
You are my horse.
I'll clean it with a brush
So that your fur shines.
Clack, clack, clack, clack!
I am a horse - gray side!
I'll knock my hoof
If you want, I'll give it a ride!
Look how beautiful I am
Both the tail and mane are good.
Clack, clack, clack, clack!
Clack, clack, clack, clack!
The horse will ask the foal:
"Tell me, my dear,
Who has a mane like that?
Who grows up so beautiful?
And he will answer for him:
“You, my sweet, yoke!”
I love my horse
I'll comb her fur smoothly,
I'll comb my tail
And I’ll go on horseback to visit.
Creative task for children
What other animals can you make using cardboard and clothespins? And to use knotted yarn?
Master class 2. Horse - paper bookmark
The video is in English, but it shows the making of the horse step by step in great detail, so everything will be clear. Very simple and original! This horse will appeal to both adults and children. The author of the video is Leyla Torres.
Master class 3. Horse - jump rope
And now we will make an unusual horse - a toy. This is a horse - a “jump rope” for children’s games, that is, a horse on a stick. The horse is made from a piece of pipe - insulation for pipes, fabric and paper. The base of the horse is made from a soft pipe bent in half, the hair of the horse is made from fabric. And the eyes and nostrils are made of paper, which is attached with double-sided tape. The author of the video is SamodelkinA.
Master class 4. Horse - a paper mask using the origami technique, simple and quick
Another great idea is a paper horse mask. The video shows in detail how it can be done. The mask is made using the origami technique, and its production is accessible even to children and beginners in this technique. Video author: Origami 4ik.
Get a NEW FREE AUDIO COURSE WITH GAME APPLICATION
"Speech development from 0 to 7 years: what is important to know and what to do. Cheat sheet for parents"
Click on or on the course cover below to free subscription
You will need:
Patience
- Paper glue
- Paper (depending on how to make a paper horse, you can use paper of two different thicknesses)
- Craft knife
- What else?... Oh yes, I mentioned... patience!
Step 1: Print
Just print pages 1 and 2 of your chosen version, patience, glue and a craft knife will do the rest.
I loaded the templates into an inkjet printer and then printed them on regular paper (the quality of the paper horse blank depends on the printer and paper, of course), and strengthened the figure by gluing thicker paper under the front side.
There are two versions:


Women's / glamorous /
- (photo in the article of this particular version)


Ideal for children and fathers to spend some quality time together.
Simply print pages 1 and 2 for your chosen version...
Step 2: Assembling the Paper Horse


Cut out each piece along the contour (thick lines), push through the paper (dashed lines), and remove the hollow islands (red spots).
The pieces are numbered and the number refers to the piece that needs to be glued to the other.
Here are the main parts where there is no need to follow a specific assembly order:
Head,
- Neck;
- Legs;
- Rockers for legs.
I recommend starting with the legs (the more difficult parts) and the head, the rest are simple boxes.
At the end add the tail and horse mane. It is basically a flat section with adhesive applied to the edge and attached perpendicular to the head/body as shown in the photo.
Sorry, there are no photos of construction, I got carried away in a fit of creativity, so I didn’t take photos of how to make a paper horse at the last stages.
Step 3: Decorations for the paper horse
After assembling the horse, you can make some decorations, and also, if you are giving this thing to a child, protect it in a transparent case.
I just used an old plastic cell phone case, I also made a wooden deck, and a back wall to look like a fence.


The method is the same - you print on thin paper, thicken it, gluing thick paper on the back, blah, blah, blah - it should be quite simple, cut, cut, push, bend, glue, etc...

I also used some foam to make shrubs, this material is usually used for household purposes. It is very easy to model, just cut with a craft knife and smooth with finger pressure.
Step 4: TA - DA - YES - YES!
Well, there you go! Paper horse in all its glory!
And finally, the final touch is to glue the rockers to the horse’s legs to allow it to swing.
I hope you enjoy making a paper horse, perhaps the process could be a way for dads to keep their kids occupied for a couple of days!
Based on materials from www.instructables.com
The graceful horse is the favorite animal of many of us. This animal, captivating with its beauty and power, has long been revered as a symbol of animal strength, courage, grace, loyalty at the same time, freedom, glory and fearlessness. It is believed that if you keep a horse figurine on your desktop, success, luck and prosperity will certainly visit you. In addition, according to the figurine of this fearless animal, it helps strengthen your business reputation. And if you want to show a small sign of attention and give your loved ones a small present with meaning, we recommend that you learn how to make a horse out of paper.
How to make a horse out of paper using the origami technique?
Origami is the now popular art of folding various paper figures, originally from ancient Japan. To create a horse, we only need a sheet of A4 paper and scissors.
- To begin with, we need to make a square out of a rectangular sheet of paper: to do this, bend one of the corners diagonally, and then cut off the excess with scissors.
- Unfold the paper and then fold it along the other diagonal to create another line. Expand.
- Then fold the sheet in half horizontally and unfold.
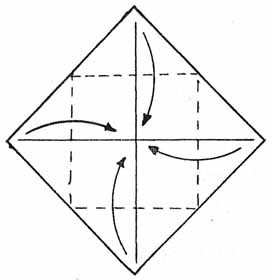
- Fold the sheet first along a diagonal line, then the sides need to be folded along a diagonal fold and hidden inside the workpiece to form a rhombus.
- Both sides of the top diamond need to be folded towards the center. Then we bend the upper triangle of the figure towards the middle.
- Unfold the top diamond and use scissors to cut the top sheet from the bottom edge to the horizontal fold in the center.
- Bend the resulting triangles to the top, forming two identical rhombuses.
- Each diamond needs to be folded horizontally in half towards the middle.
- Then turn the workpiece over to the other side.
- With the top diamond, repeat steps 5-8.
- Turn the paper horse craft over 180 degrees and bend the triangle in the central part with the corner facing up.
- Pull out and spread the edges of the figure so that you can find a small square marked with lines.
- Fold the square in half horizontally and fold its sides towards the center. This will be the body of our future paper origami horse. Iron the folds of the figure.
- Let's take care of the “limbs” of the horse. Fold the top right triangle to the side so that the bottom side of the piece forms a horizontal line. Unfold and bend the corners inward along the marked fold lines.
- Bend the upper left triangle slightly.
- Unfold and bend the corners inward along the marked lines.
- All that remains is to bend the very tip of the head inward so that the cute face of our horse is not so sharp.

Fold in half along a vertical line and unfold. As a result, we should get a paper square with clearly marked lines.


DIY horse made of buttons and paper
An original and unusual horse is made from such accessible materials as paper and buttons. Moreover, thanks to this combination, the legs of the graceful figure can move.
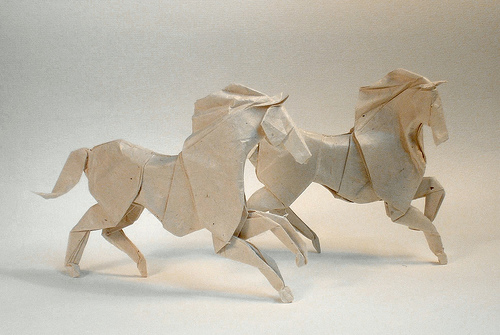
Making an origami horse will appeal to all lovers of this beautiful and strong animal, symbolizing freedom, fortitude, wisdom and will.
There are quite a lot of ideas for assembling horses in origami style. Professionals assemble complex models that include 40 or more actions.
The master class will tell you how to make an origami-style horse in different ways. Even beginners can cope with the presented assembly diagrams, and it is recommended to watch the detailed assembly of more elegant and complex origami figures in the video.
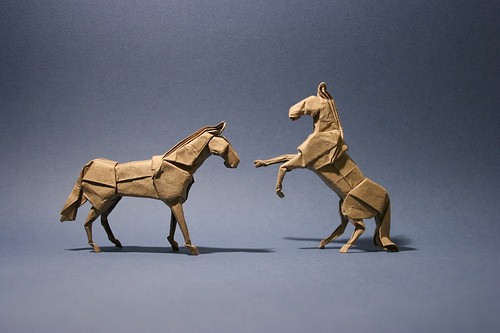


Making a herd of paper horses
Graceful horse
Even beginners can make such a horse: the simple scheme begins with assembling the basic “double square” shape. Next, you need to stock up on scissors and continue assembly according to the following instructions:
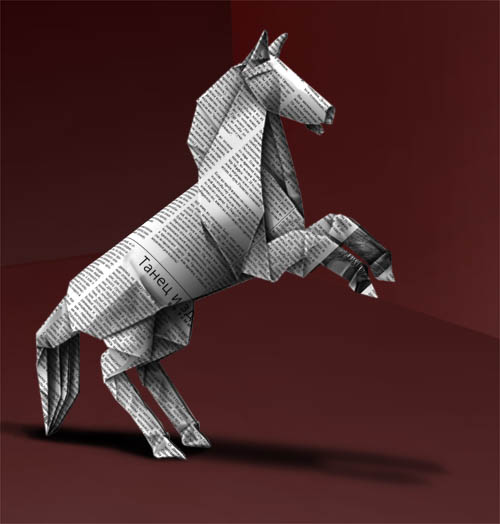
Strong horse
A pair of thin-legged horses can make a strong horse. To do this, you need to prepare a square sheet of paper and follow the step-by-step instructions:

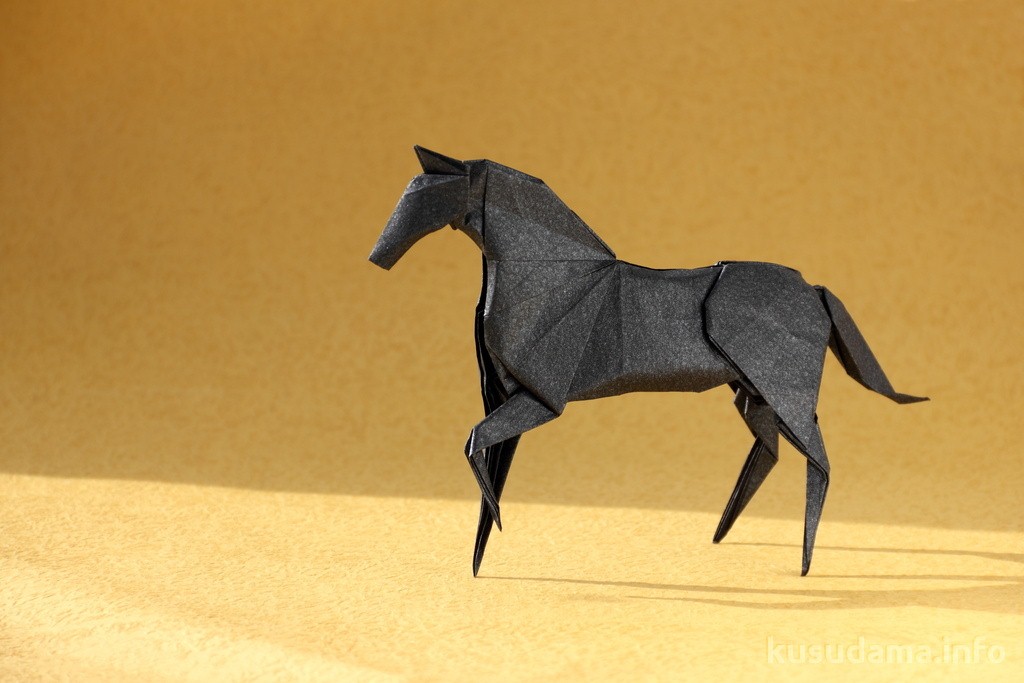
Little foal
A cute little horse - pony - will also be made from a square sheet. This MK differs from previous origami horse patterns in that, in addition to assembly, it involves working with scissors. You will also need felt-tip pens or paints to color the finished craft.
If all the necessary materials and tools are prepared, you can begin to perform the following steps step by step:
Now all that remains is to design the resulting models: draw or cut them out of colored paper and glue on the saddle, harness, and mane. Those who do not know how to draw can use ready-made templates. It is not necessary to put a saddle on the skate; it can be decorated with “apples” or stripes.


Video MK origami horses
Making a three-dimensional modular figure of a horse
Modular origami will help you create various three-dimensional models with your own hands, including horses. The key element of the figure is the traditional standard origami module, which is folded from a small paper rectangle. You can see how to fold the module in the photo below: 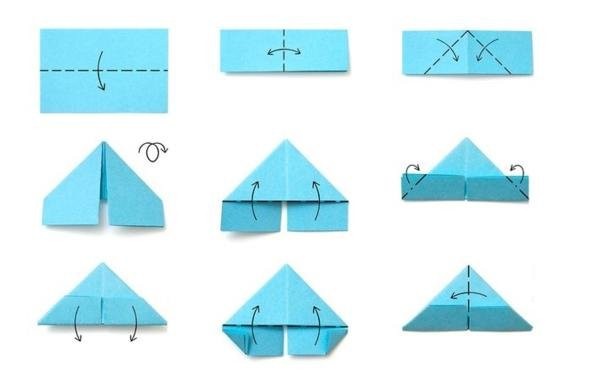
The modules are used to gradually assemble the parts of a horse or pony figure - body, head, legs and tail. To ensure that all parts adhere well to each other, you can glue them as you work.
The master class gives the general principle of assembling a three-dimensional horse: each master can assemble it in his own way, having thought out the design and details himself.
General job description:
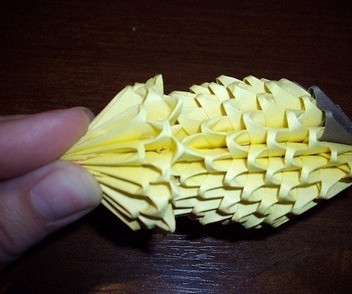
- Prepare elements for the body and mane, tail, hooves (in this example - 366 yellow and 36 brown).
- The body is assembled: modules are connected in a circle with the long side outward.


- On the 3-4th row, lift the modules with their sharp ends up and continue putting on the rows to the desired height.
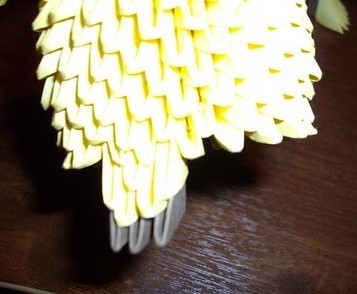
- To form the neck: put the rows with the short side outward on two modules from the previous row (“the mane” is also put on, with the long side outward).


- Form the head: connect several rows into a ring and raise them with sharp corners, continue the rows, not forgetting the “mane”.


- Place several modules on top of each other on two opposite sides to form “ears”.
- Connect the head to the body and form a muzzle from a ring of modules gathered into a bundle.

- Make legs from three modules of brown and yellow colors.


- Attach a tail.
- Glue on the eyes.
Video tutorial on creating a modular horse
You can also watch the video on how to make a horse using modular origami technique.
A selection of patterns and ideas for creativity
What other origami-style paper horses are there, you can see in the photo: