This is the central part for the upcoming full work.
Photos in good quality and high resolution (including desktop wallpapers, diagrams or other pictures) can be enlarged and downloaded, links under the corresponding images (photos).

The diagram is attached. taken from https://www.site

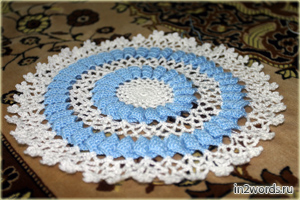
The arrows on the diagrams indicate the direction of connecting the elements, since the double crochets in the middle are folded in waves, the diagram did not fit and had to be expanded along the way.
The location of the colored rows is shaded blue, there are 2 of them, 3 rows each. The wave motif itself is repeated above each arch of the previous row in the same way as indicated on the sample. taken from https://www.site
That is, the waves fit like this:
first row
*5 double crochets (SC) + 2 chain crochets (VP) + 5 double crochets (SC)*
second row
*6 RLS + 2 VP + 6 RLS*
third row
*7 RLS + 2 VP + 7 RLS*
I didn’t experience any difficulties with laying them out; they somehow took the desired shape on their own. taken from https://www.site
Larger (in new window):
After finishing the rows, I tore off the colored threads, and passed the white ones under the colored ones without breaking them, because The rows are dense and do not show through. I haven’t pinned or hidden the ends of the threads yet. taken from https://www.site
I used acrylic threads 50g/275m, white (more like white wool) and blue. The hook for my yarn was #2. taken from https://www.site

If you have any questions, please use the comment form below. The latter are also welcome, as are photographs of your work.
Good luck! taken from https://www.site
In order to knit such a napkin, we will need 50 grams of white thread, much black and red floss threads for finishing and a hook No. 1,2.
First, we knit the middle of the napkin according to the pattern with a flower motif, starting with five air loops closed in a ring, cut off the thread and hide the end. Geese-swan napkin pattern:
Symbols on the diagram. To knit:
![]() - air loop (VP)
- air loop (VP)
Single crochet (SC)
Double crochet (Dc)
Double crochet stitch (SS2H)
The numbers on the diagram indicate the number of air loops in the arches. Pico in the last knitted row it is knitted from five air loops. (Knit the last loop in the chain from the same loop as the first)
Tie five swans single crochet stitches attached to the back of the braid. First we knit the lower part of the swans, in the form of a convex leaf.
Cast on 18 VP, make one air loop for lifting and knit with single crochets into each loop of a braid from a chain of air loops.
When we reach the end of the braid, we knit two more single crochets into the last loop for turning and knit the second row, attaching to the remaining part of the chain loop of the initial row. Then we knit according to the pattern, attaching the posts to the back of the loops.
Having knitted all the rows of the lower part of the swan, we tie the leaf in a circle in one row according to the pattern, not forgetting to attach it to our first flower motif.
So we knit the five lower parts of the swans and, in the process of knitting the last row of the binding, we attach them in a circle at the same distance from each other to the central part of the floral napkin.
After that, we knit according to the pattern: we tie four rows of arches of air loops and during the knitting process we attach to the central part of the napkin and in the last, fourth row we connect the swans together. We knit the picot in the fourth row from five chain stitches.
We tie wing I to the base of the swan according to the scheme:

Knitting swan necks: To do this, we knit a chain of eighteen chain stitches, then we knit six rows with single crochets, fasten and cut the thread, leaving a long end of the working thread. We thread this end of the thread into the needle and sew our knitting into a tube with a seam over the edge, capturing the loops of the last row and the chains of the initial row. We make the seam tight, pulling it a little so that the swan’s neck arches. We fasten the seam and sew the neck to the already knitted base - the lower part of the swan.
Beak. We tie the top of the neck with single crochets using red floss in a circle for 4-5 rows, decreasing one single crochet in each row. We tighten the remaining columns with a piece of working thread. Using black floss and a needle, make two stitches that will mark the swan's eyes.
This is how we knit the necks of all five swans. After this, starch the napkin, giving a curved shape to the necks and wings of the swans.
|
I crocheted it with a slightly thinner crochet hook, so that the lake in the center turned out to be proportionally smaller. Why - to save space, since the total diameter of the finished work is too large. Next were smaller napkins, with one row of blue “waves”. In theory there should be eight of them, at first I planned to add only two of them, but then I made them only six, but with a larger crochet hook. Thus, it was possible to arrange them beautifully around the central part, and the space occupied was again saved. taken from https://www.site
The instructions for small lakes do not tell you how to connect the elements together, so I will clarify here. The interlocking of the “lake” elements can be done while knitting the last row using connecting posts, or you can carefully sew ready-made elements. I used 2 “loops” of the last row to sew the small circles together and 3 to the large circle. In the places of “gaps” between the circles I had 1 free loop from the small circles and 3-4 from the large one. I first placed water lily flowers in these places (4 in total for the entire composition). taken from https://www.site
In the process, I really wanted to knit an amigurumi frog. Initially, I had a dilemma about what to put in the center of a large napkin? The vase seemed out of place to me and then an amazing idea came to me to put my “prince” there. taken from https://www.site
Well, the longest and most difficult amigurumi swans remain. Their number coincides with the number of small lakes, namely in my case there are six of them. I took the pattern from the little swan as a basis, but I cheated here too. taken from https://www.site
The bird turned out to be very small for such a large composition and was completely lost against the background of all this splendor. That's why I knitted all the new swans in 4 threads at once. So they turned out much more voluminous and prettier, in my opinion. For convenience, I sewed them neatly from the bottom. creating a kind of platform for them to stand (sit?) without support. taken from https://www.site As a result, only the lakes are stitched together, and all other elements are simply put in place. If desired, they can always be rearranged or removed, for example, for washing. It seemed to me that it would be better this way, otherwise it’s not at all clear how to erase all this beauty. taken from https://www.site To assess the scale of the finished swan lake, I will show a photograph when it is not yet completely completed, but the size is already visible. He lies on a wide sofa and barely fits. taken from https://www.site
Actually, that seems to be all. I ask anyone who will knit to show it (I will attach it to the article). Good luck. taken from https://www.site |


