Waterproofing the floor in the bathroom, materials for which a large assortment can be found today in any hardware store, is a mandatory procedure before starting finishing work and installing plumbing.
The bathroom is the wettest room in both a private house and an apartment, therefore, no matter what material they are made of, they need high-quality waterproofing, otherwise leaks may occur at the junctions of walls and floors during the operation of the room, at the points where engineering communications pass through the floors . Not only that, there is a great risk of flooding the premises located below. As you know, moisture, getting into a closed space, inevitably contributes to the formation of mold and fungus, which begin to gradually destroy the structure of the floor and walls, lead to a persistent unpleasant smell of dampness, and can cause a number of diseases in people living in an apartment.
The main types of waterproofing floors
There are many varieties of waterproofing materials made on various bases and in various forms. To choose the most suitable option, you should consider in advance their characteristics and the technology of working with them.
So, according to the type of application, waterproofing is divided into the following types:
- Coating.
- Okleyechnaya.
- Impregnation.
- Cast.
- Plaster.
It is difficult to say which of these waterproofings is better for the bathroom floor, since even among experts there is no consensus on this matter. The choice of material and technology of its laying is made taking into account the characteristics of the surface, which should be waterproofed and the allotted time to complete the work.
Coating type waterproofing
 Compositions for coating (painting) waterproofing - the easiest to use
 Coating compositions for waterproofing are produced on different bases and can be:
- Water-based, acrylic-based;
- Bituminous rubber;
- Bitumen-polymer;
- Cement-polymer;
- polyurethane;
Bitumen-based formulations are produced with additives from various fillers and organic solvents. Fillers make mastics more elastic, as they are used as plasticizers, crumb rubber or latex.
Mastics have excellent adhesion and can be applied to both concrete and wood surfaces.
It should be noted that bitumen-based materials have a number of disadvantages, which include:
- possible cracking and chipping as a result of temperature fluctuations;
— biological corrosion;
- an unpleasant smell during the waterproofing work.
But, in spite of these shortcomings of coating compositions, they are most often used to isolate the floor in the bathroom, as this is the most affordable way to create protection against moisture penetration.
The cost of coating waterproofing mastics is quite affordable, but its service life is no more than five to six years.
Materials made on the basis of polymers have practically no negative qualities, therefore they can be used without fear.
The advantages of coating compositions include the ease of applying the material to the floor surface and the lower part of the walls, as well as to the corners and joints with a conventional brush.

Material consumption depends on the initial quality waterproofed surface and number of layers. Usually the recommended amount per 1 m² area is indicated by the manufacturer of the composition.
How is coating (painting) waterproofing applied?
There is nothing complicated in the device of this type of waterproofing - the main thing is to do all the work carefully and adhere to the developed technology.

If the coating composition is purchased in dry form, then the technology for its manufacture can be found on the packaging. The mixture must necessarily have a homogeneous state. If a liquid component is included in the dry composition, then it is first mixed with water and only after that it is poured into the dry mass and mixed into a pasty mastic. Such waterproofing is called two-component. When the mixture is ready, you need to immediately proceed to work.
- The first thing to do before applying any coating is to thoroughly clean the surface of fine dust and larger debris. The work is carried out with a vacuum cleaner.

- Further, it is necessary to remove absorbed greasy stains or paint residues from the surfaces, if there are any, clean them off to “healthy” concrete. The same is done with loose areas where erosion of the concrete slab is noticeable. After cleaning, dust and debris are again cleaned.
- The next step is the application (deep penetration composition). The primer can be poured onto floors and spread with a roller.

Corners and surfaces around the outlet of pipes in the wall and drain in the floor must be treated with a primer composition using a brush so as not to leave untreated areas. After the first layer of the solution dries, another one is applied.
- Next, you can proceed to the application of the waterproofing composition. Work begins with mastic covering the corners and all joints of the floor and wall, pipe passages through the ceilings.
- On the freshly applied sealing tape is laid on the mastic. It is glued with an uncured composition to the walls and floor, so that the joint between them is completely closed, which is always a weak point in case of leaks. A prerequisite is that the tape must be completely straightened, not have waves, kinks, folds, voids under it are unacceptable.

When joining the strips, the overlap must be at least 50 ÷ 70 mm (during the initial laying, the overlap must be smeared with mastic.).
In the bathroom, not only the joints of the floor and walls are processed in the same way, but the corners of the walls, to a height of at least 150 ÷ 200 mm.
Another layer of waterproofing mastic is applied over the tape.

- Next, it is necessary to stick sealing membranes around the points of water supply and drainage, that is, branch pipes or sleeves emerging from walls and floors with communications laid through them.
 Particular attention - waterproofing near pipes, holes, sleeves in the ceiling, etc.
 - Then the entire remaining surface of the bathroom floor and walls is covered with waterproofing mastic to a height of 150 ÷ 200 mm.
By the way, qualified craftsmen recommend not to spare the material and apply the composition at least 500 ÷ 700 mm from the floor, especially around the bathtub and washbasin - this will protect the walls from from dampness and mold growth.
 Do not spare the material and at the same time insulate the walls near the bathroom and sink
 Mastic, when applied to the floor surface, does not smear thinly - it should lay down in a thick uniform layer of the same thickness, about 2 mm.
- Waterproofing is carried out, if necessary, in two or even three layers. Education not allowed uncovered mastic"islands". Each of the layers is applied in a perpendicular direction relative to the previous, already dried layer, about five to six hours later.
- When the work on waterproofing the floor is completed, you can start finishing only after a day.
At the end of the section - an example of the implementation of coating waterproofing in the bathroom.
Prices for coating waterproofing
Coating waterproofing
Video: bathroom waterproofing master work
Plaster waterproofing
Plaster waterproofing also belongs to the coating type, but it must be distinguished separately, since materials that differ from the rest in their composition are used for work.
Plaster mixtures include components such as gypsum, cement and polymers. If the bitumen used for waterproofing the floor, at a temperature of 0 degrees, begins to lose its elasticity, becomes brittle, and cracks can form on it, then temperature drops are not terrible for plaster compositions.
There are many plaster waterproofing mixtures of various manufacturers on sale. Particularly popular are the compositions of the Knauf and Ceresit companies.
- For example, the KNAUF FLACHENDICHT waterproofing composition includes a component such as synthesized latex, which gives the material a special elasticity. Therefore, the layer applied to the surface, after polymerization, retains its qualities at temperatures from - 18 to + 55 ° С.
This composition after kneading does not require heating, and is applied to the surface immediately.
- Another option for high-quality plaster waterproofing is a mixture of the Ceresit CR -65 brand, which has excellent adhesion to surfaces, provided that it is applied to a surface treated with a primer.
 One of the most popular compositions is Hydroizol Ceresit CR-65
 Plaster mixtures are also applied with a brush or roller. The joints of the planes must be glued with sealing tape. It is advisable to choose all materials from one manufacturer - they are fully adapted to each other.
Prices for plaster waterproofing
Plaster waterproofing
Gluing waterproofing
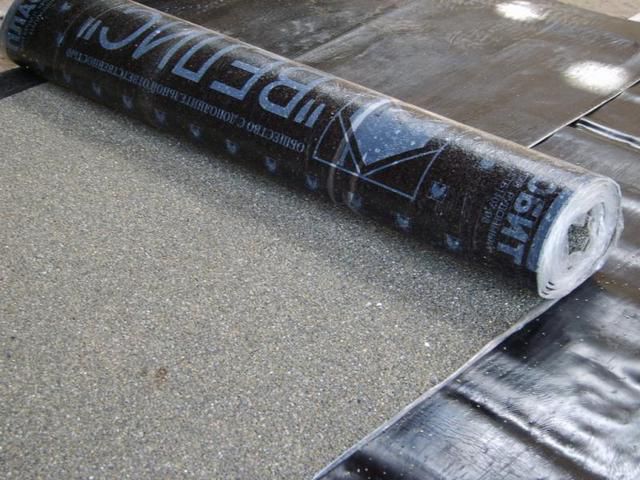
This method of protecting floors from moisture penetration can be called the most effective, but it will be somewhat more difficult to properly lay materials than with coating compositions. The most popular materials for pasting waterproofing are: roofing material, isoplast, ecoflex, iselast, mostoplast, technonikol, hydroisol.

The materials are not affected by temperature changes, and if they are installed correctly, according to existing technologies, they will protect the floor surface for many years.
Waterproofing is made in the form of sheets or rolls of waterproof material with good elasticity. But, despite this, it is not easy to lay them on their own in difficult places, for example, in the corners of a room.
Two types of pasting materials are made. One of them is placed on on the worn adhesive, others are self-adhesive.
For installation of the first type, bituminous mastic is most often used as an adhesive base. On self-adhesive sheets, in principle, the same mastic is applied to the back surface and protected by a special film, which is removed only during installation.
by the most widespread until recently, the type of pasting waterproofing was an ordinary roofing material, but with the advent of more advanced materials, it is used less and less. Modern types can have a polymer or bitumen base, so they differ somewhat in their characteristics.
- Polymeric material is films and membranes made of vulcanized rubber. Most often they are already covered with an adhesive composition.

They are favorably distinguished by:
- small thickness;
— long service life;
- excellent mechanical strength;
- no shrinkage;
- resistance to vibration.
- Bitumen-based waterproofing is used much more often, as it is more affordable. Such materials, for example, include waterproofing, made on the basis of fiberglass impregnated with bitumen, and the plasticizer makes it resistant to cracking and gives it flexibility. This material is not subject to biodegradation and the occurrence of mold on it.
It can be produced in one- and two-sided version.
 Double sided material suitable for multi-layer coating
 Double-sided material differs from one-sided by the presence of a polymer protective film on both sides - it melts when exposed to high temperatures during installation. This material is used in the event that a multi-layer waterproofing coating is arranged.
The one-sided material is equipped with a protective coating consisting of mineral chips. - it is usually used for the external coating of a soft roof.
Glue waterproofing is used not only for concrete coatings, but also for wooden flooring, on which it is laid without melting - on bituminous mastic.
Laying adhesive waterproofing
The surface of the bathroom floor before laying the gluing material must be prepared more carefully than when applying coating compositions to it - this nuance must be observed in order to create long-term and reliable floor protection.
The work is carried out in the following order:
- Bathroom floors should not have even small protrusions, so they must be removed. If necessary, the surface is leveled with compounds. Then the floor is well dried and cleaned of dust.
- Further, the floor surface and the lower part of the walls are covered with primers, which should also dry well.
- Then, on the surface of the floor and walls, a layer of mastic with a thickness of about 2 mm is applied to a height of 200 mm. Mastic can be on a rubber or polymer-bitumen basis.
- Next comes the waterproofing sticker. The first canvas, which will be found on the wall, is laid with a bend, but is first glued to the floor surface, and then to the wall.
The mastic is heated until softened with a gas burner. The surface is covered with a waterproofing sheet, which is then rolled with a roller.

The next canvas is laid on the already laid waterproofing strip with an overlap of 80 ÷ 100 mm. Then come the third and subsequent strips.
- If it is planned to lay the material in two layers, then mastic is applied again on top of the first and waterproofing is laid. The second layer is laid in such a way that the middle of the canvases is at the junctions of the strips of the lower layer, then completely overlaps them.
The installation process of techno-nicol takes place in the same way, but its advantage lies in the fact that the bituminous layer is already present on the material. When laying, it remains only to heat it until the protective polymer film melts and roll it to the surface with a roller. It is very important not to overheat the material, as the waterproofing will become brittle from this, and its service life will be significantly reduced.
Hot laying is not a very good idea, since in small enclosed spaces it is recommended to avoid working with a burner. When heated, the waterproofing material and mastic emit a sharp and persistent odor, which is rather poorly weathered. In addition, working independently with a burner without having the proper experience is quite dangerous, but if it is already decided to stick the waterproofing in this way, then it is better to entrust this process with specialists.
To perform the work yourself, it is better to use self-adhesive canvases that do not require the use of a burner - this installation is also called the “cold” method. For such a coating, the concrete floor must be treated with a primer - a special compound made on a bitumen basis.

Using it, you can create an almost seamless hermetic coating, since the sheets overlapped by 100 mm are tightly glued together. Before fastening them, the protective film is removed from the adhesive layer, and the canvas is immediately pressed against the already laid waterproofing sheet.
When using gluing material, special attention should be paid to water pipes and water drain holes. For them, holes are cut out in the waterproofing, where rubber seals are inserted. The places of contact are coated with polyurethane or silicone sealant.

Cast waterproofing
Cast waterproofing can also be made from different materials. As the name implies, the installation of these compounds on the surface occurs by spilling them in cold or hot form.
Hot waterproofing
Hot waterproofing can be asphalt-polymer and asphalt. Consumables for it are hot bitumen, asphalt concrete and pitch. This material shows good performance - elasticity, high resistance to bending, strength and reliability.
Materials are poured on the surface, where work was carried out in advance to seal the seams with sealants and mastics.
This type of waterproofing is almost never used for bathrooms in apartments - they are more suitable for the same rooms, equipped in private homes.
Hot waterproofing installation
To properly perform hot waterproofing, you need to proceed in the following order:
- The floor surface must be thoroughly cleaned from various contaminants that could remain from the repair work.
- The detected cracks, as well as the joints of the planes, are filled with sealing compounds.
- After that, the floor must be well dried - infrared heaters, gas burners and other fairly powerful devices are often used for this.
- Priming is in progress. For this type of waterproofing, hot bitumen is used as a primer.

- After that, the primed working surface around the perimeter is separated by formwork. It is necessary if waterproof only part of the room is needed.
- Warmed up waterproofing mass - temperature its heating is indicated on the packaging.
- The hot composition is carefully poured onto the surface, evenly distributed over it with a doctor blade and left until completely solidified.
- If necessary, several layers of waterproofing are poured, but each subsequent one - only after the previous one has completely dried.
Cold cast waterproofing
Cold types of waterproofing include materials such as "liquid" rubber and "liquid" glass. The technology for working with these compounds is similar, but their components differ significantly.
"Liquid rubber
This waterproofing material is made from bitumen and polymer additives, which make the resulting emulsion more wear-resistant and resistant to external influences.
 Liquid rubber packaging
 As a fixer for bitumen-polymer mixtures, calcium chloride is used, which reduces the density of the material, which makes it possible to install "liquid rubber" by spraying. The fixing agent is diluted with water in proportions of 1:10 before being added to the emulsion, and then the final composition is mixed.
Prices for liquid rubber Apiflex
Sprayed liquid rubber Apiflex
In order for the coating to be successful, it is necessary to adhere to the technology, prepare the base well for it and perform work at a temperature not lower than + 3 ÷5 °С.
"Liquid" rubber is produced in different consistencies, which allows it to be applied to surfaces in various ways:
- The bulk laying method is the most popular, as it does not require special equipment, while the composition fills all the small cracks and creates an even, smooth coating.
- Spraying is a more complex method, as it requires special equipment and skills to work with it. With the correct application of waterproofing by spraying, it turns out to be of better quality than when using other methods, since the composition is supplied under pressure and fills not only cracks, but also microscopic pores of the base.
- Painting (coating) technology is the most accessible of all three existing ones. The application differs little from the usual coating insulation, which has already been mentioned above. For painting application, waterproofing is produced in the form of a paste or solution.
After processing the floor with “liquid” rubber, a hermetic elastic film should form on the surface, which will reliably protect the floor from moisture.
The table shows the main characteristics of this material:
| Material parameters | Indicators |
|---|---|
| Tensile strength (MPa) | 2E-3 |
| Elongation at break (%) | 1500 |
| Adhesion strength with concrete surface (MPa) | 1 |
| Density (kg/m³) | 1000÷1100 |
| Amount of non-volatile substances (%) | 57÷65 |
| Curing time of the composition after its application (hours) | 24 |
| Maximum water absorption in the first 24 hours, % | 0.5 |
| Water permeability at a pressure of 0.01 MPa in 24 hours | No wet spot |
| The average consumption of the main component in the manufacture of floor covering material is 1 mm, in dry residue kg / m² | 1.61 |
Technical and operational characteristics of different brands may vary slightly. But due to the fact that all the components of "liquid" rubber are environmentally friendly, they do not emit harmful fumes during operation, they are safe for humans.
The positive qualities of all types of "liquid" rubber can be called:
- High degree of adhesion to various surfaces.
- Chemical resistance.
- Possibility of applying waterproofing on the old cleaned floor.
- Formation of a continuous seamless surface.
- High elasticity and strength of the material.
 A clear example of the high elasticity and strength of "liquid rubber"
 - Endurance with temperature changes.
- The composition is odorless during installation, therefore it is suitable for waterproofing indoors.
- Long service life.
How to apply "liquid" rubber
It makes no sense to describe working with a coating type of “liquid rubber” - it is no different from ordinary coating waterproofing. In order not to repeat ourselves, it is worth considering only the technology of spraying and spilling a waterproofing composition.
The first step is to T t Radiation surface preparation. It is carried out in the same way as for any type of waterproofing. The main condition is the evenness of the floor surface, without protruding fragments, and its cleanliness.
Before applying all types of "liquid" rubber, surfaces must also be primed. As a primer, a similar the composition of the polymer-bitumen solution, which will not only create excellent adhesion for the coating, but also enhance its waterproofing properties. The primer is applied with a roller or brush.
The next step, after the soil has completely dried, is the application of the waterproofing material. Spraying "liquid" rubber is carried out using special equipment. Tanks with a bitumen-polymer composition and with fixative - solution calcium chloride. Both components are fed into the sprayer at once, which are mixed and applied to the surface under pressure, forming an elastic membrane with a thickness of 2 ÷ 3 mm. This process is usually entrusted to specialists who have the necessary apparatus and experience with it.
 The process of spraying "liquid rubber"
 The pouring method consists in pouring the finished material on the floor surface and distributing it with a spiked roller, spatula or doctor blade. Waterproofing is applied not only to the floor surface, but also, as in previous cases, to the lower part of the wall and around the water pipes.
The approximate consumption of this material per 1 m² is 2.8 ÷ 3 liters. Complete drying of the coating occurs after two days. After this time, you can proceed to further work on the device floor.
"Liquid glass"
Knowing the characteristics and technology of applying various waterproofing materials, it will be easier to choose one that fits in all respects and becomes available for independent work.
Anton Tsugunov
Reading time: 5 minutes
The bathroom is the wettest room in the apartment. Even special curtains and absorbent mats cannot fully protect surfaces from water ingress, so walls and floors in the bathroom need special protection. By taking care of waterproofing for the bathroom, you will not allow moisture to penetrate under the finish to the concrete floor slabs and prevent their premature destruction, leading to the need for major repairs. In addition, high-quality waterproofing of the bathroom will save you from serious financial losses in the event of a pipe break or leak, from which the neighbors below could suffer. Making waterproofing is not so difficult - you can do all the work yourself.
Waterproofing methods
To ensure the protection of the floor from water in the bathroom, you can use special waterproofing materials. They can be divided into two large groups:
- coating;
- pasting.
Coating waterproofing
It is a plastic material that forms a waterproof coating after application. Coating materials include:
- mastics based on bitumen or polymers with various fillers;
- polyurethane and cement-polymer mixtures;
- liquid acrylic water-based waterproofing.
Advantages of waterproofing for a wash-type bathroom:
- universality;
- ease and speed of application;
- the ability to protect almost any surface, such as uneven or vertical.
Disadvantages of bitumen-based mastics:
- instability to temperature extremes, leading to cracking;
- bad smell.
Polymer and polyurethane mixtures have practically no drawbacks, besides they have a very aesthetic appearance and are even more convenient to apply compared to bituminous compositions.
It is produced in rolls or sheets and, in fact, is the same bitumen with filler applied to fiberglass or polyester. This type of waterproofing includes:
- ruberoid;
- isoplast;
- ecoflex;
- isoelast and other similar materials.
Advantages of pasting waterproofing materials:
- reliability and durability;
- they can be walked on immediately after installation.
- great care is required in carrying out the work;
- the complexity of the process;
- exactingness to the surface - differences should not exceed 2 mm.
Foundation preparation
Waterproofing the floor in the bathroom with your own hands begins with preparatory work. What needs to be done at this stage?
- The floor surface must be cleaned to a concrete base.
- Regardless of which method of applying waterproofing for the bathroom is chosen, the material must be laid on a flat base. Small depressions can be filled with cement mortar, but in some cases it will be necessary to make a leveling screed.
- The leveled floor is carefully swept and washed.
- The surface must be primed. The primer will not only ensure good adhesion of the insulating materials to the base, but also enhance the waterproofing of the coating.
Important! When choosing a primer, pay attention to its compatibility with the type of waterproofing.
After the final drying of the primer, you can start applying or laying waterproofing materials.
Coating hydrobarrier device
How to make the waterproofing of the floor in the bathroom, made by yourself, turn out to be of high quality and durable? The algorithm of actions will be as follows:
- The lower corners of the room, where the walls meet the floor, are smeared with a layer of bituminous mastic.
- Then, a rubber-based waterproof tape is glued to the joints around the entire perimeter.
- The entire surface of the floor is covered with a continuous layer of mastic. In this case, it is necessary to capture a part of the wall adjacent to the floor to a height of 30–50 cm. It is convenient to use a wide brush or roller to apply the material.
Important! The waterproofing coating is applied in 2-3 layers. After applying each layer, breaks should be taken to dry it, each of which should last at least a day.
After the mastic dries, the surface is primed again, and then a screed is made.
Laying tiles on a cement-adhesive mixture without a screed is possible only when using coating materials based on acrylic or cement.
Waterproofing by gluing
Waterproofing in the bathroom by gluing will cost more than using only bituminous mastic. Yes, and it will be more difficult to do it yourself. However, this method has many fans among builders.
Tip: Before laying the roll waterproofing for the bathroom, it is recommended to glue all joints with waterproof tape or coat with mastic. For additional reliability, you can apply a thin layer of mastic on the entire surface of the floor with a call to the walls.
Work progress:
- Laying of material is carried out with an overlap. Each subsequent sheet should overlap the previous one by one-fifth of the width. In this case, it is necessary to overlap the walls by approximately 15–20 cm. After cutting the sheet of the required size, the protective film is removed from it. The material is laid on the floor and rolled with a heavy roller. The procedure is repeated for each subsequent sheet.
- The welded roll materials are preheated with a burner, rolling out gradually.
- When laying rolled waterproofing, the greatest difficulty is caused by places where you have to bypass pipes and various communications. The holes for them should be made a little smaller than the required size to get a kind of bumpers. Special rubber seals are also used. All places of such joints are additionally smeared with mastic and reinforced with waterproof tape.
After laying, you can immediately start pouring the final screed under the tile.
Tip: after laying the tiles, all seams can be treated with sealant before grouting for additional protection - this will allow you to create a multi-layer waterproofing for the bathroom floor with your own hands.
Where else in the bathroom is waterproofing needed?
For high-quality waterproofing of the bathroom, it is necessary to pay attention to the walls, which also often get water. Gradually, moisture will begin to penetrate inside the partitions, leading to undesirable consequences. The most problematic places that need high-quality protection are:
- the space around the sink;
- walls adjacent to the bath or shower;
- area near the toilet in a combined bathroom.
HELPFUL INFORMATION: Bathroom design examples with shower and bathtub

One of the important stages of a bathroom renovation is waterproofing, and here homeowners often face the question of what is best to use under tiles to build a reliable and durable bathroom hydro-barrier.
Waterproofing is an important stage of repair, which many people neglect. Meanwhile, a good hydro-barrier extends the life of wall and floor finishes, reduces the risk of fungus and mold, prevents the destruction of the concrete base and protects the apartment from below from flooding. For example, the neighbors of the lower apartment complain that they have ugly stains on the ceiling, and sometimes drops are even clearly visible, while everything is dry in your bathroom. This means that the waterproofing is done poorly or is completely absent. Often, such troubles are attributed to force majeure, although in fact they are the result of excessive savings or ignorance.

If you want the repair to be durable, do not forget to carry out waterproofing work.
Which areas need waterproofing?
Waterproofing must be performed on the entire floor area with a minimum entry on the walls of 20-30 cm. In this case, the wall must be covered with waterproofing for at least 50 cm to the sides and up from the extreme sides of the plumbing, in general, wherever there is a high probability of moisture getting on the tile. Along with this, it is desirable to make waterproofing inside the plumbing cabinet, in which the frequent culprits of leaks are located: water and sewer risers.

First of all, waterproofing should be carried out near water sources.
Types of waterproofing materials
Modern materials that are able to provide good waterproofing of the bathroom floor and walls are distinguished by the method of application and composition:
- Coating compositions - the most widely used materials are bitumen-based (bitumen-rubber, bitumen-polymer) and cement-based (cement-polymer mastics), others, such as acrylic, are used less frequently.
- Pasting or roll materials are made on a polymer or fiberglass basis.

Coating waterproofing composition
Types of coating waterproofing
Coating waterproofing materials are commercially available as dry or granular powders, semi-dry pastes or ready-to-use liquid form. Also, coating mixtures are one-component and two-component, the latter, as a rule, are quick-drying and more elastic.
- Bitumen-polymer mastics are sold ready-made. They are made from bitumen binder and polymer fillers. This is an excellent insulating material that has high stretch and recovery rates, is non-toxic, odorless, resistant to temperature changes and aggressive environments. It is possible to use bitumen-polymer mastic for tiles only on the floor in the bathroom, subject to subsequent filling with a thin screed.
Advice! Coating waterproofing is most relevant in small bathrooms, up to 7 square meters. m.
- Liquid waterproofing, bituminous latex or "liquid rubber" is one of the easiest and most convenient ways to waterproof a bathroom. The mixture is applied to the prepared base. The surface is leveled, cleaned of dirt and dust, primed. Manually, "liquid rubber" is applied with a spatula or roller in a layer up to 4 mm in one pass.

Application of liquid waterproofing
- After complete polymerization, the composition is leveled and becomes a seamless surface with excellent moisture-proof properties and high elasticity. On top of the bitumen-latex waterproofing, it is recommended to perform a thin screed. And after it dries, it will be possible to lay the tiles.
Important! Waterproofing with "liquid rubber" requires additional finishing. On the floor, this is usually a thin layer of leveling screed. If it is necessary to waterproof the walls under the tiles, this option is not suitable, the layer of liquid rubber can only be sewn up with drywall.
- Waterproofing cement-polymer materials are quick-setting cement-based mixtures. In addition to thorough waterproofing, they can be used to quickly repair and block leaks in concrete surfaces. Cement-polymer coating waterproofing is excellent for both floors and walls, if they are later tiled. The mixture is applied with a spatula, less often with a brush, on any previously cleaned and primed surface.

Application of a cement-polymer moisture-proofing composition
- Budget moisture protection. One of the most inexpensive and short-lived ways to provide waterproofing in the bathroom is acrylic enamel. It is applied to the surface in several thick layers (at least 3-4 layers). Soon the paint will crack.
As an alternative, some use liquid glass, but it is able to provide the necessary hydro-barrier, only in combination with a plasticizer, which, after drying, makes the layer plastic.
Roll pasting waterproofing materials
Materials for rolled waterproofing are made on the basis of polyester or fiberglass. On the underside, the canvas is covered with a layer of adhesive that provides adhesion to the base, and on top - a component that improves adhesion with tile adhesive.
Rolled waterproofing is laid on a previously prepared, cleaned and leveled surface. Height differences within 2 mm per 2 linear meters are allowed. In the list of their advantages, one can note an affordable price, the strength of fastening to the subfloor and the ability to start facing almost immediately, without observing a long technological break.

Roll waterproofing material
In addition, roll materials are suitable for waterproofing wooden floors. They are quite elastic, withstand the movement of wood and at the same time retain solidity. The rolled method of sealing is advisable to use on large areas.
Cloths of material must be overlapped by at least 10 cm on top of each other and approaching the walls. The joints are carefully glued with a roller. It is important to remove all air bubbles, if the slightest gap remains, it can be considered that all the work has been done in vain.
When and how to start arranging moisture protection
One of the key questions at this stage of repair is when to waterproof: before pouring the screed or after. But there is no consensus on this yet. And all because each of the options has both its pros and cons.
- Running the screed over the waterproofing will provide a level concrete base that has excellent adhesion and will provide good adhesion to the tile adhesive mix. Bitumen, bitumen-polymer and bitumen-latex compositions, as well as roll materials can be used.

Under screed waterproofing
- Builders who choose to seal over the screed justify their decision by the fact that in the event of leaks, the concrete mass will be protected from moisture. At this point, everything is correct, but - it is impossible to guarantee the durability of the cladding, glued directly to the waterproofing through a thin layer of tile adhesive. In this case, only cement-polymer mixtures or rolled waterproofing are suitable for arranging moisture protection.
- You can also go for the third way, the most expensive in terms of time and money, but also the most reliable - combined waterproofing.
Features of combined floor waterproofing
Prepare a rough base. If necessary, carry out partial repairs or completely dismantle the old screed.
- The prepared and cleaned surface is covered with a concrete contact primer, left to dry completely.
- A screed with a height of 3 cm or more is pulled along the beacons, into which a reinforcing mesh is laid.
- After a week, the surface is cleaned of dust and primed in two layers.

Application of the composition
- A layer of any coating waterproofing is applied along the perimeter of the room in the corners of the wall-floor, allowed to dry, and then the corners are glued with a waterproof tape. The coating waterproofing mixture now covers the entire surface of the floor with at least 20 cm on the walls. Three layers are applied, strictly maintaining the drying interval of each.
- Concrete contact is applied to the last layer of dried waterproofing.
- A day later, pulls out the second screed with a minimum thickness of 1.5 cm.
- After the final drying, the floor is covered with a primer, allowed to dry and the tiles are laid.
Wall waterproofing features
For waterproofing walls under tiles, cement-polymer mixtures are used.
- Before applying waterproofing, the walls are primed in two layers. Particular attention is paid to the corners and places of entry of pipes.
- Special cuffs are put on the pipes, and the corners must be glued with a sealed waterproofing tape.
- Sections of the walls are coated with a waterproofing compound, and after it has completely dried, they are covered with concrete contact to improve adhesion with tile adhesive. For reliability, a reinforcing mesh is additionally recessed into the waterproofing.
- After the layers have dried, proceed to the lining.

You can continue work only after the complete drying of the waterproofing composition
In construction work and waterproofing in particular, there is a clear trend: the more expensive the material, the more durable and reliable it is, and vice versa. Therefore, it is difficult to unambiguously answer the question: what kind of waterproofing to choose for tiles. It is important to take into account the time frame in which you need to invest, evaluate your own strengths, if professionals are not involved in the repair, as well as financial capabilities.
Bathroom waterproofing: video
Carrying out waterproofing works: photo


Before those who are planning repairs in the bathroom, the question often arises: is it necessary to do waterproofing under the tiles, or can you do without it? In this article we will talk about the principle of operation of the moisture-proof layer, and about the cases in which it is indispensable. You will also learn about the detailed technology of applying materials, and find answers to the following questions:
- What is bathroom waterproofing?
- Why is she needed?
- How do waterproofing materials work?
- How to choose application technology and materials for your bathroom?
The bathroom is a room with an individual microclimate. This room is characterized by frequent temperature changes, constant high humidity and condensation. The walls of most bathrooms are made of brick or concrete, which have a porous structure and always need to be protected from moisture and subsequent destruction.
Any finish has a certain percentage of moisture saturation and moisture return. During the operation of the bathroom, hot steam, water, and moisture penetrate the tiles through the tile joints.
This process is very slow and can take years, but after a certain period of time, tiles, marble or granite are completely saturated with moisture.
 Marble and granite are saturated faster, and ceramics a little longer, but after the tile is completely saturated with moisture, it begins to give it to the plaster mixture, which in turn gradually swells and loses its adhesive properties with the tile, and as a result, the plaster layer is destroyed , walls and in some places mold can appear.
In conditions of high humidity, waterproofing the floor and walls under tiles is needed in order to keep floors, walls and ceilings from moisture, mold, and extend the life of the tile and reduce costs during subsequent repairs.
Before starting work on waterproofing the bathroom, we determine its “wet” areas or zones - this is part of the walls and the entire floor.

"Wet" zone No. 1
As a rule, the area of the entire floor is exposed to frequent wetness, therefore it is the wet zone No. 1. Therefore, ideally, it is necessary to equip a hydro-barrier of the entire floor with a minimum entry on the walls of 20-30 cm.
"Wet" zone №2
"Wet" zone No. 2 are the walls adjacent to the bathroom or shower and pipe places.
Before the stage of final tiling, it is necessary to equip a waterproofing apron, approximately 50 cm high. In those places where water splashes constantly fall on the cladding, insulating material is applied 50 cm up and to the sides of the object.
"Wet" zone №3
The area near the sink, shower, and where plumbing fixtures and accessories are located is “wet” zone #3. Wall waterproofing for and around these objects is also applied 50 cm up and to the sides.
Types of materials for waterproofing a bathroom. What is better to choose?
Previously, only bitumen was used as waterproofing, but modern industry now offers a wider range of materials of various cost with improved composition and better technical characteristics.
The most popular types of waterproofing materials:
Mastic


These are universal waterproofing mixtures based on cement, with the addition of hydrophobic substances. They have good waterproofing properties, a high degree of adhesion to surfaces of any type.
Such cement-polymer mixtures are used when working with ceilings, walls and floors, because. they have absolute moisture-repellent properties and are easy to use. A spatula is used for application.
Such a coating is strong and durable, because. waterproofing mixtures of this category have increased mechanical resistance, and high vapor permeability. The scope of their application is quite wide, so these materials are used for waterproofing bathrooms, toilets, baths, foundations and pools.
Popular and well-known types of cement waterproofing: Waterproofing coating "HYDROLAST Universal" and HYDROLAST P 15 kg.
Roll gluing waterproofing with impregnation 
Rolled adhesive waterproofing with impregnation is one of the materials that is applied to a flat, dust-free base (permissible height of irregularities is 2 mm.) All sharp protrusions must be removed and deep cracks repaired. For the bathroom, it is better to use not welded, but self-adhesive materials. The bottom layer of waterproofing is impregnated with an adhesive that ensures a strong connection with the base, and the top layer contains components that improve contact with the tile. In the event of an emergency, floor waterproofing is one of the most affordable and reliable methods to protect against water leakage to the lower floor.
Popular and well-known brands of rolled waterproofing materials: TechnoNIKOL.
DIY waterproofing in the bathroom
By choosing the right materials and application method, you can make a moisture barrier yourself. Depending on the type of material and the number of treated areas, the application technology is somewhat different, but the principle of operation of the future hydro-barrier and the initial stage of work are always the same.
First you need to clean all surfaces of the room from the previous coating and remove construction debris. Defects and damage on the surfaces of the bathroom are eliminated with plaster.
After that, it is necessary to withstand a two-week interval, when the leveled surface dries, and proceed to the direct arrangement of the waterproofing layer.

Classic tiling is as popular as ever. A huge variety of types of tiles allows you to create any interior, but since the tile has the ability to gradually absorb, accumulate and then release moisture to the plaster, it is necessary to apply a waterproofing coating before laying it.

Bathroom walls are waterproofed not to protect them from leaks, but to prevent condensation from penetrating under the tiles, contributing to the destruction of the walls and the reproduction of harmful bacteria.
In order to save money, they make partial waterproofing of the walls, 50 cm up and to the sides at the locations of sanitary fittings and pipes, but for more effective protection of the walls, it is recommended to apply a waterproofing coating over the entire surface.
Coating materials (cement-polymer compositions, mastics) are used as an insulator. The waterproofing mixture is applied with a spatula, it forms a smooth surface and serves as an excellent base for tiles.

If it is planned to install a shower cabin in the bathroom, the walls and floor near it, and other plumbing items, will be considered wet areas. Before starting work on waterproofing, the floor is leveled, a screed is made.
After the screed has dried, we glue polystyrene foam plates on the floor at the installation site of the booth, they insulate the bottom layer of the pallet and exclude the occurrence of moisture. At this stage, we install a drain and process all seams and joints with sealant.
After that, we isolate the floor using coating mixtures or roll insulation. For a bathroom with a shower, the floor should be insulated with a minimum entry on the walls - 20 cm. The wall near which the cabin is located is completely insulated.
If you have a shower room with a shower tray, first insulate the floor under it, then install the tray and cubicle, and after that you should apply a waterproofing coating near the shower room. The rest of the bathroom objects are processed according to the principle described above.

Wood is an organic material that swells when exposed to a humid environment and will gradually break down over time.
Due to constant changes in temperature and humidity, the walls in buildings made of timber often “dance”, since under the influence of various factors the timber can swell and narrow.
The bathroom in such a house should be as tight as possible in relation to the rest of the premises. Before arranging the wooden floor on the logs, the foundation of the house is waterproofed with mastic or a cement-polymer composition. Logs are treated with an antiseptic and dried thoroughly.
Before laying the floor, wooden boards are treated with one of the waterproofing compounds. To do this, use bituminous or primer varnish, which have a high degree of elasticity (narrow and expand during deformation). Parquet varnish is used after laying a wooden floor, it protects the outer surface of the wood from moisture. The walls and ceiling of the bathroom are treated with the same means, paying special attention to joints or corners. If the walls are made of drywall, before applying the waterproofing layer, it is treated with moisture-resistant impregnation.

Roll materials, unlike coating materials, require longer laying. A prerequisite is a flat floor surface and the presence of a screed. Before laying tiles, an additional layer of thin screed is applied to the rolled waterproofing.
Pasting materials have a high degree of elasticity, so their use in wooden houses is very advisable. Despite the regular “movements” of the tree, the insulation does not collapse, but retains its integrity.
The vapor permeability of the gluing waterproofing allows the tree to "breathe", thereby extending the term of its operation. Laying material requires special skills and, in some cases, the use of special equipment.
conclusions
Having studied the technology, you can independently make the waterproofing of the bathroom under the tiles, or entrust this important matter to professionals. In any case, it is the applied composition that plays an important role in the arrangement of the hydrobarrier.
Our hardware store offers a wide range of materials, among which you will find the most suitable waterproofing for any type of premises, and if you have any questions about waterproofing materials, you can always get a free consultation from our specialists.
August 15, 2016Specialization: Capital construction works (laying the foundation, erecting walls, constructing the roof, etc.). Internal construction works (laying of internal communications, rough and fine finishing). Hobbies: mobile communication, high technologies, computer equipment, programming.
Waterproofing a bathroom is not just an important, but a mandatory step in finishing a plumbing room. Especially in a wooden house, where the load-bearing structures do not tolerate moisture. No less important is the waterproofing for the bathroom under the tiles, thanks to which the integrity of the interfloor ceilings and repairs in the apartment next to the bottom in the event of an accident are maintained.
Most recently, I did such work and, taking this opportunity, I want to tell you how to make waterproofing in the bathroom with your own hands so that not a single molecule of water leaks from the ceiling under your plumbing room.
The need for bathroom waterproofing
To begin with, I will allow myself to acquaint you with information about what waterproofing is and whether it should be done when finishing a bathroom. This term in construction refers to a set of measures aimed at preventing the penetration of liquids through the enclosing walls and interfloor ceilings of buildings and structures.

According to SNiP number 2.03.13-88, the bathroom belongs to the class of rooms that experience medium and high intensity of the impact of liquids on the floor surface. The building instruction states that water protection measures are mandatory for it. Naturally, in addition to the floor, waterproofing of the walls for tiles or other finishing material is also needed, otherwise the necessary water resistance cannot be achieved.
It is especially important to waterproof the bathroom in a frame house and a room where drywall was used for wall decoration. These materials are easily damaged as a result of getting wet and will quickly become unusable if they are constantly in contact with water or water vapor.
Regardless of what waterproofing materials are used, the goal of this stage of work is to create a waterproof "trough" on the floor in the bathroom with sides on the walls of the room 15-20 cm high.

In the photo - a "trough" of waterproofing material in the bathroom.
A monolithic hermetic layer will not let water that gets on the floor into the interfloor overlap, which will protect the structural elements of the building from destruction. In addition to increasing the life of the building and preserving the nerves of neighbors, this will prevent the appearance of mold, fungus and other pathogens.
Some doubt whether waterproofing is needed under the tile, because the tile itself does not let water through. In this regard, I can note the following: when facing walls with ceramic tiles, an absolutely sealed waterproof layer is not formed (due to the presence of seams), therefore, the type in question cannot be considered as an alternative to waterproofing.
As for the specific method of forming a waterproof layer and the materials used for this, they depend on several factors:
- the state of the surface to be processed;
- material from which interfloor floors are constructed;
- the terms allotted for the arrangement of the hydroprotective layer;
- number of storeys of the building;
- the ability to reduce the distance between the floor and the ceiling of the sanitary room.
Waterproofing methods

I hope I convinced you of the need for waterproofing materials. In this section, I will talk about the various ways to protect the bathroom floor from water and the types of materials that are used for this.
I presented all the necessary information in the form of a table so that you can decide for yourself which technology to choose for the necessary work.
| View | Description |
| Gluing waterproofing | Flexible membranes, bitumen coating are used for work. Roofing felt or roofing felt are the most common, but now more effective and easy-to-install adhesive waterproofing is sold in stores. For example, TechnoNIKOL. The fixing of the sheets of material is carried out due to the glue applied in advance on one side of the membrane. Sometimes it is necessary to use a gas burner or a building hair dryer for work. |
| Cast waterproofing | One of the most effective and fastest ways of waterproofing surfaces, which is often used during repairs in city apartments. Waterproofing is carried out with polymer mastics, which, after hardening, form a sealed seamless layer that prevents moisture from seeping into the ceiling. |
| Coating waterproofing | The most common technology (at least in my practice). It is carried out with bituminous mastic. Liquid waterproofing is applied to the treated surfaces with a brush or roller and, after hardening, also forms a completely sealed layer that does not allow water to seep into the floor. |
| Backfill waterproofing | For work, bulk hydrophobic materials are used, which fill the floor in the bathroom. I have not come across such a method in practice, so I can’t tell you something specific. |
| Plaster waterproofing | Cement mortars are used, in which polymeric additives or liquid glass are added to prevent the liquid from seeping through the applied waterproofing layer. This is a fairly effective and inexpensive way to protect interfloor floors from moisture. I rarely resort to it just because the coating waterproofing is easier to apply. |
To the question of which technology is better from the ones presented above, everyone answers for himself. Personally, I am impressed by the coating method as the easiest to implement. It is about him that I will tell a little more. If you are interested in learning about other methods of waterproofing, ask questions in the comments.
The specifics of the use of coating materials
Previously, animal fat and mineral oils served as the basis for waterproofing materials. Now you can protect the bathroom floor from water seepage using a dry powder (a solution is made from it), liquid mastic or paste.
The thickness and effectiveness of the sealed layer depends on the consistency of the waterproofing solution:
- Bitumen-based liquid mastic is suitable for waterproofing bathrooms. It is applied in two layers, each after hardening - 1 mm. Most often, a tile is placed on top of such a mastic or a concrete screed is poured.

- Paste mastic is made from bitumen with polymer additives. It also fits in two layers, each about 3 mm thick. The paste-like mixture can serve as both a waterproofing layer and a heavy, leveling floor. Fiberglass reinforcing mesh is often used to harden the surface.

- Dry powder based on cement with hydrophobic additives. It is used for simultaneous waterproofing of the surface and leveling the floor in the bathroom for a decorative coating. It is applied in one layer with a spatula.

I prefer bitumen-based liquid coating waterproofing.
Floor waterproofing by painting
Now it's time to tell you about how waterproofing is done for the bathroom. I will describe the technology using the example of an ordinary bathroom in an apartment building. And you already refract it, taking into account your conditions.
Training
The effectiveness of measures to protect the floor in the bathroom from water directly depends on the preparatory stage. Let me tell you how I do it:
- I inspect the ceiling (floor in the bathroom) and perform minor repairs to the reinforced concrete surface. I seal small cracks with mounting foam or cement mortar, I clean large cracks with a perforator and also fill with cement mortar.

- If your bathroom floor is located with a significant difference in height (more than 2 cm), I advise you to first make a concrete screed along the lighthouses. If the difference is not so significant, but still present, you can limit yourself to a self-leveling mixture.

- After repair, I prime the surface. The primer improves the adhesion of the waterproofing to the mineral board and reduces the consumption of waterproofing material. I apply the primer with a brush in two layers with a 2-hour drying interval.

- At the junction of walls and floor slabs, I glue a waterproofing film. In these places, microscopic shifts of structural elements are possible, which can lead to the appearance of cracks. Therefore, an elastic tape is used that maintains integrity when the base moves.

If you didn’t buy the tape in advance, then the mentioned areas should be very carefully (in 4-5 layers) smeared with bituminous waterproofing mastic.
Solution preparation
In the case described in this article, for waterproofing the floor, I used the coating mastic MG-1 manufactured by the Leader company. It is sold in buckets of different capacities (I bought 6 kg) and is completely ready for use.

However, many use cement-based formulations with various additives, which are sold as a dry powder, for work. Then you will need to prepare a solution by mixing the powder with water in the proportions indicated on the package.
It is important to achieve complete homogeneity of the mixture. To mix the solution, I recommend using a mixer that is worn on a drill.

To achieve the maximum quality of the prepared solution, follow these tips:
- Use only clean containers. Very often, the remains of a previously prepared mixture became the reason that the new waterproofing mortar did not turn out to be homogeneous and the whole work had to be redone.
- The prepared solution has a limited shelf life (no more than 40 minutes). Therefore, you need to knead only the amount of material that you can use up in a specified period of time.

Applying mastic
Applying bituminous mastic on the floor is not particularly difficult. The material has a liquid consistency and can be applied with an ordinary wide brush, evenly distributing it over the treated surface.

The scheme is as follows:
- First, the first layer is applied, after which it is left to dry for 6-8 hours.
- After that, a second layer is applied, which dries for at least a day. Only after 24 hours, you can continue finishing work in the sanitary room.
It is very important to process not only the floor, making a raid on the walls to a height of about 20 cm, but also those surfaces that will get water when taking a bath or shower. Although SNiP does not require such an operation, I still advise you to spend some time and mastics on waterproofing the walls in these places. This will significantly increase the service life of building envelopes (especially in wooden houses).

Summary
Now you know how waterproofing is done in the bathroom. As you can see, do-it-yourself processing of the floor and walls using a bituminous mixture is carried out quickly and does not require significant cash costs. Therefore, I see no reason to neglect this stage of finishing sanitary facilities, thereby protecting myself and my neighbors from unnecessary problems.
What do you think is better for waterproofing a bathroom under a tile? I am interested in the methods that you have already tested in practice. If there are any, I will be glad if you tell about them in the comments.


