Paper envelopes - how much joy, news, both pleasant and not very much they carry in themselves. In paper envelopes, people send their letters to friends, distant relatives and lovers.
Today it has become very fashionable to put greeting cards, invitations to a wedding celebration or anniversary in paper envelopes, and even give money gifts.
 How to make a simple paper envelope become a real work of art and arouse rapturous glances?
Each of us knows how to make an ordinary square paper envelope. But still, for those who are not familiar with the technique of folding a paper envelope, we attach a detailed diagram.
 Any, even the most ordinary, paper envelope will become an extraordinary piece of applied art if it is decorated with skillful, courageous, golden hands.
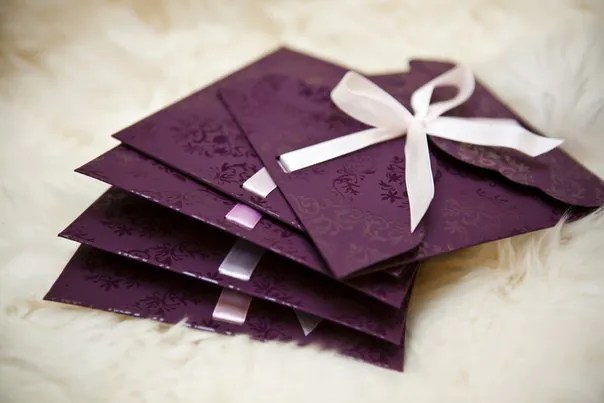
Paper envelope # 1
 To make such an original envelope, you need a sheet of paper, preferably of a solid color and beautiful threads.
Fold a sheet of paper in half. Wrap one half of the paper sheet tightly with threads. We fix the ends of the threads with tape or glue.
On the opposite inner side, you can write a wish.
The space between the threads and the sheet of paper will perfectly fit a letter, banknote or a romantic note.
 In addition, the title side can be decorated with flowers.
Paper envelope # 2
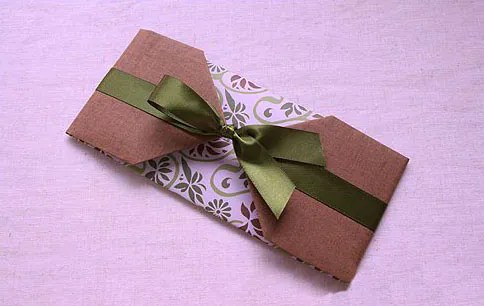 It will be a little more difficult to make such a paper envelope, but it looks great.
You will need decorative paper, ribbons, double-sided tape, and the ability to neatly fold a piece of paper.
 The sheet of paper must be folded as shown in the diagram. Then glue a line of double-sided tape in the center, and already on it a beautiful ribbon, which you will tie on a bow.
Such an envelope will perfectly cope with the role of a money envelope at any celebration.
Paper envelope # 3
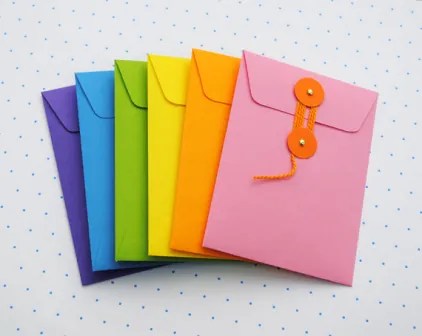 These multi-colored paper envelopes are made according to the principle of a pocket.
Did everyone hold a paper CD bag in their hands?
 Well, these colored paper envelopes are very similar to a CD bag.
 The main thing here is to attach buttons to the finished envelope. These can be decorative buttons, sewn on or glued on buttons, and even Velcro.
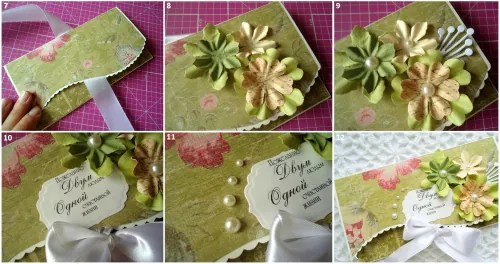
Paper envelope # 4
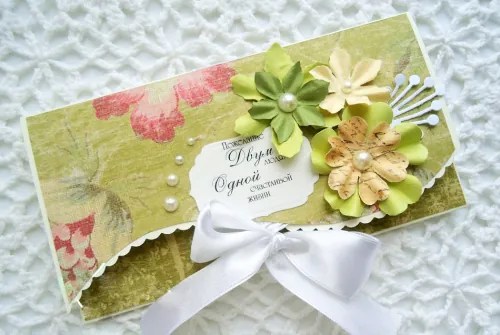 It is not at all difficult to make such an envelope. To do this, fold a sheet of paper according to the principle of a postcard that opens on both sides. Title pages can be cut in waves using special decoration scissors.
 Then start decorating. Quilling elements, appliques, stripes from beautiful patches, as well as beads, rhinestones and ribbons can become a decor.
Many thrifty or forgetful people who run past shops with postage supplies are then faced with the question of where to get this very envelope at the right time. And if there is already paper at home, then how to make an envelope from A4 sheet? After all, from time to time, everyone has a need or a case when he is very needed. This question is especially relevant during the holidays. After all, if a postcard sometimes does not require additional packaging, then, for example, a sincere congratulation on a beautiful sheet or just money without an envelope loses some of its attractiveness. It is doubly pleasant to present and receive something in a hand-made envelope - this means that the person has taken care of the packaging in advance. And what if the postcard or congratulation has non-standard sizes? Then there is definitely no way to do without samizdat.
What envelopes can you make yourself?
You can independently make almost any type of such paper packaging: from the simplest (for writing) to the complex gift wrapping. You can also make a decoration for money yourself, even replacing the protective box for the disk. Therefore, in the article we will try to figure out how to make an envelope from A4 sheet.
We use the simplest ways
Of course, if there is no experience in making an envelope, then easy methods are extremely relevant. There are several of them, and people with a kind heart and correctly positioned limbs took care of this, who periodically share instructions.
The first way

The easiest option is the future product as shown in the figure. This will require scissors and a strong hand to bend straight where the dotted line is. If the process was successful, then it remains only to glue a little at the junction of all sides of the resulting cutest envelope. It remains only to choose what to invest there! As you can see, making an envelope from A4 sheet turned out to be much easier and faster than reading about the proposed method. No problem! This simple algorithm will also come in handy when a question has arisen for money from A4 sheet. " packing according to the occasion.
An indisputable plus on its own is the fact that the donor can arrange it according to the occasion, picking up and sticking a picture or simply decorating it with an inscription-wish.
Method two (modernized)
The second method is based on the first, but involves more work with scissors. This type of envelope is suitable for a sincere message, and if someone was interested in the question of how to make an envelope from A4 sheet for writing with their own hands, then the answer is right here. Cut out the contour along the lines shown in the picture, bend it at the dotted line. At the junction of the envelope planes, you need to use glue. The result is a neat, graceful envelope. Interestingly, this method is suitable for any thick paper - colored, packaging, cardboard.

If there is only paper
What if you have paper on hand and no adhesive? Then a new question is brewing: "How to make an envelope from A4 sheet without glue?" It's okay, there is always a way out.
If there is no glue in the house, then a stapler or tape will do. These office assistants will also come in handy in envelope making. of course, it is better to take the thinnest one so that the finished envelope looks neat. Tip: in stationery stores or in the departments for creativity, you can find colorful bright scotch tapes with pictures. Then the edges of the product glued together will acquire the most creative look.
What if you only have paper and nothing else?
What if there’s nothing at all to glue the edges of the envelope? In this case, let's take inspiration from the Japanese origami method. As usual, you need to take a piece of paper, then fold it exactly as shown in the image. After that, it remains only to bend the corners of the upper parts so that the envelope is ready.

The second way of making an envelope without glue from A4 sheet is suitable for making a product of an original shape, and you need a square blank. Fold the sheet straight diagonally to form a triangle. Then one corner of it must be bent to the diagonal line. The right and left parts of the future product will require bending exactly one third of the length. It turns out that on both sides, the corners of the folds intersect to the edge. After that, you need to bend the corners back from the edges so that it becomes noticeable how small pockets have formed. They must be opened, bending up, and secured. Please note that if you are going to invest something (and for this, a craft is being made), then you need to do this at this stage. The very last action: put the top of the envelope in a pocket, which will become a small "lock" and will not allow the product to open.
And if you want even more beautiful?

If a simple envelope is no longer suitable, then you can go further and show the world a masterpiece. A beautiful, elegantly or imaginatively designed envelope will be a great addition and packing for your gift, if it is a card with a wish, a gift certificate or money that is always so necessary. So, how to make a beautiful envelope from A4 sheet?
It can be decorated as the soul desires and imagination allows. Colored appliqués or special stickers can be glued. You can paint and attach ribbons and flowers. You can even make a drawing through a stencil: stick some image (it is better to choose simple, easily recognizable pictures along the contour). It can be leaves, flowers, animals. Then paint the surface of the envelope with spray paint. When the paint is dry, remove the pasted appliques, and you will have an original designed envelope.
Another idea is to take a paintbrush, dip it in and spray it onto the envelope. You can use as many paints as you like, but do not forget that it is better to rinse the brush in water before using the next color.
Another option is to use lace in decoration. Stick only on the corner or cover the maximum surface of the envelope - it depends on your imagination.

"Clothes" for the disc
Lost your CD or DVD box again? Or maybe you were given an unpackaged copy? The lack of any protection for such information carriers is a big risk, because any scratch can damage the important data on them. There are still no boxes, boxes, packaging for discs, but you want order? It doesn't matter, because the instructions on how to make an envelope for a disc from A4 sheet are already here. Thanks to it, you can quickly and easily make a convenient, space-saving disc packaging. This lesson will take no more than a minute, and the resulting envelope will come in handy more than once. To make it, it is enough to make a few movements.

The envelope is ready, and after a few rehearsals, you can show off your ability to make simple and quick packaging for discs. In this way, you can make envelopes not only for information carriers, but also for postcards of non-standard shapes and sizes. You can please your loved ones by handing a warm wish or letter in such an envelope. Of course, then you need some kind of additional decoration or paper of a different color. As a last resort, just a nice signature.
Conclusion
It's great if the article helped to understand the seeming difficulties of creating packaging for discs, for money, for postcards. There are plenty of ways to make an envelope from A4 sheet, and, depending on the purpose, types of them can be made arbitrarily. For manufacturing, you can choose bright wrapping paper, or you can also choose a magazine sheet. You can completely decorate the finished envelope, or you can make a laconic inscription. Or even apply the scrapbooking technique using ribbons, buttons, threads, rhinestones and lace. It all depends on the fantasy and the situation about which the envelope is being created. The fate of the investment or gift is unknown, but the first impression of the delivery process will remain forever. The person who is presented with a beautifully designed present will remember this moment forever.
You can make many different crafts from ordinary album sheets, as well as create a variety of envelopes for disks, letters and money. Such a detail will be an excellent addition to a gift, because hand-made things are always appreciated. So let's see how to make an envelope.


Envelope from A4 sheet: method number 1
We will make this envelope from the album sheet. Fold it in half horizontally and unfold it again. Fold the top corners towards the middle.

Now fold one edge up to half of the sheet where the fold line is. And then the second one.


Bend the top of the sheet as shown in the photo.


There is only one thing left to do - to fill in the edges, and the envelope is ready. Look carefully at the images and repeat.


The product is ready.

It can be used for congratulations or for money. You can decorate it in a variety of ways: ribbons, patterns and much more.
Envelope from A4 sheet: method number 2
And here is the second manufacturing option. An envelope like this is best made out of pretty A4 scrapbooking paper and comes out large enough.
Fold your sheet in half horizontally, and then unfold it to form a strip in the middle.

Fold the top left corner to the fold line. Now do the same for the bottom right corner.


Take a close look at the photo and make the folds as shown there.


Place the envelope to be as shown in the picture.

Again, carefully look at the photo and repeat the steps.


Below we see the formed pocket, we need to put the corner into it, which was obtained in the previous action.


Do the same with a different angle, fold and tuck into the pocket.


That's it, the envelope is ready without glue. It will turn out very nicely if you use some decorative elements in addition to colored paper.
Postal envelope from A4 sheet
You can also make a mail envelope from a large rectangular sheet.
Take a sheet and fold it in a certain way, Bend the sheet 5.5 cm at the top and 11.5 cm at the bottom.

Bend the paper 2 cm on each side.

Cut strips 2 cm wide at the top of the workpiece.

Now make a side cut between the remaining two pieces.

Lubricate 2 cm strips of paper with glue and connect.

Everything, the product is completely ready.
From notebook sheets
If it so happened that there was no white paper in the house, then various envelopes can be made from a notebook sheet. For example, you can make a triangle letter.
Take a notebook sheet and bend the upper left corner diagonally. Then bend the upper right corner in the same way. At the top you should have a triangle with a strip of remaining paper underneath. Now working with it, bend the bottom corners diagonally and tuck everything into the triangle. Now fold the triangle in half. That's it, the envelope is ready. Do not forget to write the text beforehand before folding the triangle. Fold the envelope so that the text is on the inside, and on the outside you can write the name of the addressee.

Most importantly, do not forget about jewelry, otherwise your gift will look too simple, and you will not achieve the desired goal. Below are a few more examples of handmade envelopes for inspiration, as well as a video to help you in your endeavors.
Here is such an openwork option:

And such masterpieces are created using templates that can be found in large numbers on the Internet:

Fun and original envelopes with buttons:

Another unusual option:

And beautifully designed scrapbook products:

The easiest way:
In origami technique from colored A4 paper:
Another variation on the same origami technique:
And more simple ways:
Today we want to tell you how to make an origami paper envelope in the shape of a square with your own hands. In our master class, we will look at two schemes for collecting envelopes through the Japanese art of origami, and step-by-step descriptions with detailed photos will explain how to do them correctly.
Tools and materials Time: 10-30 minutes Difficulty: 4/10
- patterned colored paper for origami / scrapbooking;
- scissors;
- ruler;
- universal glue;
- pencil or pen;
- decorative adhesive tape or seal with sticker.
Step-by-step instructions with a photo
To make the envelope, we used sheets of glossy patterned scrapbooking paper that was originally square in shape. Of course, you can use any other paper you have at home, but then your envelopes won't look so colorful!
Congratulate your loved ones and loved ones on the holidays with gifts wrapped in miniature paper envelopes made by you yourself! They will undoubtedly appreciate such a present!

For making crafts, you can easily attract children and, of course, it will be a fun and interesting pastime for all of you!

Method 1. Simple origami envelope
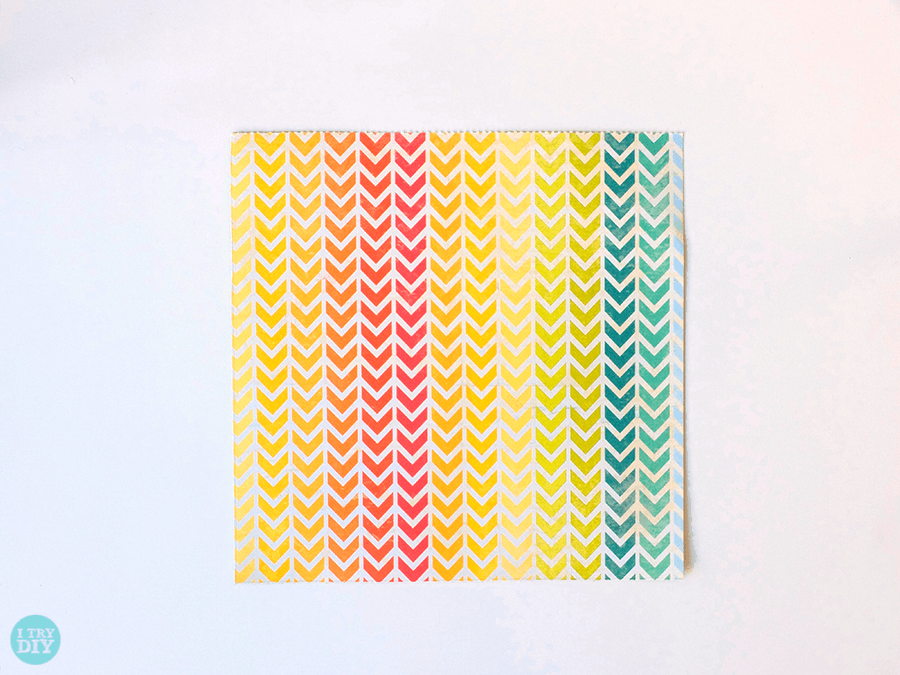
Step 1: cut the square
Take nice colored paper and cut a square out of it. If your paper is originally square, skip this step.

Step 2: fold diagonally
Take your square and fold it in half diagonally.
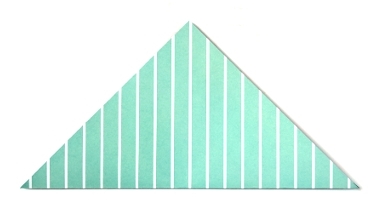
To make the largest origami envelope with 14x14cm sides, we used a 30x30cm square of white and green stripes of origami paper. The middle envelope with sides 11.5 x 11.5 cm was made from a piece of thick glossy paper with a red and pink check measuring 25x25 cm.And, finally, the smallest envelope was made using a piece of colored paper with a strawberry pattern measuring 20x20 cm. the finished craft was 9x9 cm.
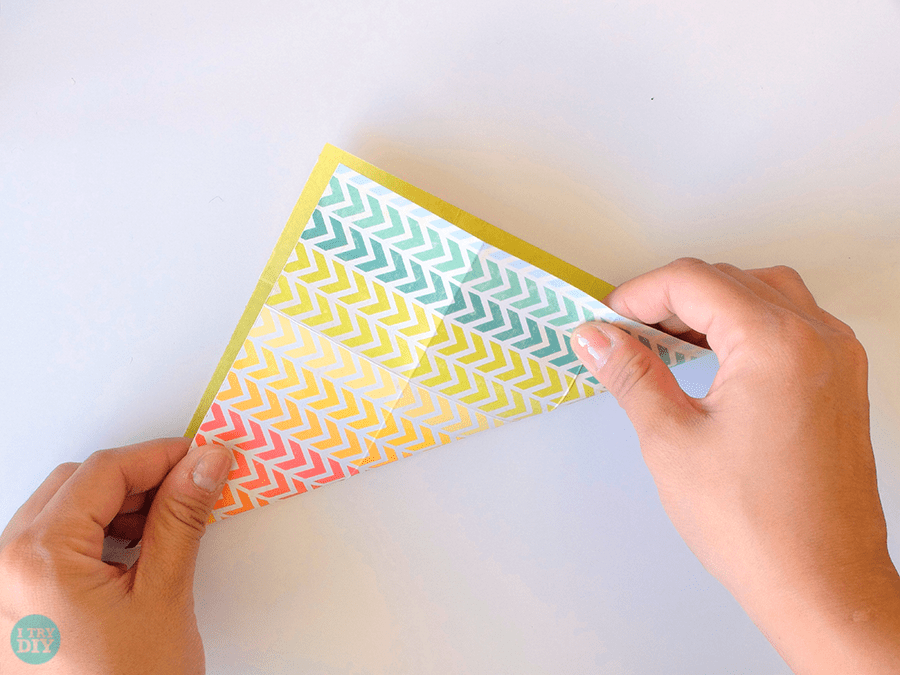
Step 3: fold the corners
- Place the resulting paper triangle in front of you with the folded diagonal side down.
- Using a ruler and pencil, divide the bottom of the triangle into three equal parts.
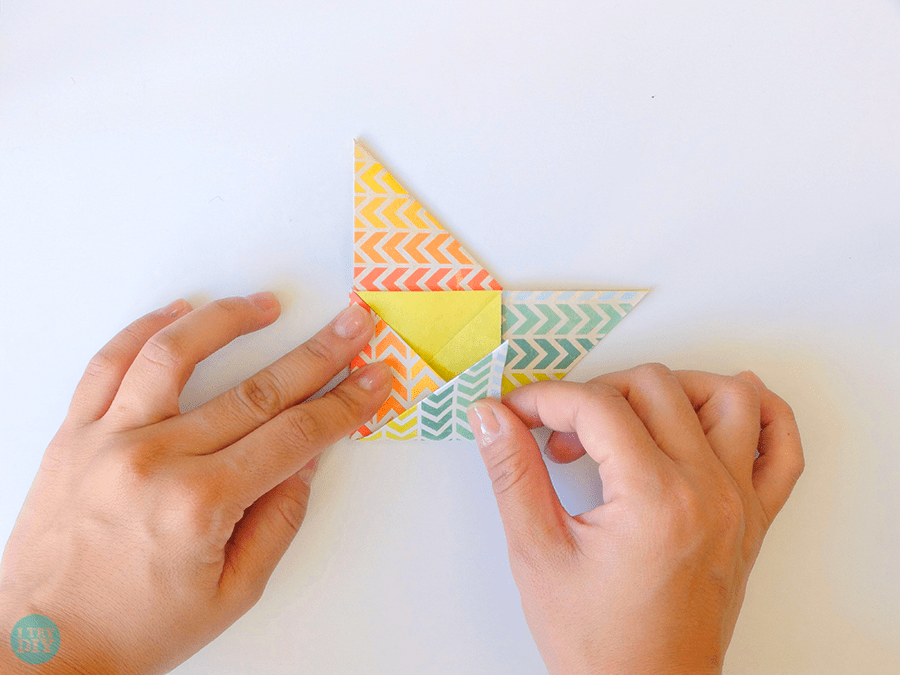
- Fold the right corner of the triangle forward a third of its length and fold down towards the left.

In the same way, fold the left corner of the triangle one third of its length towards the right.

Step 4: fold the corners
You now have two open triangle pockets.

Open the triangles back. Slide the left triangle and place it in the right pocket. Use a ruler or your fingers to iron any folds well to keep the envelope as flat and flat as possible.

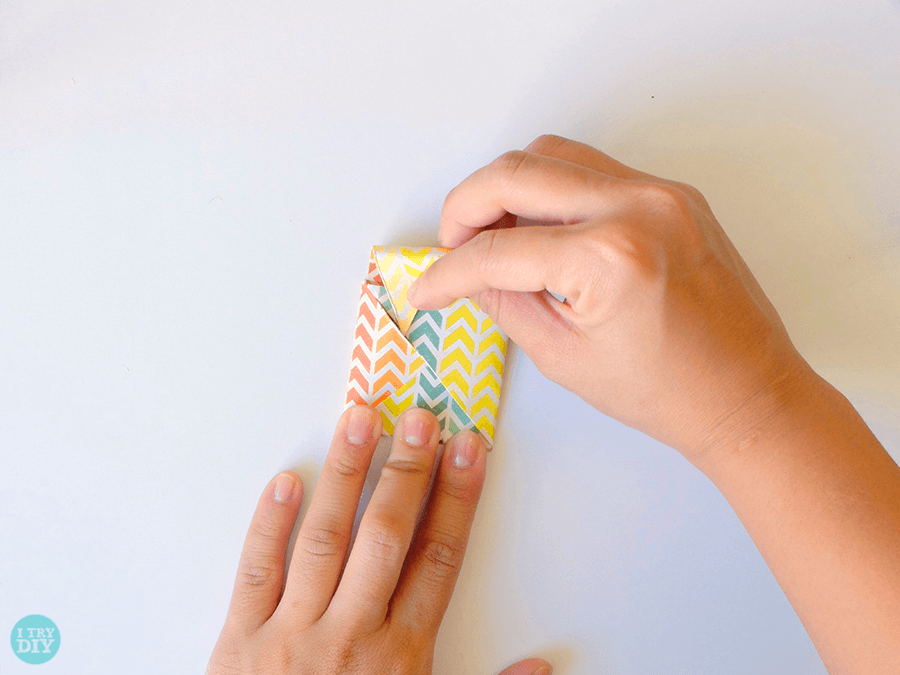
Step 5: wrap the top
Using a ruler, fold the top of the craft down evenly and form a neat envelope.

A simple do-it-yourself origami paper envelope is almost ready! All you have to do is fill it with small gifts, treats or money and seal it with a sticker or a piece of decorative tape.

If desired, write on the envelope the name, address, or an affectionate nickname, as you used to call your loved one. Don't forget to add cute words and wishes!

Method 2. origami envelope from a square
This stunning origami square paper envelope has a double bottom. And if you decide to present a gift in such an envelope, you can make a double surprise by packing two different presentations in each bottom!

Step 1: cut the square
Cut a perfect square out of colorful origami paper. Keep in mind that the dimensions of the finished envelope will be 1/3 the length of the original sheet.
Step 2: fold the square
Using a ruler and pencil, divide one side of the square into three equal parts.


Make the folds as sharp as possible to simplify your work later. Just do not wrinkle too much, otherwise you may ruin the paper!

Repeat the same folds in the other direction.

You should end up with a square with nine identical square sections.

Step 3: add folds
Make a diagonal fold.
Repeat diagonal folds in the other direction.

Take one of the corners and fold it to a point in the middle.

Bend the other 3 corners to the point in the middle. You should have the following folds.

Step 4: make a turntable
If you look closely, you will see a pinwheel-shaped craft with folds in front of you. You need to keep this in mind for the next steps.
Take two opposite corners and pinch them with your thumbs and forefingers.
While holding the corners, slowly twist them clockwise on both sides. You will feel the corners pull in opposite directions. This is where you need to figure out how to twist your paper towards the center.

You will know you did it right when your square looks like a turntable with a square in the center.

Iron the folds well with a ruler.

Step 5: close the envelope
Now let's close our square origami envelope! Take the left half and fold it towards the center.

Do the same for the bottom flap.
Screw on the right valve.

Tuck the remaining top flap into a small pocket under the first / left sinus. This will allow you to keep the area covered.
You did everything right!

Here you can see how to fit a small sticker into an envelope. Instead of a sticker, you can apply any small inscriptions, wishes or money. What would you put in such an envelope?

See how simple it is! We hope you enjoyed our master classes with diagrams, in which we showed how to make an origami envelope, and you will share with us photos of your products. And if you still have questions, watch the video, which clearly shows how to fold an origami envelope from a regular sheet.
Greetings! When you want to congratulate your loved ones with a craft, postcard or cash equivalent, you want to pack it all beautifully.
Therefore, there are many beautiful paper envelopes. They can be made very easily with your own hands, especially since I have selected options for you for every taste: from simple to original.
But these pockets can be used not only as an attachment to a gift, but also to carry everyday functions, for example, to become a protection for a disk or to decorate a corner in a girl's album.
For many years, it has been popular to give money for any significant event, but simply handing it over is not very polite, so you need to arrange it like a gift. And the envelope will help us with this.
It can be rectangular for the size of bills, or you can create an original one, for example, a square shape.
I liked the idea where a paper heart is taken as the basis for the entire craft. Then, using a ruler, folds are made in the middle of the hemispheres. Along these lines, the heart is folded and fixed with glue for reliability.
I am also giving a master class on how to quickly arrange a cash gift for a birthday, by the way, all ideas are also suitable for weddings, because this is also the birthday of a community unit - a family.

I liked the laconic and elegant design of how you can give money to a man or boss.

I also found an unusual option that also combines the functionality of a postcard.

To very quickly make decoration for a gift, use the most popular template.

We use it to make envelopes that can be decorated in an unusual way if you paste an insert with a message inside.

This is how it is done step by step.
It is better to take double-sided paper and not very thick so that creases do not appear on the folds.

If you need to make the packaging according to the size of the banknote, then I suggest using the bottom template. The currency is different for everyone, it may not necessarily be rubles, so I deliberately do not give the sizes. In order not to be mistaken, measure your banknote. 
There are many different backgrounds for creativity in craft stores, including paper lace from which you can create such tenderness.

For a gift for a schoolchild or student, take a pencil as a basis.

The triangular part tightly fixes the money so that it does not fall out.


1. Make a drawing on a4 sheet and cut out all the details.

2. Take this diagram as a basis. The nib can be cut directly from colored paper.

3. This is what the workpiece looks like, ready for completion.

4. Stick the tip on the inside and the craft is ready. The front part can be decorated with volumetric details.

Also, in order to support young happy parents who have recently learned the joy of motherhood and fatherhood, I propose to make a symbolic package. After all, a child's birthday is one of the most important events in the life of every family.

Manufacturing process:
1. We need this template with dimensions of 200 mm by 245 mm.

2. For decoration, take openwork napkins, lace or satin ribbons.

3. The design of the insert for wishes has dimensions of 90 mm by 155 mm.


4. The envelope must be bandaged, as is usually done in the hospital. If a boy was born, then most often they use a blue ribbon, and if a girl is born, a pink one. But I don’t consider it necessary to choose these particular colors.

I will list many more templates below in the corresponding section. You can use your own sizes.
Original ideas in scrapbooking technique
Scrapbooking allows you to create very delicate and cute products using different volumes, textures and backgrounds. It is considered popular here to mix materials such as paper, fabric and wood. It turns out very cozy crafts. And it's never a shame to hand them over.

Everything is closed with a tape that wraps around it on both sides.

The most convenient way to make folds is with a ruler. Then all the lines will turn out to be smooth.

This option is assembled in three parts. Side pockets are glued to the base.
But first you need to cut them out. The sides of the triangle are half the length of the base.

We make folds on both parts.

An original idea for packaging, when each bill can be hidden in a separate house. And from these pockets create a whole book. Look what a wonderful booklet.

You can buy envelopes, or you can fold them yourself, see the template options below. Using double-sided tape, connect all the blanks.

The front and back sides need to be decorated. To do this, take a thick sheet and wrap it with your chosen background.

For gluing the cover, it is better to take PVA glue.

Another envelope for money in this technique, but on a different template. It has an oblong shape.

This is how you arrange the front of the craft. See how many different textures there are.

All lines must be carefully bent, if there is no professional tool, use a ruler.

They do not always give only money, perhaps you want to thank the person for the service and please him by putting a chocolate bar inside, but you need it to fit exactly.
Let's take a closer look.


Take this diagram. It is better to fit it to the size of the chocolate, because they are also square in shape.
The fold lines are highlighted with a dotted line, and the places that need to be cut are highlighted in blue.
 The edges can be beautifully decorated with special stamps or scissors with a curly edge.

Run through all the folds with your marigold so that the workpiece takes the desired shape.

We fold and decorate our box.

I liked this design because sometimes I want to make someone nice by giving a sweet treat. And this idea allows you to beautifully present such an ordinary present. And, most importantly, it is suitable for people of any age and profession.
DIY plain paper envelopes
Discs are outdated, but they are still used not only for recording films, but also as information storage. For example, photographers and videographers can still present them to you with a recording of a wedding or other event. Of course, it is customary to store such solemn attributes in a beautiful design.
For example, use tab holders on both sides of the envelope. It opens like a postcard.

Or glue a decorative pocket made of thick fabric and decorate this shell using the scrapbooking technique.

At our house, dad removed all the disks from the boxes into homemade envelopes, so they take up less space during storage. If you also want to save space or you simply could not find the box, then this diagram will help you easily make a pocket from a4 sheet.

Another option is to pack the disc without using scissors or glue.

I also suggest this template as an idea, because it has a convenient ability to close the disk.

The blue lines mark the lines that need to be bent. The width corresponds to the diameter of the disc, so we take it 12.4 cm.
Cardboard idea with two pockets (compartments)
How do you like the idea of the envelope with two compartments? Its functionality increases immediately. By the way, if you increase the width of the part, then this craft can also be used to store disks, only two of them can already fit.

Manufacturing process:
1. We make a part according to the template and bend its lower ends.

2. But in advance, you need to draw fold lines from the inside of the workpiece with the blunt side of the knife, this is how it will look.

3. Make nice curves at the edges. You can pre-cut parts from a different color and stick over the pockets.
 4. Cut along the contour and glue the edges to the base so that the compartments do not turn back.
To add originality, these same edges can be sewn on a sewing machine or decorated by hand with an overlock stitch.
How to make an envelope from A4 sheet so that it closes?
The most optimal sizes are obtained from a A4 landscape sheet. They can not only give money gifts, but also send letters. The post office now accepts envelopes of different colors and sizes. The main thing is to indicate the correct address and stick the desired brand.
To make the craft more beautiful, do not take an ordinary white sheet, now there is paper in various shades of the same format.
You can collapse this with a wavy edge. All sizes are indicated, I think it will take you no more than five minutes. 
I also offer an option from a sheet of the same format, but I would like to pay your attention not so much to the form as to the interesting idea of closing the envelope. With the help of buttons and loops, it turned out not only very functional, but also elegant. After all, the buttons also acted as a decor.

Another similar option with buttons.

The easiest way to close is by using a tab that slides into the slot.

Even the simplest options for already boring forms can be made thematic or design.

Up to eight small pockets can fit on a sheet. You can put a wish or a small photo in each and give it to your mother, beloved or girlfriend.

You can also close the craft with the side parts, like this option.

It is made from four circles of the same diameter.

That bend in the middle.

And superimposing on each other form such a blank. The lower part of the parts must be glued. Since you have already folded each circle, the blanks themselves form a square base. Now it remains only to bend them, hooking the edge of the previous part to the next one.

A similar idea for a square box, but with a string bow.

Here, the base that we collected in the previous version is immediately cut out. And only semicircles are bent.

See how this can be collapsed step by step.

And now you need to thread a string or a floss thread into a needle with a wide eye and make holes in two places and stretch it.

I also invite you to watch a short video, which shows a master class on how to fold a letter wrapper from an album sheet.
A letter in such a homemade design will also be accepted by any post office.
Origami idea with children (step-by-step instructions)
In general, almost any envelope is made using this technique. Except for the fact that some templates are supplemented with additional tabs and tabs for better fixing of the package. Therefore, it is often necessary to use scissors to decorate them.
But, if you only have a regular standard sheet, then let's start learning the basics of origami. After all, in this technique it is much more difficult to make than an ordinary envelope.
So, the first scheme allows you to create a very custom craft with truncated ends.

The same scheme, but greatly simplified, was used to create this pocket.

A standard envelope is also made without the use of scissors, you only need your accuracy and evenness of lines.

And when you become masters in this technique, then try to make a package that transforms into a box.

Another detailed instruction on how to quickly assemble the packaging, having a completely ordinary square sheet.

You will need a square piece of pretty paper. You need to find a fold line for him, do this by folding the sheet diagonally.

And bend one end of the resulting triangle towards you, onto the front part. Then you need to tuck the side, and hide the end of its end inward.

Craftsmen do not stop at well-known schemes, but try to create new amazing forms.
Or I saw that the designers have developed such a version of the envelope, which immediately becomes an insert with information.

I offer step-by-step instructions, described in the video, on creating crafts with a heart-shaped edge. You will definitely not find such packaging on any of the other invited guests. You will be the only owner of such a copy.
This option does not require additional design. With its original edge, it already stands out and attracts the eye.
Common templates and diagrams
Well, now it's time to bring you the most popular and simple templates. Anyone can be taken as a basis and know for sure that you will always get an envelope.
There are schemes with and without inserts, rectangular and square, with round corners and regular, etc.

A template with dimensions so that you do not have to guess and run with a ruler to banknotes.

Outline with a beautiful wavy top.

Complex idea with glue allowances.

Another easy option for wrapping a cash gift.

Taking the dimensions shown above, you can create such a shape. 
Or limit yourself to 16 centimeters and just wrap a gift in the bottom.

The following scheme will definitely appeal to girls.

Here, straight lines show where the folds need to be made.

A bar of chocolate can easily fit in this package.

And one more version of a rectangular packaging.
Thank you for your attention. Use any of the above options to show that you spent your time preparing for the holiday and wanted to make the newlyweds happy with the birthday or hero of the day. After all, homemade beautiful things have no analogues and are very highly valued.


