We will need: an ashtray, paraffin wax, silicone, scissors, plastic bottles, cardboard, a marker, plastic wrap, cement, plaster, varnish, glue gun.
1. Glue a piece of insulation to the base of the ashtray, which we will use as a handle or stand. Heat the ashtray slightly over the fire to cover it with a thin layer of paraffin (if not heated, the paraffin will hide all the small parts of the ashtray.

2. We take construction silicone. Such a syringe will cost about 100 rubles.


3. Cut the syringe with a clerical knife and coat the ashtray with silicone on all sides, except for the base. The thickness of the silicone layer should be about 5 mm. Work best with open windows.

4. Dry the mold for several days.

5. Cut off the extra bumps and rags from the mold, but do not remove it from the ashtray so that the silicone does not break.

6. Cut out strips from plastic bottles and solder a wide ring from them using a hot needle.


7. Glue the base of the plastic ring to the cardboard.


8. Draw a line with a marker along the part of the form that protrudes the most. This is necessary to determine the upper level of the solution. If we pour more of it, then we will not be able to extract the form from the frozen bed.

9. Cover the ring with plastic wrap with gaps outward.

10. Knead the cement mortar and fill it up to half of the bowl. We immerse the ashtray in the solution in the form (strictly vertically). Make sure that no air pockets form under the form.

11. If necessary, report or remove the solution. You can make a lock from the ball, but in this case it is not necessary, since everything is irregular in shape and will not be dressed differently.

12. Lubricate the upper edge of the solution with grease, then knead and fill the second part of the solution to the edges of the mold.


13. To speed up the drying process of the solution, when it grasps, disassemble the ring.


14. After 1-2 days we disassemble the bed. Here the upper ring fell apart, but its role is minimal, since the bulk of the gypsum mixture is poured into the lower part of the bed.


15. Carefully remove the ashtray from the silicone mold. It shouldn't break.

16. We put the silicone mold in the bed, collect the ring fragments around the bed, mix the alabaster thinner and perform a trial pouring. We constantly shake the bed.


17. We are waiting for 10-20 minutes (depending on the brand of gypsum), disassemble the bed and take out the ashtray.

18. We remove the plaster casting from the mold.
The ashtray is not at all difficult with your own hands. It can be an unusual gift or interior decoration.
We make an ashtray with our own hands from a beer can
To make an ashtray from a beer can, as in the photo above, we need:
- Metal can for beer or any other drink
- Metal carving scissors
- Work gloves
- Pliers
So, to make an ashtray, you need to decide on the choice of a beverage can. With scissors for metal, the top with the lid is cut off from the can. You won't need it anymore.
The walls of the remaining part of the can are cut into strips with scissors. The more stripes, the more “petals” you will end up with. You need to work with metal with gloves, because it is very sharp after scissors.
When the jar wall is cut, the strips can be folded in half and slightly obliquely. It turns out that each strip goes with its end to the next. Thus, you need to do with all the segments, as shown in the step-by-step photo instructions below.

The end result should be a flower-like cup. The metal ashtray is ready!
Ashtray made of shells.An ashtray made of salt dough or shells can decorate not only a room, but also
the office of its owner. This ashtray will be made using the reverse decoupage method. Ashtray decor consists of natural shells or wood shells.

For work we need:
- Transparent glass ashtray
- Leg-split
- Natural or artificial seashells
- Decoupage card
- Acrylic paints and varnish
- Hard brushes
- Putty
- Pendants on the marine theme
Before starting work, the surface of the glass base ashtray must be cleaned and degreased with alcohol. Next, on the bottom of the ashtray, you need to glue the printout of the sea chart face down. Excess paper is removed with sandpaper on a dry basis.
To make the ashtray look like an antique, you will need to cover it with craquelure substance. Thanks to this coating, cracks will appear on it.
To make the cracks more noticeable, after the craquelure dries, they are putty with bitumen. Now they are noticeable and visually deeper.
The instructions for the craquelure may indicate that its top layer must be washed off. You don't need to do this, because the yellowness from the top layer matches the old style of the ashtray.
Now you need to make the entire ashtray in the colors of the applique on its bottom. To do this, you need to mix several acrylic paints. You will need a light olive color.
The sides of the ashtray must be painted with a thick layer of the resulting primer.

The bottom of the ashtray must be painted with white. Work should be carried out with gloves in a place prepared for this, otherwise there is a risk of getting things in the room dirty.
The sides of the ashtray are again primed with putty. It is desirable that the layer is dense. When putty is applied, the ashtray should be rolled in sea sand and small shells.
Already at this stage, the little thing turns out to be very beautiful. After all the walls are covered with sand, they can be covered with clear acrylic varnish. The layer of acrylic varnish should be dense and uniform, then the sand and putty will firmly adhere to each other and the ashtray can be safely handled.
When the glue has dried, the walls of the ashtray should be painted over with gold acrylic paint. Since the surface is not flat, but voluminous, it is better to paint over the walls with a stiff brush with point movements.
Now you need to take a hard and dry brush. She needs to walk along the protruding parts of the ashtray in black, green, white and mother-of-pearl colors. The main thing here is not to overdo it, because the main color is golden. This is what the ashtray looks like at this stage.

For further work, you will need glue. A glue gun works best. They should glue decorative elements to the walls of the ashtray: larger shells and pendants with a marine theme.
Next, you need a hard brush again. With its help, with point movements, you should paint the shells on the walls of the ashtray, first in green, and then in yellow, gold and mother-of-pearl. There is no need to fill the objects with paint, you just need to add an interesting color to them. When the walls are painted over, they need to be covered with final layers of acrylic varnish and allowed to dry. There should be several layers of varnish so that the relief of the ashtray merges with it.
If the varnish is dry, you can start decorating the bottom of the ashtray. To do this, take a string of twine and attach it to the bottom with a snail, remembering to glue each section of it.
Now you can remove excess paint with alcohol. The ashtray is ready when the layers of varnish and paint are completely dry. It turned out to be a stylish and unusual gift.
Video selection on the topic of the article
And the video on this topic clearly demonstrates the manufacture of an ashtray. Happy viewing!
An ashtray can be a good gift for dad, provided, of course, that he smokes. You can find many different ashtrays on sale, but if the thing is made by hand, then this is already an exclusive gift.
You don't have to make an ashtray from scratch, but take an ordinary glass ashtray and decorate it with an original pattern. Glass ashtrays of simple shapes are an excellent base option, they are well patterned and look good. You can also use pottery or clay.
To make an ashtray with your own hands, you need to prepare: the actual glass ashtray (preferably white glass), alcohol for degreasing the glass surface, a printout of the selected pattern, acrylic varnish, primer and acrylic paints.
A drawing for decorating an ashtray can be chosen based on the hobbies of a man for whom a gift is being prepared, for example, on the topic of hunting or fishing. In this case, a picture of a lighthouse was chosen - the marine theme is always in fashion.
How to make an ashtray with your own hands
- The ashtray is decorated with decoupage. To begin with, degrease the glass surface of the ashtray with alcohol.
- The selected drawing is printed on plain A4 paper. The drawing should be suitable in size, that is, be of the same diameter as the bottom of the ashtray.
- Cover the drawing with a layer of acrylic varnish and dry.
- Cut out the pattern along the diameter of the bottom of the ashtray.

- A little water is poured into a shallow container and the printed drawing is soaked there for one minute (no more) so that it gets wet. Then the image is taken out of the water and gently dried with a towel.
- The back of the ashtray is sprayed with varnish (it is better to use an aerosol varnish). The drawing is placed on the bottom of the ashtray with the face down and carefully smoothed with your fingers. For a tighter fit, you can roll over the pattern. Allow the drawing to dry well.
- A special primer for decoupage or white paint is applied to the image.
- The entire ashtray is covered with acrylic paint of the selected color (dark shades look good), and then with bronze metallic paint. Apply paints with blotting brush strokes.
- The next layer of paint should be purple, it is also applied with blotting brush strokes, and the third layer is again bronze metallic. After all layers of paint have dried, the ashtray is covered with three layers of glossy varnish, which protects the paint surface from damage.
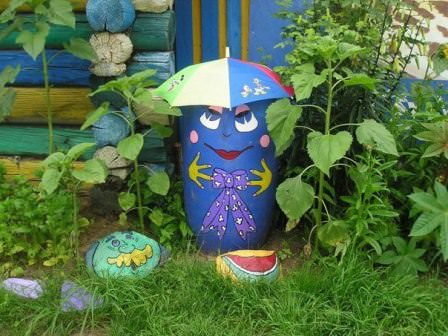
Buying a lot of country accessories involves serious waste, but today we are learning to save money and make some of them with our own hands. Garbage cans, bins and ashtrays for giving from improvised means - it's not as difficult as it might seem!
Of course, many are already accustomed to using an old bucket instead of an urn, and a small glass jar instead of an ashtray. It is quite real that it is convenient and inexpensive, but only such devices do not have any kind, more precisely, they spoil many of our achievements in design and decoration with their too simple appearance. That is why we decided to find a way to rectify the situation and tried some hand-made on ourselves, thereby learning how to make urns and ashtrays with our own hands for summer cottages. Everything is very simple, and now we will tell you how to do such interesting things on your own without spending a lot of money and time.
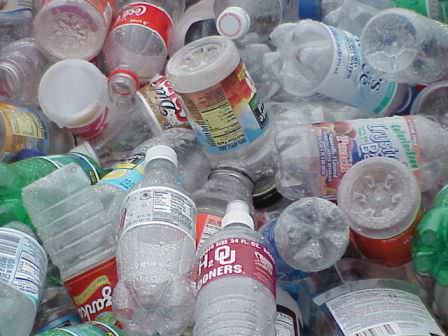
Waste bin made of plastic bottles
You can make a trash can for use in the country from a variety of scrap materials, but we were most interested in the production of plastic bottles, which can be considered a free building component. That's right, because there are plenty of bottles in every country house, they remain after water and drinks, after big gatherings, and you should not throw them away.
The first thing we need for production is a metal frame, which can be made of wire, aluminum plates and even a metal profile for drywall. By and large, we only need 2-3 identical elements of an oval, round or rectangular shape to build the base, the top of the tank and the middle jumper from them. Having adjusted all sizes and shapes, you can proceed to the next stage.
For this we need 2-4 pieces of reinforcement or the previously mentioned profile. These metal elements are necessary to fasten the main parts together and make the racks. You can choose reinforcement and tie it with ovals or circles with wire, or you can bend the U-shaped profile for drywall in one plane, and connect the posts from the profile with the main parts with clamps or even rivets.

When the frame of the homemade trash can is ready, we proceed to the final stage - we build the walls of the tank from plastic bottles.
So, for this we need a steel wire, a nail, an assembly knife, and a pair of pliers. First of all, we measure the pieces of wire along the height of the tank and cut them taking into account the attachment to the upper, middle and lower parts of the structure. The length of each piece should be 20-30 cm more than the height of the future tank.
Next, with pliers we clamp the wire on the bottom of the tank, throwing several turns on the frame, put 1-2 bottles on the wire, making a hole in them with a nail, make several turns of fastening on the middle part of the frame, again a couple of bottles and now fastening to the upper part.
It is highly advisable to think over the size, shape and color of the bottles in advance so that chaos does not turn out. You can define a uniform pattern using bottles of the same displacement and color, or you can transform the craft a little by choosing bright bottles.
Consistent fastening of bottles and a good tension of the wire, tight fit of the bottles to one another vertically and in rows will ensure the high quality of a homemade trash can. Of course, after production, it is worth remembering that it is not designed for heavy waste and burning debris.

These bins can be created with or without a bottom, but today most of these bins and bins are built without a bottom so that they do not have to be turned over during cleaning. It will be enough to just lift them.
Small urn from an old bucket or barrel
The used up tanks for liquid and bulk products should not be immediately determined to the landfill, because they can also serve well in the perimeter of the summer cottage. As an example, we would like to cite old buckets and barrels that can be easily converted into waste bins and small trash cans.
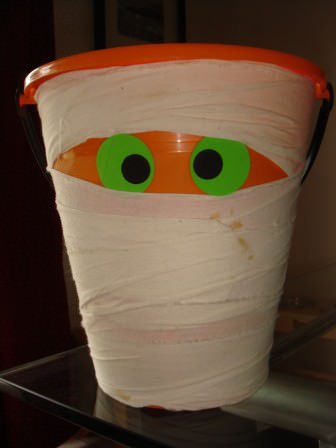
Any old bucket that is not too dilapidated, or a barrel that is not rotten, can become a garbage container in the gazebo, near the summer kitchen, and so on. To do this, we do not have to modernize a lot, but only adjust the tank to its size, perhaps patch up the old holes a little, repaint it in a cheerful color and install it where necessary.
Buckets can serve almost immediately, but barrels often have to be cut a little because they are too large. After carrying out the simplest reconstruction work, you can upholster the tank with building materials - plastic, wood, thick cardboard, after applying patches of tin or aluminum sheet. That's it, now only painting in the desired color or a bright drawing in the style of the location.
Country ashtrays with their own hands
Ashtrays in the country can be of two types - desktop and floor.
Making a table ashtray
Each craftsman makes table ashtrays in the country in his own way - pours out of plaster, clay and other materials, carves from wood or bamboo, cooks or rivets from metal. We offer the simplest, almost minute version, which is already known to many. This is a beer can ashtray.
To make it, you will need an empty and clean can of beer or soda. Its top should be carefully cut with a knife, then, also neatly, but with scissors, dissolve the jar vertically into a certain number of strips, leaving a little depth in the lower part, only a few centimeters. Now you need to wrap the stripes down, rolling them into a kind of roll, and that's it - the table ashtray is ready.

Floor ashtray making
With a floor ashtray for a summer residence, things are a little more complicated, but not so much. You can use an old milk can for its manufacture or even a piece of a large-diameter stainless steel ventilation pipe. With a can, it's a little easier, because you just have to throw a removable fine mesh on it, say, from an old construction sieve, and that's it. Further, only a kind of decor, and the ashtray goes to its workplace. You will have to tinker with the pipe, since it will need to attach the bottom. But here, too, ingenuity comes to the rescue, and we simply put inside an old bucket or its neatly cut bottom, which, resting its edges against the inner circumference of the pipe, becomes the bottom. Now the mesh on the top and decorative embellishments.

When working with metal forms and parts that need to be cut, we recommend that you be extremely careful and take all the necessary safety measures, as unpleasant injuries are possible.
How to make an ashtray for a summer residence with your own hands (video)
As you can see, there is nothing supernatural in the manufacture of such accessories, and therefore, as soon as there is a free minute or an urgent need for an urn, trash can or ashtray in the country, you can immediately start manufacturing and complete the project within an hour or two.


