Chic evening and wedding dresses, from which it is very difficult to take your eyes off, are sold in many clothing stores, but the tailoring standards are not ideal for everyone. In our article we want to tell you how to sew a corset for a dress, taking into account the features of your figure, in order to emphasize all its advantages and look like a real princess in your dress. No matter how fashion trends change, dresses with corsets are still in trend. No other cut and tailoring can better emphasize the figure or hide some flaws in a person’s constitution. In addition, the corset can be decorated with rhinestones, expensive stones, and decorated with sparkles, feathers and bows, which will make the prom or wedding dress original and one-of-a-kind. Without some experience in sewing, making a corset for a dress with your own hands can be a real challenge. That is why, before you start sewing, you should thoroughly prepare and arm yourself with the necessary information.
Types of corset
In the process of modeling an outfit with a corset, it is necessary to take into account the further purpose of the dress, the type of fabric for sewing it and, most importantly, the figure of the owner of such a thing. Regardless of what your outfit will be - evening, wedding or everyday, the standard corset pattern will be equally suitable for any of them.
Important! For an everyday dress, it is very important not to overdo it with sparkles and decorations, and for a wedding dress, on the contrary, not to make it too simple and everyday.
The corset can be of two types. We will talk further about the purpose and features of each of them.
Decorative corset:
- The most optimal option for girls with a “wasp waist”, which does not require additional adjustments.
- Fashion designers and tailors consider a decorative corset an outfit option for everyday wear.
- This outfit can be worn by both pregnant women and brides with an ideal figure.
Slimming:
- The product is designed specifically for body shape correction, namely its visual change.
- A properly sewn corset will lift the chest, hide excess on the sides, and additionally support the back.
Important! Brides purchasing clothes with a slimming model have a more slender and graceful silhouette.
What to make a corset from?
You can sew a corset for a wedding dress with your own hands from any dense fabric. In most cases, satin, lace or guipure are used as the main material, and cotton is used for the lining.
Important! If you do not use a sufficiently dense material when sewing, the product will end up wrinkled and wrinkled.
The following elements are used to decorate a dress with a corset:
- Eyelets;
- Lacing;
- Locks;
- Buttons;
- Spiral boning for finishing curved seams;
- Whalebone for making a slimming corsage;
- Hooks;
- Steel bones.
Important! On sale in the sewing accessories department you can find a variety of bones to give the corset its shape. It is not recommended to purchase cheap plastic bones for sewing. They are not durable, and in places of bend they twist and become deformed.
Lacing is usually designed on the front or back, some models include lacing at the front and back at the same time. For models with a tightening corset, this arrangement is very convenient, since it becomes possible to adjust the tightening force, thereby adjusting it to the desired size. You should not sew a corset that is too narrow or, on the contrary, a loose one, and especially not over-tighten it while wearing it.
Important! It is necessary to purchase bones for the rigidity of the corset only after constructing the pattern and determining its exact length. Trimming seeds at home is not recommended. Please note that the length of the bones should be 2 cm less than the main length of the corset, otherwise they may tear through the material.

For sewing you will need the following tools:
- Ruler;
- Scissors;
- Fabric hole punch;
- Strips of cellophane;
- Hammer for fastening eyelets;
- Rotary knife;
- Sewing machine;
- Disappearing marker for creating a pattern.
Create a template
Before sewing a dress with a corset with your own hands, you need to decide on the style of the dress, the purpose of the corset, its shape, as well as the length and other features.
Important! Before building a pattern on the main fabric, we recommend trying to sew a corset from cheap material, so to speak, making a trial version. This way, you can adjust it to your figure at any stage of sewing, and avoid mistakes when working on the main product.
The whole sewing process takes quite a lot of time. In the process of sewing a trial version, you will quickly understand the sequence, especially if you do not have some experience in this matter.
What measurements should I take to sew a corset?
Whatever shape or model your corset is, remember, it should fit and match your body type, highlight all your advantages and hide possible flaws. To correctly construct a pattern and organize the sewing process, you should correctly take the following measurements:
- Chest circumference.
- Waist circumference.
- Hip girth.
- Additionally, write down the distances from the waist line to the point under the chest, from the waist line to the bottom along the side seam, from the waist line to the bottom of the abdomen.
Pattern construction options
In the sewing industry, there are two options for constructing a clothing drawing:
- Settlement. An old and proven method for creating a pattern, which involves taking certain measurements for each selected model.
- Dummy. Construction takes 10-20 minutes - in such a short period of time, all measurements are taken more accurately in compliance with all the features of the human constitution. To construct a drawing using the dummy method, fabric is placed on a person or mannequin.
A fake method of constructing a corset pattern
Modern seamstresses and tailors use design using drawings less and less. Nowadays, the tattooing or dummy method is more popular. As we said above, it takes less time, and the accuracy of measurements is much higher.
To make a pattern, you should prepare:
- dummy;
- special disappearing felt-tip pen;
- pieces of polyethylene measuring 20 by 45 cm.
Important! The number of cellophane strips corresponds to the number of parts of the future corset.
Sequence of pattern construction:
- On the mannequin, mark a line under the chest, chest and waist lines, as well as an additional abdominal line. To do this, tie the laces or elastic bands horizontally on the mannequin.
- Draw lines along the tied laces with a special marker, then remove the threads from the mannequin.
- The next step is to mark the side seams and the center of the front and back parts, and also draw all the reliefs of the future corset.
Important! Since the parts are cut out by folding the fabric in half, measurements should be taken from one half of the mannequin.
- Take one piece of cellophane and attach it to the front of the mannequin, using a ballpoint pen to draw lines from the fold to the relief.
- Then transfer the side parts and back parts. When all the lines are transferred to the cellophane strips, check their correctness and evenness of application, add seam allowances.
As a result, you should have the pattern details, only on cellophane.
Calculation method for creating a pattern
Before sewing a corset for a wedding dress, any sewing workshop must take the customer’s measurements and design a pattern. Sometimes professional seamstresses use the new method that we mentioned above, but many rely on drawing on paper the old fashioned way.
Sequence of drawing construction:
- Take the simplest pattern for a dress as a basis or draw a rectangular grid and apply the measurements of the waist, chest and hips taken in advance on it.
- Then apply all the reliefs on the main pattern and make a pattern.
Important! Before you apply the lines to the fabric, be sure to add a 2-3cm seam allowance.
- After the pattern is prepared, it's time to transfer all the lines onto the fabric. Place the pattern so that the central cut of the back is parallel to the grain thread of the fabric, and the matching points of the parts on the waist line are parallel to the weft thread.
Important! This arrangement of the pattern will not allow the finished product to stretch during wear.
- The right and left sides of the corset are identical, so when cutting the fabric, fold it in half. If your lining is made of the same fabric, then fold it in four, making sure to align the edge.
Now you can start cutting the fabric.
Important! To make the fabric shrink, soak it in warm water before sewing. To understand where each part is, number them.
How to sew a corset for a dress?
- Sew the main fabric pieces along the side seams. Do the same with the lining.
- Cut the resulting seam allowances at equal distances from each other with scissors, not reaching the line 2-3 mm, and smooth them in different directions with an iron.
Important! This procedure is necessary to prevent wrinkles from forming on the bends.
- Now it's time to sew the lining and main fabric. To do this, fold the parts with the right side inward, sew one side seam and iron the allowances on one side, the second side seam, on the contrary, should be ironed.
- Turn the product right side out and smooth the seams through a thin cloth or gauze.
- Then, from each seam on the main and lining fabric, make two vertical stitches for the boning.
- Sew the drawstrings on the side seams and tuck the bones into them.
Important! Make sure that the seams on both parts are approximately at the same level. For a more accurate match of the seams, you need to start finishing seams for the bones from the center of the side seam, and then to the side of it.
- Connect the main and lining fabrics at the same level as much as possible; for additional fixation, you can baste them with thread.
- Carefully, slowly, lay the finishing stitch as close as possible to the main stitch, the next one at some distance from it.
- Do the same on the other side of the seam - you get grooves for the bones.
Important! To position the bone correctly, the width of the groove should be 1.5-2 times the width of the bone.
- Once all the pitting channels are ready, use scissors to trim the bottom and top edges of the piece.
Processing the upper edge of the corset
First of all, at this stage you must decide how you want to finish the edges of the item. There are several finishing methods: the edge can be treated with a special braid or edging, which are sold in the store, or you can make a regular smooth edge.
In the case of the latter option, at the stage of sewing the main fabric with the lining, the parts are sewn at the top and bottom, while leaving an unstitched area to turn the product inside out. After this, make another line along the front side as close to the edge as possible and sew up the open space below. In our article we will tell you how to process the edge of a corset with lining fabric.
Finishing sequence:
- Lay the lining fabric on a flat surface, straighten the corset on top and outline the top with chalk, soap or a marker.
- At a short distance along the product, measure 4 cm down from the cut of the lining, connect the dots in a line and cut out the part.
Important! You should end up with a 4 cm wide piece that completely follows the lines of the top of your corset.
- In the same way, cut out the edging for the bottom of the product.
- If the model includes straps, prepare them before processing the top edge.
Important! For proper processing, the width of the blank for the straps should be 4 times larger than the desired width of the finished straps.
- Cut the required width and length of the straps from the main fabric, fold the edges inside out so that they touch, iron, then fold in half and sew a vertical line on both sides.
- Place the straps vertically on the front side of the corset, align the cuts, place the edging on top, wrong side up, and sew close to the edge.
Important! To prevent the straps from moving during the sewing process, secure them with pins.
- Turn back the edging fabric, point the seam allowance upward and place another line along the edging at a distance of 0.1 mm.
- Turn the edging to the wrong side of the product and iron it.
Processing the bottom edge of the corset:
- Before stitching the bottom of the product, insert the bones into the prepared channels. There are 4 layers of fabric in each hole for the boning (base, lining and seam allowances). Bones can be installed in the middle or between the lower layers of fabrics.
Important! If the main fabric is thin, insert the bones between the lining fabric.
- To finish the bottom edge, prepare the edging in the same way as for the top edge.
- Place the border with the right side facing in and stitch around the edge.
Important! When using a sewing machine, be careful when working around the bones so as not to break the needle.
- Repeat the same steps as for finishing the top edge.
- From the wrong side, sew the piping to the lining using hidden stitches so that it does not turn away.
How to design a clasp?
- If the corset fastener will consist of lacing, make markings for the eyelets on the halves of the product. A special sewing tool, a punch, will help you make high-quality holes in the fabric.
- Mark the locations for eyelets along the entire length of the product.
Important! The standard distance between loops is 2.5 cm.
- Punch holes and install grommets.
- Measure the required length of the straps, cut off the excess, place the ends on the wrong side of the top of the product, at a short distance from the eyelets, and stitch.
We hope our tips and step-by-step process on how to sew a corset from jeans , silk and other fabrics, will help you create an outfit that your family and friends will appreciate. This dress will highlight the dignity of your figure, making it more elegant and graceful. Another incomparable advantage of a dress with a corset, made to order or made by hand, is its uniqueness. Therefore, you should not waste energy and effort on such a product, but using the example of world cultural stars, wear original items of your own design.

Dear friends!
In this master class, I won’t bother you with how, and most importantly, why, cut the fabric into small pieces and then put them together again.)) I want to concentrate on the technical side of this dress - the corset base.
There are different options, this is one of them - a corset base with an independent fastener - a detachable zipper. Construction is done according to measurements, without tightening. The purpose of the corset in this case is to hold the dress in place, and not to contain excess volume.
This method allows you to reduce the load on the external zipper, reduces the number of layers sewn to one zipper, and makes it easier to approach all areas of the dress during use, if, for example, there is a need to iron it.
To make the corsetry, I call it the technical part of the dress, you will need: - interlining fabric (formflex firm hold, veri-shape durable press, or similar) - regilin 1 cm wide (hereinafter referred to by me as “bones”)
- organza (leftovers from previous projects will do) - lining - detachable zipper
 |
| 3 |
 |
| 4 |
 |
| 5 |
P.S. Organza tends to shrink from high temperatures, so run an iron over it before sewing. By the way, this applies to all parts of the corset, including the “bones”.
 |
| 6 |
Why this method of arranging the bones, and not the more common one, where the bones are stitched into reliefs?
- There are fewer thickenings in the reliefs, the thickness is more evenly distributed throughout the entire volume of the corset. There is less chance of “bones” running, because the model lines of the dress can be anything (as in this dress) and do not necessarily coincide with the typical reliefs of the corset.
Another plus is the opportunity during the fitting, when the corset is already half assembled, to make adjustments to the seams if necessary, without much effort.
Pin the lining parts of one set together with the gasket parts.
... and in the center of the darts.
Stitch seams and darts (except for the center back)
 |
| 17 |
 |
| 18 |
Iron
Connect all seams and darts of the second set of lining
 |
| 21 |
Stitch
Iron.
Sew with a single-foot foot
Pin the lining side to the zipper
 |
| 30 |
 |
| 31 |
The technical part of the dress is ready.
Pin together the top sections of the dress and corset.
Straighten the cut.
 |
| 38 |
 |
| 39 |
Stitch facing
 |
| 42 |
 |
| 43 |
 |
| 46 |
 |
| 49 |
In all centuries they were the main clients of tailors. And to please, tailors came up with special clothes that tightened what needed to be tightened and supported what needed to be supported. Corsets were made to look like an hourglass, but they had a thin waist and high chest.
Modern ones are not the brutal structure that they were in the Middle Ages. Today it is not customary to tighten the waist to the size of a lover’s neck, as it was before. However, having a waist is still fashionable today. That’s why corsets are sewn today to slightly correct the figure in some places.
For sewing linen corset First of all, you need to make a pattern. Take some measurements of your figure and measure the circumference under the bust (a centimeter extends at the level of the bottom strap of the bra), waist circumference. The centimeter goes around your waistband where you decide to place your waist.
If you want to tighten your waist, then reduce this size by the required number of centimeters, only within reasonable limits. Hip circumference - a centimeter runs along the protruding bones, the distance from the waist line to the point under the chest, the length of the product below the waist - measured along the side line from the waist to the bottom of the product, the length of the product below the waist along the belly line - measured in a sitting position with a ruler from the waist to the bottom abdomen so that the ruler does not interfere.
The simplest lingerie corset consists of seven parts: a back part with a fold, a side part of the back - 2 parts, a side part of the front - 2 parts, a front part - 2 parts, because the lacing will be located here. Take a sheet of paper (preferably graph paper) and build a rectangular grid for the future pattern. The width of the mesh is equal to the half-circumference of the hips, the length of the mesh is equal to the height of the product, which is the sum of the distance from the waist to the chest plus the length of the product below the waist.
Divide the horizontal line of the hips in half and draw a vertical line. This will be the side line of the corset. Now the front of the corset is on the left, and the back is on the right. Divide the front of the corset in half and draw a vertical line. Also divide the back of the corset. Find the centers of the side corset pieces and draw a dotted line. From there you will set aside the main measurements.
Divide the measurement of the half-circumference under the chest by four and set aside the resulting centimeters on the upper segment. On the front part, the resulting centimeters are deposited from left to right from the leftmost point, on the side parts this number is located on both sides of the central dashed line equally (divided in half), on the back part 1/4 of the half-circumference of the chest is laid off from right to left from the rightmost point.
Formal going out dresses are traditionally made with corsets, but this item of clothing has also become firmly established in everyday life. Urban models, variations of underwear, and weight loss products appeared. To have an idea of how to sew a corset, you can check out the master class for beginners. Preparation of materials, assembly method, design of the fastener - even a beginner can do all this. And finally, the product can be decorated to your liking.
Many people associate a corset with a wedding dress. You can sew an integral attribute of the celebration with your own hands. Manufacturing does not require special skills when it comes to simple options. The more complex the model, the more experience is required from the master.
Do not handle complex items of clothing. First, you need to practice on basic models, understand the intricacies of pattern construction and sewing. If everything goes well, you can take a more difficult option.
Corsets are divided into two groups: decorative and slimming. The first ones are suitable for those whose figure does not need correction, as well as for pregnant women, people with health problems, when tightening can cause harm. A slimming option will add elegance and grace. It will lift your chest, make your waist thinner, and your back straighter.
The product can be made from absolutely any material that will withstand long-term use. You should not take on sewing a corset to lose weight on your belly yourself; excessive prolonged tightening will harm the internal organs.
When choosing a model, consider whether the figure requires correction. When the answer is yes, the location is indicated:
- If a girl wants to lift her breasts, then choose models with a highlighted neckline and cups.
- For a thin waist, the peculiarity of corset construction comes down to a pronounced center line.
- For general tightening, a standard model is sewn.
For the lining, use soft cotton material. For the upper part, the fabric is selected at the discretion of the future owner of the corset. It can be denim, guipure, silk, satin, satin.
The more the figure requires correction, the denser the fabric should be.
Materials and tools
Tools and materials play a key role, as does pattern construction. Cotton fabric is used for the base, and any high-quality fabric is used for the top. It is undesirable to purchase bulk material; when attaching eyelets and frequent use, there is a risk that the fabric will simply come apart. As accessories you need to purchase:
- eyelets, buttons or hooks;
- locks;
- ties;
- whalebone;
- regilin;
- spiral and steel bones.
Lacing is performed both from the back and on the center line in front. Also, both options can be combined in one model. The appearance of the item directly depends on the accuracy of the fastener design.
Tools for modeling the product and its assembly are needed in full: a ruler, cellophane strips, a sewing machine, devices for attaching eyelets, scissors, and a cutting tool. You can always practice and sew a corset for a dress from inexpensive, available material. When working with a clean version, it will be difficult to make adjustments. 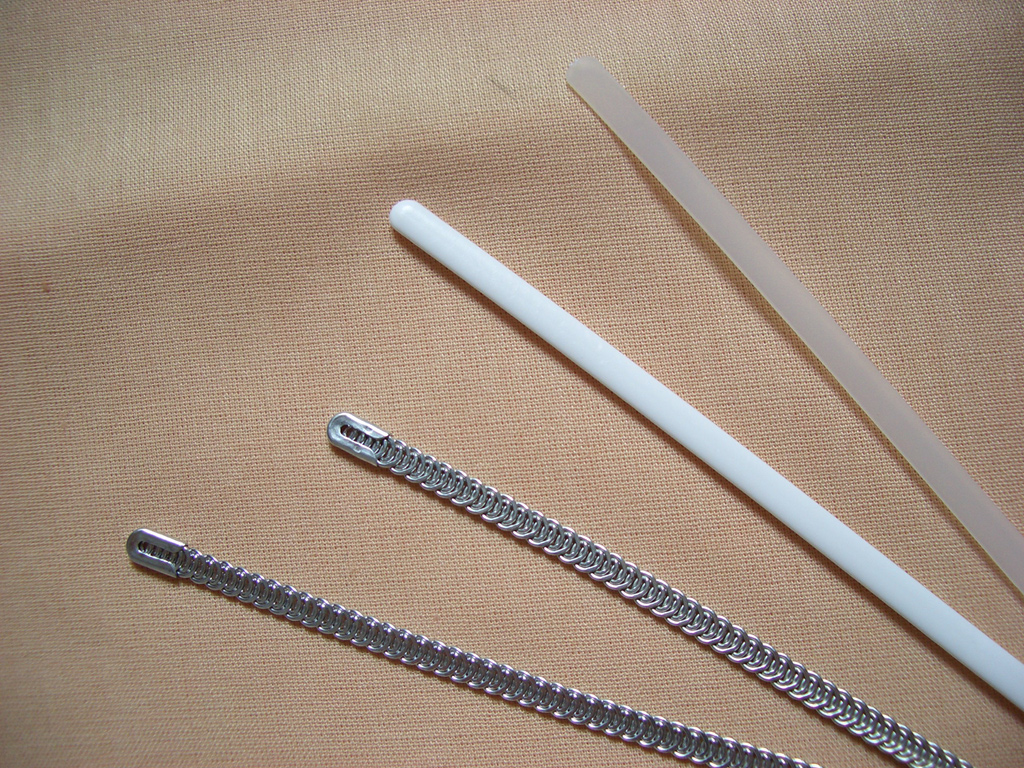 Bones
Bones  Eyelets
 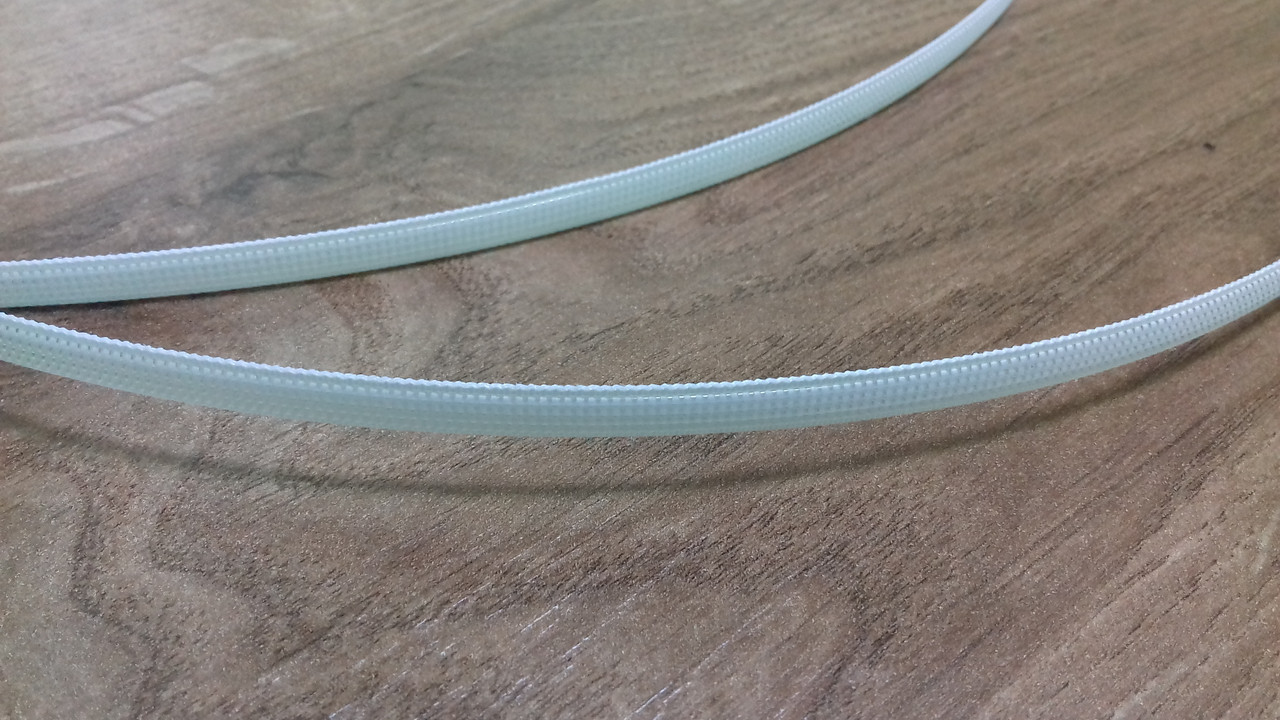 Regilin
  Corset cord
Taking measurements and creating a pattern
Once the craftswoman has decided on the type of corset, she can begin creating the pattern. First of all, take measurements so that the product fits perfectly:
- chest girth;
- hip girth;
- waist circumference;
- from the point under the chest to the waist;
- from the waistline to the bottom along the side seam;
- from the waistline to the bottom along the stomach.
Modeling and sewing a corset can be carried out using two different methods of creating a pattern - calculated and dummy. The latter is usually called the tattooing method. The calculation consists of taking measurements and creating an individual pattern. The second one is simpler - the fabric is pinned according to the figure (or a mannequin placed in place is used). For the fake method, follow the instructions:
- The cords are tied on the mannequin in three places (chest, waist and abdomen). Use a cutting marker to draw them out and remove them.
- Also, using a disappearing marker, draw lines, seams, mark relief parts, and the location of the bones.
- Wrap part of the mannequin with cellophane film and trace the details with a pen. The finished elements are obtained by adding only seam allowance.
The construction of a slimming corset is not much different from a decorative one. Difficulties arise when modeling unusual original products. In this case, the master class will not help; professional courses will be required. Modeling technology comes down to simple steps:
- The pattern is transferred to a rectangular grid and adjustments are made. After this, a pattern is made. If the model is made for a girl, then the waist line is made less pronounced.
- Transfer the pattern to the fabric, marking all the details and numbering them. They check the accuracy, add seam allowance, and cut it out.
The technology of sewing a corset is carried out according to a template. After going through all the steps, you will get a “naked” standard model. It can be decorated or left as is.
It is worth remembering that only options with cords and ribbons will help slim your figure and model your silhouette. This effect cannot be achieved with buttons or a hidden zipper.
Sewing instructions
After the above preparations, you need to transfer the pattern to the fabric. For transfer, use tailor's crayons, special cutting pencils or thin pieces of soap. To do this, observe the following rules:
- Position the pattern so that the back is parallel to the grain thread.
- The joining points of the parts (precisely at the waist level) should run parallel to the weft thread.
- The correct corset does not stretch at the waist.
- The left side duplicates the right.
The material is cut according to the transferred pattern. In order for the product to fit better and perform its functions, the cut fabric is numbered and then dipped in warm water.
Instructions on how to sew a corset with your own hands:
- Sweep the central and side elements. Sew with back details, try on. Iron the seams and stitch them together.
- Repeat the steps with the main parts. If adjustments are not required, then also finish with a machine seam.
- Connect the outer part and the lining.
- Sew drawstrings on the side seams and insert bones. Ideally, they are located between the base and the lining. Instead of drawstrings, it is allowed to use rigilin - this will greatly simplify the work.
- Secure the rigilin with two lines, and cover the edges with masking tape. Sew both parts of the product.
An important part when sewing a corset is the design of the fastener. It can be done both on loops and on eyelets, buttons, or a hidden zipper. With eyelets, everything is simple: holes are made with a punch, and the metal edging is secured. To decorate the corset with loops, follow the instructions:
- Cut off the fabric strip and attach it to the wrong side.
- The strip is turned inside out, secured with a pin, then cut into pieces of equal length.
- The edges are overcast to prevent them from fraying during sewing and use. Otherwise, the fabric may come apart at the most unfortunate moment. Make the loops so that they are the same length and width.
- Attach the loops from the inside with matching thread.
You can insert a ribbon or cord into the fixed stitched loops for subsequent tightening. To make the corset clasp for a wedding dress look neat, it is made of fabric of the same color and texture as the main product. Before tightening, check the reliability of the hinges.
 Product decor
The corset pattern does not imply the presence of jewelry. The advantage of simple models is that they can be modified through decoration. For evening and wedding options, rhinestones and crystals are often chosen, which shimmer when hit by rays of light. At the same time, it is important to observe moderation; the more abundantly the top of the corset is strewn with crystals, the more modest the skirt should look.
Models in a romantic style are decorated with satin ribbons, lace, weaving, elegant frills, embroidery, and translucent falling sleeves. The decor is usually chosen in the same color as the corset itself. If desired, you can make a belt from a satin ribbon. It is tied and secured with a bow, which can be located either at the back or at the front.
Corsets hand-embroidered with rhinestones, beads or decorated with handmade embroidery are considered a special luxury. Such models are chosen for special special events, including weddings. They cost an order of magnitude more than standard options. This also includes exclusive products with a corset decorated with precious stones or feathers.
A master class on sewing a corset will allow you to make a standard product that can be easily transformed using embroidery or appliqué. At the same time, even a novice craftswoman will be able to create a slimming or decorative model at home. The main thing is to choose high-quality materials and do everything exactly according to the instructions.
Video
Femininity is back in fashion, if you want to highlight your curves without breaking the bank, learn how to sew a corset. This elegant wardrobe detail makes the waist thinner and the décolleté area more seductive.
Materials and accessories for making a corset
Sewing a corset requires perseverance and precise cutting from the seamstress. If you do not have experience in creating patterns, you can choose ready-made ones or order individual measurements from a cutter.
Knowing how to sew a corset yourself can add some spice to your look.
Modern corsets come in two types.
- Decorative or corsages. They don't model the figure. They are distinguished by high density, suitable for slender girls.
- Slimming – creates the perfect silhouette. Suitable for women with curves.
The selected fittings depend on what type you choose for custom tailoring. If you have no experience in making such products, then it is better to stick to a simple decorative corsage without a top.
Accessories and material:
- dense and non-stretchy fabric for the top;
- corset lining fabric or plain cotton;
- reglin;
- grosgrain ribbon;
- spiral or plastic bones;
- sewing threads;
- bias tape;
- accessories for lacing;
- lace, hooks, buttons.
If you decide to sew a slimming option, you will need whalebone. For lining, you can use the same fabric as for the top.
How to sew a simple corset with your own hands - step-by-step instructions for beginners
Experiment with inexpensive fabric before working with your base material. This will help you understand how the finished product will look and make individual adjustments to the pattern.
Sewing a corset step by step:
- Transfer the pattern to the fabric and cut it out, be sure to respect the seam margins.
- Baste the center front pieces with the side pieces.
- Baste the side backs with the lining details.
- Sew and press the seams.
- Connect the lining and the top.
- Sew vertical channels along each seam, inserting bones into them. Instead of channels, you can sew ragline and close it on top with a ribbon, but in this case you will just get a tight bodice. Both the bones and the raglin should be about 2 cm smaller than the seam.
- Finish the edges with bias tape or piping; it is stitched to the base and then carefully hemmed by hand.
- Mark holes for lacing, pierce and install eyelets.
The corset is ready, now you can sew on decorative details - ribbons, beads, rhinestones, pieces of leather or fur.


