Very often, manufacturers of Android smartphones equip their firmware big amount Software that users will never need. At the same time, such software takes up a sufficient amount of memory on the internal storage and cannot be moved to the card. Moreover, all these programs “hang” in RAM and “eat up” a significant part random access memory and productivity central processor. Today we will talk about how to deal with this and teach you how to remove system applications on Android.
You need to carefully remove unnecessary applications (for example, maps, the launcher itself, music, cloud, Facebook, Google movies, YouTube, etc.). The fact is that some of them are necessary for the operation of the system and, if they are removed, its functionality will be impaired. For example, if we remove the standard browser and do not install a third-party one, then when we try to access the Internet, the OS will throw an error.
Moreover, if you delete, for example, the service wireless connections(and this can be done easily), Wi-Fi or Bluetooth will simply stop working and can only be restored by flashing the firmware. The list of necessary components can be continued for a long time.
Therefore, before you start uninstalling, be sure to make sure that the program is not needed for the OS to work and its absence will not harm it. Also pay attention to the prompts of the uninstallers themselves.
Methods for removing and disabling system software
So, let's get straight to working on the standard programs on your phone or tablet. You can do this most different ways, both using third-party software (in most cases) and standard tools. You should know that all of these options, except one (does not remove all programs) require Root rights. You can get them in different ways depending on the firmware (Android 2, 3, 4, 5.1, 6.0, 7, 8) and smartphone model. The KingRoot program often helps.
Root permissions are administrative privileges in Android that allow you to modify the firmware files itself.
Disabling using standard means
This method is the simplest and works without Root rights. However, it also has disadvantages. The fact is that not all programs can be disabled. Let's look at how it works:
- Lower your device's notification bar and go to its settings. This is usually a gear icon.

- Scroll the contents of the window a little lower and find the settings item called “Applications”.

- Next, select the application you want to disable.

- If this program supports the shutdown function, you will see the corresponding button. Just press it.

- Next, select the item marked in the screenshot from the pop-up menu.

- Programs disabled in this way are not deleted: they simply stop until you run them yourself.

Attention! When you disable the standard software using the described method, the updates that were installed on it will be automatically deleted.
Program "Remove system applications"
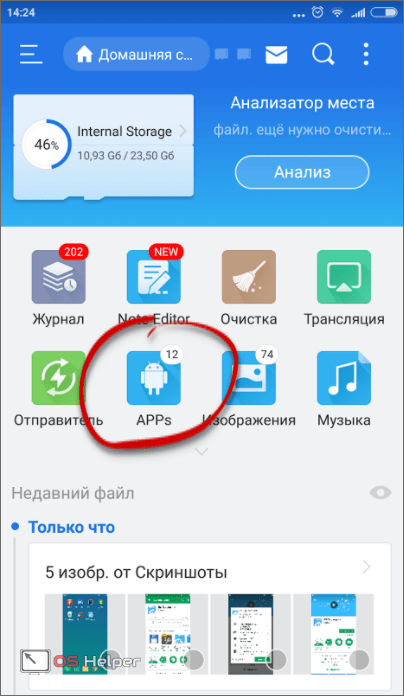
Next we move on to using a third-party software. The first application on our list will be “Uninstall system applications”. You can download it at Play Store, which is exactly what we will do now.
- Let's go to the store Android applications and write the name of the program in the search bar. As soon as the desired result appears in the results, click on it.

- Install the program by tapping the button marked in the screenshot.

- We allow access to location, multimedia, Wi-Fi and other functions.

- The download of the program we need will begin. Since its size is small, it will not take much time.

- So, the download is complete, so let’s proceed directly to working with the application.

- At the first launch, we will need to provide the same Root rights that were mentioned in the introductory part of the article. Click the button marked in the screenshot.

- A list of all applications, including system ones, will open. We check the boxes that we want to delete and press the button marked “2”.

- We will be warned that we have identified applications that are important for the operation of the system. Think twice if you see such a message. In our case, everything is correct, so click “Yes”.

- The removal process will be completed in a matter of moments.

Ready. The program will disappear from your smartphone at the same moment.
Let's consider another option, which, if it differs in some way from the first, is only appearance. We will also download the program from the Play Market.
- We begin to write the name of the utility in the search bar of the Google store and, as soon as our program appears in the search results, tap on it.

- Next, press the familiar green button.

- We allow Easy Uninstaller all required powers.

- We are waiting for 5 MB to be downloaded from the network and installed on our Android.

- We go to the home screen and see a new shortcut in the form of a trash can. This is exactly what we need.

- In the list of programs available for removal, mark one or more items and press the button marked “2”.

- Once again we confirm our intentions by clicking on “OK”.

That's all. The application or applications will silently disappear so that they no longer burden our phone.
CCleaner
Here's another one interesting option. Surely, few of you knew that the well-known program for cleaning the disk and phone storage is capable of deleting pre-installed applications. Nevertheless, it is true. Below we will show how it works.
- In the same way as in previous cases, we are looking for the application in the Play Market.

- We install it by pressing the familiar button.

- We are waiting for the download of all the files necessary for CCleaner to complete.

- Let's launch our cleaner. Today it will act as an uninstaller.

- So, when the program opens, go to its main menu. To do this, click the button with the image of three horizontal stripes (marked in the screenshot below).

- In the menu that slides out from the left side, click on the “Application Manager” item.

- A list of installed and system software will open. To begin the removal procedure, click on the icon with the image of a trash can.

- And again we are warned that if we thoughtlessly “demolish” the standard software, we can easily “kill” our operating system, which, unlike a computer, is not so easy to repair. If you understand this, you can continue. Click the button circled in the picture.

- Mark the programs or games that need to be uninstalled and tap on the “Delete” button (marked with the number “2”).

After this, the program, game or their combination will be removed from Android.
Via file manager
This removal option unnecessary applications from Android is different from the above. Here we will do everything ourselves, while the previously described uninstaller programs worked in automatic mode. So let's get started.
- We will use one of the best file managers. This is ES Explorer. Let's download it using Google Play.

- Click the button labeled “Install”.

- We allow the application all types of access that it needs to function properly.

- The program is downloading. Since it “weighs” a little more than 10 MB, it will not take up much of your time.

The application is installed and ready to use. Next we will look at how to remove standard programs. Launch the tool.

- Open the main menu of ES Explorer. We have marked it in the picture below.

- Now we need to allow our file manager to work with components operating system. To do this, enable the “Root Explorer” function using the trigger marked in the screenshot.

- Naturally, in this case we will need to provide the program with Root rights.

- When access to the firmware files is allowed, return to the main ES Explorer screen and go to the menu.

- Next, we need to go to the “Device” directory. This is ours file system, and not the file system of the drive, but the system disk or firmware.

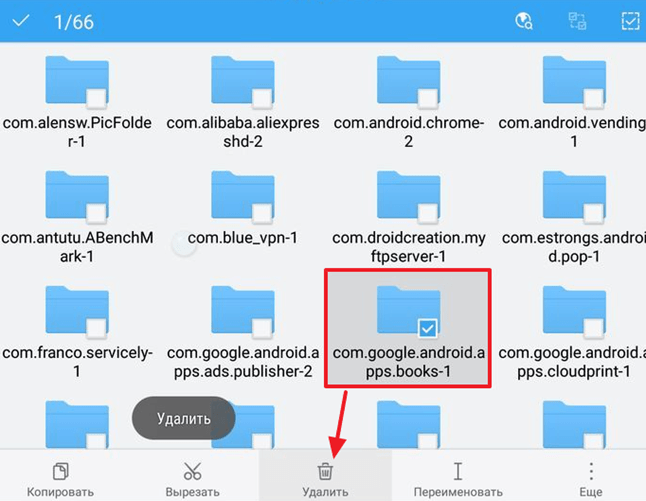
- So, to uninstall the same application, you need to erase files from several places. Let's visit the first one first. Go to the “system” directory.

- Then open the “app” folder.

- In Android 5 and above, you will see application folders. They contain APK files. In more earlier versions operating system they will be located here without directories. One way or another, we need to delete the selected application with or without a folder. To do this, click on the object and hold it until the button marked “2” appears.

We confirm our action by tapping “OK”.

So, we have cleared the first path, let's move on to the second.
- We return to the root directory of the firmware and go to “data”.

- Then open the “app” directory and “demolish” all traces here unnecessary program.

- Go to “data” again.

- We go to the directory marked in the picture below and delete the data of the unnecessary program from here.

That's all. The method is one of the most complex and dangerous for the OS. We recommend using it only for people who are well versed in the topic.
We are gradually moving on to another option for removing pre-installed Android applications. This time it will be another utility called Root Uninstaller. Let's look at how to work with it.
- In the old fashioned way, go to the Play Store and enter the name of the tool in the search bar. When the desired object appears in the search results, tap on its icon.

- Click the button marked in the screenshot.

- We wait for the installation of all the necessary files to complete.

- Go to the home screen or menu and select the application you just downloaded.

- As in other cases, we will need to provide access to the operating system files. Otherwise, nothing will work.

- When the program opens, we will see a list of all third-party and standard applications, and also, if any, games. Tap on the one that needs to be removed.

- An additional menu will open with several options.
Identification of the various buttons:
- Freezing. The application or game is blocked: it does not occupy RAM and does not load the processor. However, the occupied disk space is not freed and the program is not removed;
- Delete. The application is completely removed from Android;
- Backup. A backup copy is created, which in case of failures will help correct the situation and restore what you deleted;
- Reset. The software is cleared of all updates and data received during operation.
There is also a number additional functions not particularly important to us.

- As soon as we click the delete button, a warning will follow in which we will need to confirm the action taken. In order to do this, click “OK”.

Attention! To ensure data safety and guarantee stable operation of the system, be sure to use the tools before deleting each program Reserve copy!
From the name of this program it is clear that it requires superuser privileges to operate, although they are required for our entire list. So, let's look at how to work with Root App Deleter in more detail.
- The first thing we will need to do is download the application to our phone. To do this, we will use the Google Play store. Enter the name of the program in the search field and select the desired result from the results.

- On the Root App Deleter home page, click the familiar button labeled “Install”.

- The program “weighs” only 700 kilobytes. This is very little, especially compared to competitors.

- So, the list of uninstallers has been replenished with a red icon, click on it.

- There are several tiles in the main menu of our application. We will work with the uninstaller. Click on the item marked in the screenshot.

- Next, we will be asked to select one of the program removal modes. This could be a newbie that automatically creates a backup copy of the existing software before uninstalling it. There is also an expert mode in which programs are deleted immediately and irrevocably. Choose the algorithm that suits you.

- As a result, a list of programs available for removal will appear. We will uninstall the most unnecessary of them. By at least, in our opinion. Click on the application name.

- Since this is beginner mode, there is no delete button, but there is a disable button. This way we can test the operation of the system and, if everything is fine, we will remove the software completely in expert mode.

- As in other cases, you cannot do without Root rights. Tap on “Provide”.

Ready. The program is disabled and no longer consumes phone resources.
Titanium Backup
Next up is the famous backup app. Among other things, the tool can remove any software, and if SuperUser is present, even system software. So let's figure out how to work with it.
- So, go to Google Play and look for Titanium Backup there. The main thing is to find the Root version. Otherwise, nothing will work. See screenshot attached below.

- Then, as in other cases, press the button indicated in the screenshot.

- We are waiting for the download of the small file to finish.

- And we launch our Titanium Backup by tapping on its icon on the home screen.

- When starting, the program will request access to the firmware files - we provide it.

- And here a small obstacle awaits us. The fact is that for Titanium Backup to work properly, you need to enable USB debugging on your phone. Don't be alarmed - there is nothing complicated about it. Initially, click “OK”.

- Next, let's move on to the settings of our device.

- Scroll to the bottom of the list and select “About phone”.

- Next, you need to quickly start tapping on the “Build number” item. In our case, there is a non-standard add-on to Android - MIUI, so here we click on its version.

After this, an additional item called “For Developers” will appear in your settings.

We just need to switch the trigger marked in the screenshot to the active position.

Now you can continue the instructions for removing useless system applications from Android through Titanium Backup.
- Go to the “Backups” tab and click on the program that we want to “demolish”.

- Here we see several points of working with the software. Below is their designation.

- After clicking the delete button we are in last time will warn that we have not created a backup copy of the program and that if we remove the system software, the operating system may crash. Despite everything we click “YES”, we still advise you to create a backup.

A little earlier, we removed standard applications from the system using the same program. However, now we will use another tool, which is also included in the functionality of ES Explorer. It works like this:
- Launch ES Explorer from the icon on the desktop or in the application menu.

- On the main screen, tap on the marked icon.
- Select the application that you want to remove.

- Click the “Uninstall” button.

Root rights in in this case are not required, since the system has remembered ES Explorer after the first grant of permissions.
- The uninstallation will begin, which looks exactly the same as a standard Android uninstall.

That's all - the program or game has been deleted.
There is also an option to remove built-in applications using a PC through the Debloater program, but it does not always work and is quite complicated. It is better to use one of the methods described above.
Results and comments
So, now the question of how to remove factory applications on Android is completely revealed to you. We have provided a lot of methods, one of which will definitely work. It is important to perform a backup before any action so that you can restore the data later if necessary. You can also disable the software rather than uninstall it in order to check the functionality of the system without it.
One way or another, if something doesn’t work out and you still have questions, describe the situation in the comments, and we will certainly try to help.
Video
Also, for greater clarity and completeness of the picture, we suggest watching a training video on this topic.
Which are then not used by the user and consume system resources. However, such applications are considered standard and cannot be removed by ordinary means. This situation often does not suit users and they wonder how to remove standard applications on Android.
In this article we will try to answer this question. But before we get started, there are a few things to note important points. Firstly, deleting standard applications can lead to unstable operation of the device. In order to reduce the likelihood of various problems and errors, do not delete applications with an Android or Play Market icon. And secondly, to remove standard applications you need . Without ROOT rights nothing will work, don’t even try.
Method number 1. Use the Root Uninstaller application.
The easiest way to remove standard applications on Android is the Root Uninstaller application. This application allows a user who has ROOT rights to manage standard applications as he wants. For example, with Root Uninstaller you can remove standard applications, freeze standard applications, create backup copies of deleted applications, restore remote applications, and also hide applications.
Root Uninstaller is very easy to use. First, you need to install this application on your smartphone and launch it. After that, simply select the standard application that you want to remove, and in the window that opens, click on the “Uninstall” button. You can also freeze it instead. In this case, it will stop working and disappear from the list of available applications, but will not be deleted from Android devices.
The Root Uninstaller application can be downloaded from the Google Play store. This application is available in both .
Method number 2. Remove standard applications manually.
You can also remove standard applications from your Android device manually. In this case, to remove standard applications you will need file manager, which can use ROOT rights and work with system files. In this article we will use ES Explorer.
The first thing you need to do is configure ES Explorer to work with ROOT rights. To do this, launch ES Explorer and swipe right to open the side menu of the application. Once the menu is open, go to the Tools section. Here you need to click on the “Root Explorer” menu item and turn it on.

As a result, a request to grant root rights will appear. Click “Ok” to grant root rights to the application. And after root rights are granted, click on the “Root Explorer” menu item again and do not release your finger until a menu appears on the screen with additional settings. In this window you need to select “Connect as R/W”.

And then, check the boxes next to the “RW” option and click on the “Ok” button.

This completes the setup of ES Explorer and you can proceed directly to removing unnecessary standard applications on your Android device. To do this, use ES Explorer to open the internal Android memory device and go to the /system/app folder. Here you just need to note APK files standard applications and click on the “Delete” button. In addition to APK files, you also need to delete files with the application name and ODEX extension (if any).

If your device is running on Android based 5.0 or more new version Android, then in the /system/app folder all applications will be located in separate folders. In this case, you need to delete them along with these folders.

After deleting the applications themselves, you need to remove updates for them. To do this, go to the /data/app folder and if there are APK files with updates there, then they also need to be deleted.

In Android 5.0 and newer versions Android updates will also be located in separate folders. As before, we simply delete them along with the folders.
The last step is to delete the databases and cache that are associated with the application. To do this, open the /data/data folder and delete the folders there associated with the standard applications to be removed.

That's it, the removal of standard applications from Android is complete. Reboot your device for the changes to take effect.
Most owners of Android devices know that on a smartphone or tablet you can initially find a bunch of unnecessary junk in the form of pre-installed applications. Judging by the reviews, most of them are not only not needed by the average owner, but also cause quite serious indignation at the fact that such programs are constantly updated without his knowledge and take up space in internal storage or use RAM. How to remove Android system applications will now be shown. And it is absolutely not necessary to have or be a superuser. But first things first.
How important are system applications?
Many people think that all built-in applications of Android systems are “built into” the operating system and are mandatory components for its functioning. This is wrong.
In addition, any device based on this OS has at its disposal unnecessary services that use Google registration with confirmation via Gmail. The question arises: why register the same Google account+, if the device was initially confirmed according to the standard procedure?
And if you look at services like Google Maps, it’s not hard to imagine how much space they take up in internal storage. There are no questions regarding applications that use geolocation, but most uninitiated users do not need this. Removing system applications w3bsit3-dns.com (a specialized site dedicated to mobile gadgets) recommends using several accessible ways, even in the absence of root rights or superuser rights, which is often a prerequisite. Let's look at the most common options.
Removing system applications from Android devices: general rules
Let’s immediately differentiate the understanding of deleting or disabling standard programs from similar actions based on firmware. With system firmware, the situation is much simpler, because in most cases, even when installing them, intervention is required at the superuser level, similar to Windows systems where there is Account super administrator. The essence is the same.

Some programs installed on Android devices allow you to bypass these restrictions, especially when flashing firmware, but a “clean” system can easily resist changes. Hacking an OS to grant developer rights, so to speak, is quite simple. But it will be problematic to remove Android system applications correctly.
Using programs like Explorer
An inexperienced user needs to know that the entrance to Google service Play with an attempt to remove an application will not have any effect (it simply will not appear there). Deleting program files manually is also a thankless task, since most users do not know where all these objects are located. In addition, many of them may be hidden or contain data in locations other than the installed program directory.
In the very simple version you should use Root Explorer or its analogues (Framaroot, Titanium Backup, Root App Remover).
In Explorer, you need to find the tools item and, by entering the root explorer menu, agree to the provision of superuser rights. Then in a new window you should confirm the R/W connection, and then search in the app directory located in the System directory.

When the necessary APK files are found, you need to delete only applications, but not services (think a hundred times before doing this). But this won't be enough. At the same time, you should delete all objects of the same name with the .odex extension. Only after this the system will be cleared. Some people believe that this cleaning method removes registry entries. We beg to differ with this, because in Android, built on the basis of Linux systems, there is no registry at all.
System App Remover
In the previous case, deleting pre-installed applications can be very easy to make a mistake. For example, it is known enough a large number of cases of “demolition” of the Wi-Fi module, as a result of which users were left without communication. Reverting the initial build after this is very difficult (but possible).
Another thing - official utility System App Remover, which can even be downloaded from Google Play. Only root rights are required. But the application filters system components, giving the user the right to choose, highlighting categories like “Can be deleted”, “It’s better to leave”, “It’s not safe to delete”. In the simplest case, deletion concerns widgets social networks(Facebook, Twitter) or similar services like YouTube. This will not harm the system.

In the second option on Android, the program does not recommend deleting system applications, since this may affect the list of contacts, calls, messages, etc. Again, without knowing the name of the service, you should not do such things, otherwise the phone mode can be deleted, after which making calls will become unavailable.
Uninstalling system applications without root rights
Now a few words about the lack of appropriate access rights to change the configuration. Uninstalling system applications from Lenovo, as well as from other manufacturers mobile devices, you can do it yourself without using privileges of this level.
To do this, you need to use the SuperOneClick and Deploater applications in parallel when connecting the device to the computer. Without talking about the principles of operation, we can only note that their actions force the system to believe that the user has developer rights. During the installation process, the drivers are first installed, and then the main application is launched. It operates based on vulnerabilities found in Android versions 4.0, so the antivirus may perceive the program as a symptom of external unauthorized influence.

Conclusion: The real-time scanner needs to be disabled. But the program deletes all unnecessary selected objects with .apk and .odex extensions automatically.
Is it worth doing?
Removing Android system applications looks acceptable. But do not forget that some services may be disguised, and their names will not tell the user anything at all. In particular, this applies to elements whose names begin with the prefix com.android or com.google. This is where you need to be especially careful and remove such elements of services only with a full understanding of all the consequences.
Device manufacturers build programs into their devices. Sometimes comfortable, sometimes not. Alas, it is impossible to remove unnecessary pre-installed applications. Therefore, they needlessly take up invaluable space on the hard drive, sometimes making it difficult for the processor and RAM to work. However, this problem also has a solution. How to remove useless programs?
Is it possible to remove system applications on Android?
Firstly, it is indeed possible to remove built-in programs. Secondly, this doesn’t even require special skills. You will only need to install root rights on the device. In other words, bypass internal protection system and gain access to all Android functions.
Why you may need to remove pre-installed programs
Besides the obvious - freeing up disk space - there are more important reasons: sometimes system applications an error appears, an unpleasant bug due to which the android cannot work normally. To the point where the device cannot be turned on. In such cases, a notification appears about problems in a specific standard program. One option is to remove it.
It is worth considering that not all applications can be removed without harm to the operating system. Root access allows you to use anything you want, but it can also do a lot of damage.
Important and useless stock apps
Without consequences, you can remove programs built not into Google Android itself, but into the shell of a specific manufacturer.
For example, Meizu smartphones with their proprietary Flyme OS shell have a “Tools” application, which has a ruler, compass, level, etc. Similar programs can be found in many shells like TouchWiz from Samsung or Xperia from Sony.
It is much more dangerous to get rid of Android programs itself. They all depend on each other. And even third-party applications use them for their own purposes. For example, if you remove Google Maps, you will not be able to play the popular Pokemon GO.
On the 4pda.ru forum, users have compiled an extensive list of built-in applications:
- Visit this page.
- Expand the spoiler “Description of stock programs.”
- Make sure that the application you are planning to remove does not have functions important for the OS:
- if the name says “YES”, it means you can erase the program;
- If “NO”, then you perform all actions at your own peril and risk.
How to get rid of unnecessary factory programs
Disable
To disable some stock programs, you don't even need root access. You can turn them off, the effect will be the same (except that they will continue to take up disk space).
Demolish
Installing root access using a computer
Please note that obtaining administrative rights will void your warranty service. Root makes the system more vulnerable to viruses and internal errors.
Manufacturers do not want to take on unnecessary responsibility, so the terms of use strictly state that rooting is a reason to deny you warranty service.

Uninstalling a program
It is highly advisable to save copies of the deleted files somewhere. Because your actions may have unintended consequences. And if errors or failures subsequently arise, simply return the application to its place - the problems should disappear.
For backup, it is recommended to use the Titanium BackUP program. With its help, you can either make a full backup of the device and in the future restore the non-working device to its saved state, or freeze a separate application that you want to remove, so that you can later unfreeze it and put it back.

How to remove standard programs on Android - video
Possible problems
After removing system programs, system malfunctions may theoretically occur. Therefore, it is best to back up a copy of the files in a safe place in advance so that they can be reinstalled.
But if a backup was not made and problems arise, flashing the device will help.
- Go to the official website of the manufacturer of your smartphone or tablet and download the required firmware version.
- Each device has separate instructions for reinstalling the system. Find it and act according to the recommendations.
All applications you deleted will be installed with the firmware, so any problems caused by deleting system programs will be solved.
How to get back deleted stock apps
If you have disabled them
If you simply disabled the program, then just launch it again in the “Settings” -> “Applications” -> “All applications” menu. To do this, find in the list the right application, select it and click “Run”.
You can also do Hard Reset, that is, resetting the settings to factory settings. This will delete all parameters and return the phone or tablet to its original state, and at the same time start the disabled standard processes. There are two ways to do this.
Hard Reset via Settings
- Open “Settings” -> “About phone” -> “Storage” -> “Reset settings”.
- Check the required boxes:
- “Deleting data” will destroy program settings, contacts, messages, etc.;
- “Formatting the built-in memory” will erase all data from hard drive devices other than those initially installed, that is, photos, videos, third-party applications.
- Click the "Restore" button. After a few minutes, the device will reboot in its original form.
Recovery using Recovery Mod

How to reset your smartphone to factory settings on Android - video
If you deleted them
If you saved a duplicate deleted files, then simply return them to their original place in the device. That is, place the .apk and .odex files in the /system/app folder, and the update files in /data/app (even if the updates are lost, the program itself will restore them).
If backup copy no, there are two options:
- or you find files from other users;
- or reinstall the Android OS.
Look for missing files only in reliable sources, as it is very easy to get a virus. Ask to look for data, for example, friends who also use root rights, or download information from trusted sites. Many Android forums have special threads where users share standard application files with each other. All materials are checked by forum moderators and the participants themselves, so the chance of infecting the device is minimal.
The last and always working method is to reflash the device. Download the official version of the system from the manufacturer’s website and install it via Recovery Mod.
Many built-in programs, especially from the device manufacturer rather than the developers Google Android, are useless. At the same time, they take up a lot of space, interfere with the system, eat up battery power and slow down the OS. Getting rid of them is not difficult, but it will require root access. And it is highly advisable to save copies of the deleted files in order to protect yourself in case of failures and possible errors.


