Manufacturers mobile devices, running on the Android OS, often integrate various software into the device’s firmware. Some pre-installed applications are very useful and exciting. Others simply clog the internal memory of gadgets, acting as useless ballast. And the most annoying thing is that removing system programs from Android is not so easy, because there is no virtual Delete button in their properties. Let's figure out how to remove standard applications on Android devices.
Ways to clean Android from built-in software
The Android mobile system is developed on the basis of Linux and is closely associated with the Google IT corporation. Therefore, everything related to Google services is pre-installed on phones and tablets. Such programs include YouTube, Google search engine, Play Mapket, Maps, Play Games and much more.
Despite the existing prohibitions on clearing mobile devices of system software, you can remove such applications on Android in several ways:
- through the Root Uninstaller utility;
- using a file manager that can work with Superuser rights;
- using the Debloater program and a personal computer.
Preparing to erase embedded software
Any interference with system files may result in unpleasant consequences– from minor malfunctions in Android to the loss of all personal data and settings. To prevent this, before deleting system applications on Android, it is recommended to do backup copy mobile device.
To create a backup, you can use the MyPhoneExplorer utility. The procedure will be as follows:
Now, if the removed software leads to a software failure, you can easily return everything to its place using the created backup file.
To remove a pre-installed application on Android, you will also need to open it on mobile device root access. Only with its help will an ordinary Android OS user be able to make any changes to system files.
You can activate superuser rights using the KingRoot program:

Once everything is ready, you can proceed directly to erasing unnecessary programs on Android.
Cleaning your smartphone from unnecessary software using Root Uninstaller
If you have Superuser rights unlocked on your device, then in a simple way To get rid of unnecessary embedded software is to use the Root Uninstaller program. Let's look at how to remove a system application on Android using it:
After rebooting Android remote applications will disappear from the mobile phone.
Cleaning the device from pre-installed software may negatively affect its functionality or even lead to failure of the device. To prevent your smartphone or tablet from becoming bricked, it is better not to delete files that have the Android OS icon opposite them.
Manually erasing firmware
If the required system application is not displayed in the list of pre-installed software (System apps) of the Root Uninstaller program or for some reason it is not removed, you can uninstall it through a file explorer that can work with extended rights. And such a manager is ES Explorer.
Using this utility, built into the system Android programs s are removed as follows:

The final step is to clear the Android cache of residual files. The specified data is located in the data/data folder. For the changes to take effect, all you have to do is restart your mobile device.
Cleaning the system from firmware via a computer
When considering how to remove built-in applications from a tablet or smartphone on Android OS, the Debloater program should be noted. This utility works through a computer and allows you to erase preinstalled programs from a mobile device even without activating the superuser profile on it.
The issue of deleting programs or games installed on a phone or tablet with the Android operating system arises for users regularly. The game may become boring, the program may become irrelevant, and space in the device’s memory needs to be freed up for something more necessary. In addition, very often the manufacturer includes some standard programs, which have very dubious usefulness, but occupy internal storage devices and the resources consuming them.
In this article, we will reveal some secrets regarding how to remove applications installed on Android, both standard and installed by the user.
How to remove standard android applications installed by the user
The easiest way to remove programs and games installed on the Android OS is by the user himself. To remove Not the right application from the memory of your phone or tablet, perform the following operations:
1. Go to Menu -> Settings -> Applications;
2. Select the application you want to remove;
3. Click the "Delete" button;
If you have selected an application in which the “Delete” button is not clickable (inactive), then this application is a system application and it is impossible to remove it using standard methods.
Uninstalling an application via Google Play Market
Some users who frequently download apps using Google's website Play Store, it may seem more convenient to remove such programs in the following way:
1. Launch the Google app Play Market on your phone or tablet;
2. Click on the characteristic Google Play Store icon at the top of the screen (a bag with an arrow to the right);
3. Select “My applications”, a list of everything that you have installed will open in front of you;
4. Select the one you want to uninstall from the list of installed programs and click the "Uninstall" button.
5. The application will be deleted from your device’s memory.
How to remove stock apps on Android
Standard applications that are installed in the operating system along with the firmware, as a rule, cannot be removed using the methods described above. Such applications are called system applications, and to remove them you need to perform additional operations. However, the only difficulty in deleting standard applications is the need to obtain Superuser (Root) rights on your phone or tablet.
In short, a Superuser, or Root in the Android operating system, is a system user with unlimited access rights. The so-called “rooting” of Android devices can take place differently on different phones or tablets. In many Chinese smartphones Manufacturers generally include root rights in the standard firmware from the factory, thereby making our lives easier. Tier 1 brands generally believe that this level of control over their devices is not beneficial for ordinary users, and their phones and tablets must be manually unlocked to gain root access.
Obtaining Superuser rights is a simple operation in itself, but it is the subject of a separate article. In the meantime, we will give some recommendations for removing standard programs, assuming that you have already received Root on your smartphone or tablet:
All standard applications are located in the device memory in the /system/app folder;
You can access this folder only using specialized software, for example, the Root Explorer application. Using his example, we will further explain how to remove unnecessary applications;
Think carefully before deleting standard applications. Perhaps some of them, which seem useless to you, are actually responsible for the operation of services needed by the system. Consulting about this on forums dedicated to your device seems to be good practice for us;
Google applications (Maps, Mail, etc.) can be safely deleted if you don’t need them. It is not recommended to remove Google services, since they are responsible for the operation of Google services, and uninstalling them can lead to problems with the operation of these services and even the entire firmware.
If you have decided exactly which standard programs you want to get rid of, use Root Explorer to go to the /system/app folder of your device. There you will find all the *.apk application files you have installed.
1. Enable R/W mode in Root Explorer;
2. Delete the apk files of the application you do not need;
3. Together with the apk file, delete the odex file of the same name for this application;
4. The application will be deleted from your device’s memory.
Exactly the same algorithm of actions is preserved for any other file manager that can use root rights to access the system partition and remove programs from there. Some system applications may also be located in the /data/app folder, check and remove them from this folder too.
We hope that this small instruction will be useful to you, and you learned how to remove standard android apps, and a bunch of unnecessary programs that the manufacturer crammed into your phone or tablet, after reading the article will not take up precious space on your device. Be careful when removing system programs and uninstall only those whose purpose you know for sure, so that you don’t have to re-flash the entire operating system due to failures. Good luck!
Many smartphone buyers can be called inexperienced. Such people don’t even know how to uninstall applications. They think that removing a program shortcut from the desktop entails eliminating the application itself. But in reality, everything is somewhat more complicated. It is about deleting programs and games that we will talk about in today’s article. We will also tell you how to remove standard applications - those that were preinstalled by the smartphone manufacturer.
The easiest way is to remove those utilities that you previously installed yourself. It doesn’t matter whether you did it when Google help Play or downloading the APK file from third party resource. There are two methods to remove programs and games. The first is the following:
Step 1. Go to the menu.
Step 2. Hold your finger on the icon of the application you do not need. The system will prompt you to move the shortcut to your desktop.

Step 3. Instead, move it to the " Delete" located at the top of the window. A pop-up menu will pop up in which you need to confirm your action.
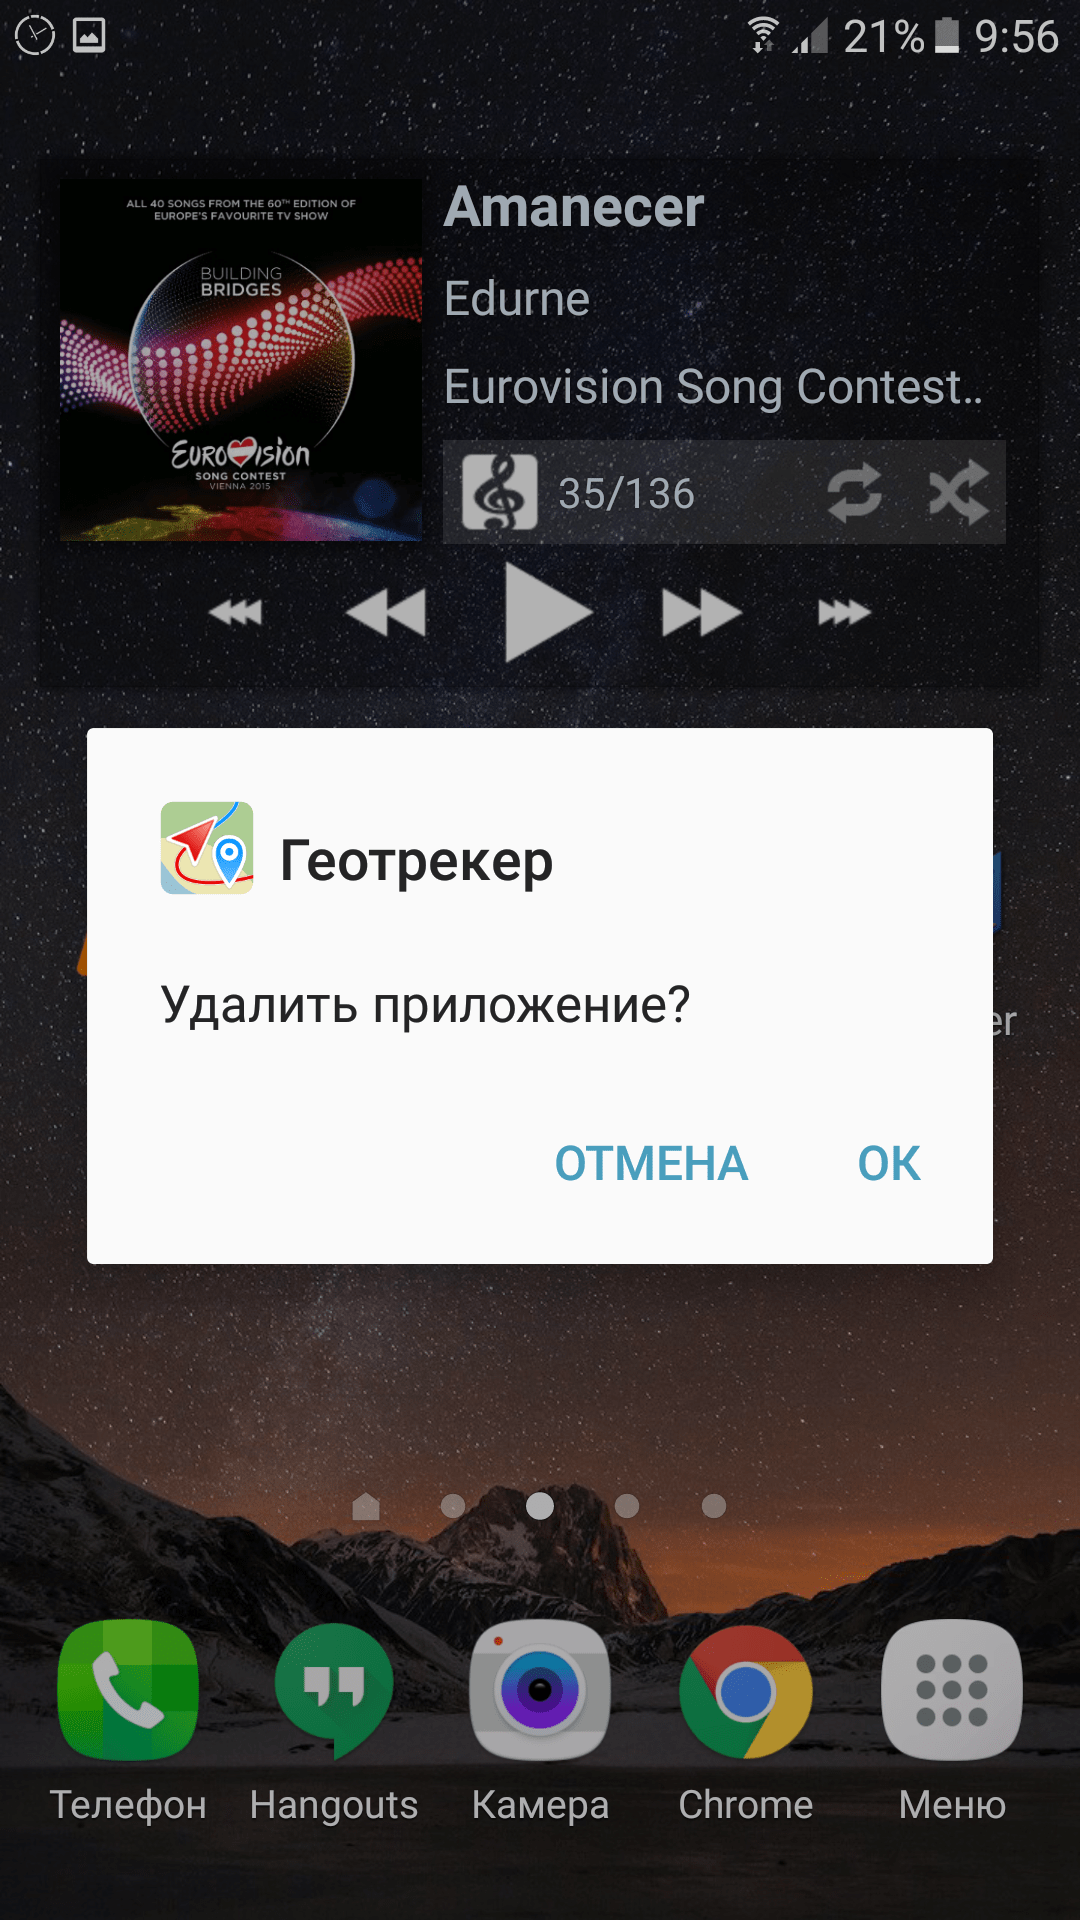
Step 4. The program will be removed from your smartphone fairly quickly.
As for the second method, it is somewhat more complicated:
Step 1. Go to the section " Settings».
Step 2. Select " Applications».

Step 3. You will see a list of all applications installed on your device. If this is not the case, then click on the item “ Application Manager» (usually required on smartphones Samsung).

Step 4. Click on the program you are going to remove.

Step 5. In the menu that appears, click the button Delete».

Step 6. Confirm your action, after which the operating system will get rid of this application.
Removing pre-installed applications
It is much more difficult to eliminate system applications. The fact is that some smartphone manufacturers preinstall some games and programs in order to receive money from their developers. Most often, such programs cannot be removed, otherwise the creators of smartphones would not be able to make money. But in fact, there are workarounds that still allow you to remove system applications.
However, be careful! You always need to understand which standard applications can be removed and which ones are better left alone. The fact is that eliminating some of them will lead to unstable operation of the entire operating system. If it is quite possible to get rid of any browser or navigation application, then it is better not to disturb “Calendar” or “Camera”.
You can only remove built-in applications using workarounds using root rights.
If you have superuser rights, then download ES Explorer or some other serious file manager, and then do the following:
Step 1. Launch ES Explorer or its equivalent.
Step 2. Enable the Root Explorer item, at the same time giving the utility root access.

Step 3. Navigate to internal memory along the path /system/app.
Step 4. Select the APK file of the application you do not need. If there is an ODEX file nearby with the same name, then select it too.
Step 5. In the context menu, select " Delete».
Step 6. On Android 5.0 and later versions of the operating system, all standard programs are located in folders. This does not change the essence of the matter - you will simply need to delete the entire folder, and not individual files.

Step 7 Next follow the path /data/app. Updates may be stored here. installed applications. They should also be removed. On devices running Android 5.0, again, updates are stored in separate folders. But this only makes the task easier.

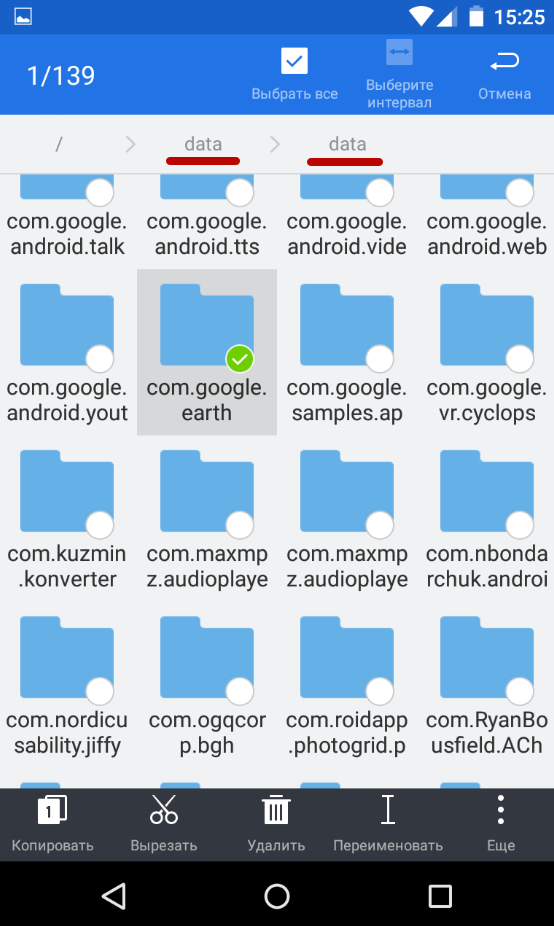
Step 8 You can also delete (and even need to) the database of system services and applications along with the cache. All this is stored along the way /data/data.
Using Root Uninstaller
There is another way to eliminate unwanted programs. It consists of using Root Uninstaller. This application also works only on gadgets with unlocked root rights.
Step 1. Launch the program, giving it root access at the same time.
Step 2. Select the utility or game you want to remove.
Step 3. Click the button Delete" In the same menu you can make a backup just in case.

Step 4. It is done! You can freeze applications in the same way. This will not free up space, but the program will definitely disappear from the menu.
Android smartphones are undoubtedly very popular. They attract primarily with their open platform, user friendliness and, of course, the abundance of possibilities. But nevertheless, Android, which comes as standard in many phones, has a whole set of pre-installed software.
The vast majority of this is software produced by Google. And it’s no secret that Google’s main business is collecting our private information. Google is constantly collecting information about us, search queries are carefully logged, movements are tracked, and passwords, emails and contact information are stored for years to come. All this is an integral part of modernity, but we are quite capable of changing it.
Today I will tell you how to remove Google programs from your phone, replacing them with open-source analogues and thereby significantly increasing the level of your privacy.
It's no secret that any device under Android control(By at least that is certified by Google) contains not only components assembled from AOSP, but also an impressive number of proprietary Google programs. These are the same Google Play, Gmail, Hangouts, Maps and a bunch of other applications, including a dialer and a camera (starting with KitKat).
For all these components there is not only no source code, but also no explanation at all about the principles of their operation. Many of them are initially designed to collect certain types of information and send it to Google servers. This is how, for example, GoogleBackupTransport behaves, which is responsible for synchronizing the list of installed applications, passwords and other data, GoogleContactsSyncAdapter, which synchronizes the list of contacts, or ChromeBookmarksSyncAdapter, whose job is to synchronize browser bookmarks. Plus collecting information about all queries in the search engine.
There is, of course, nothing wrong with the fact of synchronization, and it is an excellent mechanism that allows you to configure new phone in a matter of minutes, and Google Now even manages to give us useful information based on our data (sometimes). The only problem is that all this destroys our privacy, because, as Snowden showed, under the hood of the NSA (and, most likely, a bunch of other services) is not only some evil empire called Microsoft, but also Google, and as well as many other companies from the “we are not evil, but fluffy philanthropists” crowd.
In other words: Google will merge us all without any problems, and it’s not a fact that its employees, sitting in their offices with masseuses and dogs, are not laughing at the names from your contact book (everything is encrypted there, yes), drinking 15-year-old pu-erh from Yunnan Province. Or maybe to hell with Google? Let's take their Android and let them go through the forest?
What is Google Apps
The latest version of the custom KitKat-based firmware for my smartphone weighs 200 MB, however, in order to get a real experience from the smartphone, I also have to flash the gapps archive on top of it, the size of which is 170 MB. Only after this will I receive a system similar to that pre-installed on Nexus devices, with all the goodies in the form of a desktop integrated with Google Now, a screen lock based on a face shot, a camera with support for spherical shooting and a kilogram of Google software, from Google Play to Google Books.
I repeat once again: all this is closed software from Google, which in a good way cannot be distributed at all without their knowledge (that’s why it is not in custom firmware like), but since it is quite easy to extract it from the firmware of Nexus devices, you can find it on the Internet great amount similar archives, including severely truncated ones. In order to release an Android smartphone with a set of gapps on board, the manufacturer must send it for certification to Google, which, after evaluating the quality and performance of the smartphone, will either give the go-ahead or kick it (but this does not stop the Chinese at all).
This is how Google Apps get to your smartphone. Of the users, 99% either use pre-installed applications or install them themselves on absolutely clean and completely anonymous firmware. And then, from the moment you enter your username and password, synchronization and downloading of information begins.
To figure out how this happens, let’s unpack the same archive with gapps and take a look inside. We are interested in the /system/app and /system/priv-app directories; during installation, their contents are copied to the directories of the same name inside the smartphone. The second directory is a KitKat innovation, apparently invented to store private applications that are accessible only to the administrator (owner) of the device and invisible to other users logged into the system.
In the /system/app directory we will find a large number of various Google applications, easily recognizable by the name of the package: Books.apk, Chrome.apk, Gmail2.apk and so on. Each of them will share information differently, but that's totally fine (yes, Google will know you're reading Paulo Coelho through their app!). The greatest danger here is GoogleContactsSyncAdapter.apk, which is only responsible for sending a list of contacts to the remote server. We write down the name in a notepad and move on.
Most of the files from the /system/priv-app directory are the services and frameworks necessary to run this whole synchronization and surveillance machine:
- GoogleBackupTransport.apk - synchronizes data from installed applications, Wi-Fi passwords and some settings;
- GoogleLoginService.apk - connects the device with a Google account;
- GooglePartnerSetup.apk - allows third-party applications to access Google services;
- GoogleServicesFramwork.apk - a framework with various auxiliary functionality;
- Phonesky.apk - Play Store(surprisingly);
- PrebuiltGmsCore.apk - Google Services, as the name suggests, is the core of the entire gapps suite;
- Velvet.apk is a Google search that includes a desktop search bar and Google Now.
In essence, this is the part of Google Apps that is responsible for leaking our private information. Let's try to get rid of all this.
Method number 1. Disabling through settings
The easiest way to unlink a smartphone from Google is to use the standard system settings. The good thing about this method is that it does not require root rights, installation of custom firmware, or custom recovery. Everything can be done in any stock firmware without losing access to your account and applications like Gmail (if necessary). However, no one will vouch for the efficiency, since it is quite possible that some gapps components will continue to send data.
The main location for synchronization settings is the menu “Settings -> Accounts -> Google -> [email protected]" Here you can disable things like syncing contacts, application data, Gmail, Play Music, Google Keep, and more. All you need to do is simply uncheck the desired menu items. Next, go to the “Settings -> Backup and reset” menu and uncheck the “Data backup” and “Auto recovery” items.
The Google Settings application, which is part of Google Services, is also responsible for many synchronization settings. With its help, in particular, you can disable Google access to the location (“Access to geodata -> Access to my geodata / Sending geodata / Location history”), disable sending personal data to the search engine (“Search -> Personal data”), disable Google Now (“Search -> Google Now”) and disable remote control(" Remote control-> Remote device search / Remote blocking and reset settings").
In the same “Google Settings”, by the way, you can disable any application that uses Google account for authorization. We are talking not only about the software installed on the device, but also about all applications ever used, including websites. For example, I found a lot of sites on this list that I haven’t visited for at least a couple of years.
In case you are not going to use it at all Google services, it will be easier to disconnect your smartphone from your account completely, that is, simply delete it through the settings: “Settings -> Accounts -> Google -> [email protected]-> Menu button -> Delete account.”
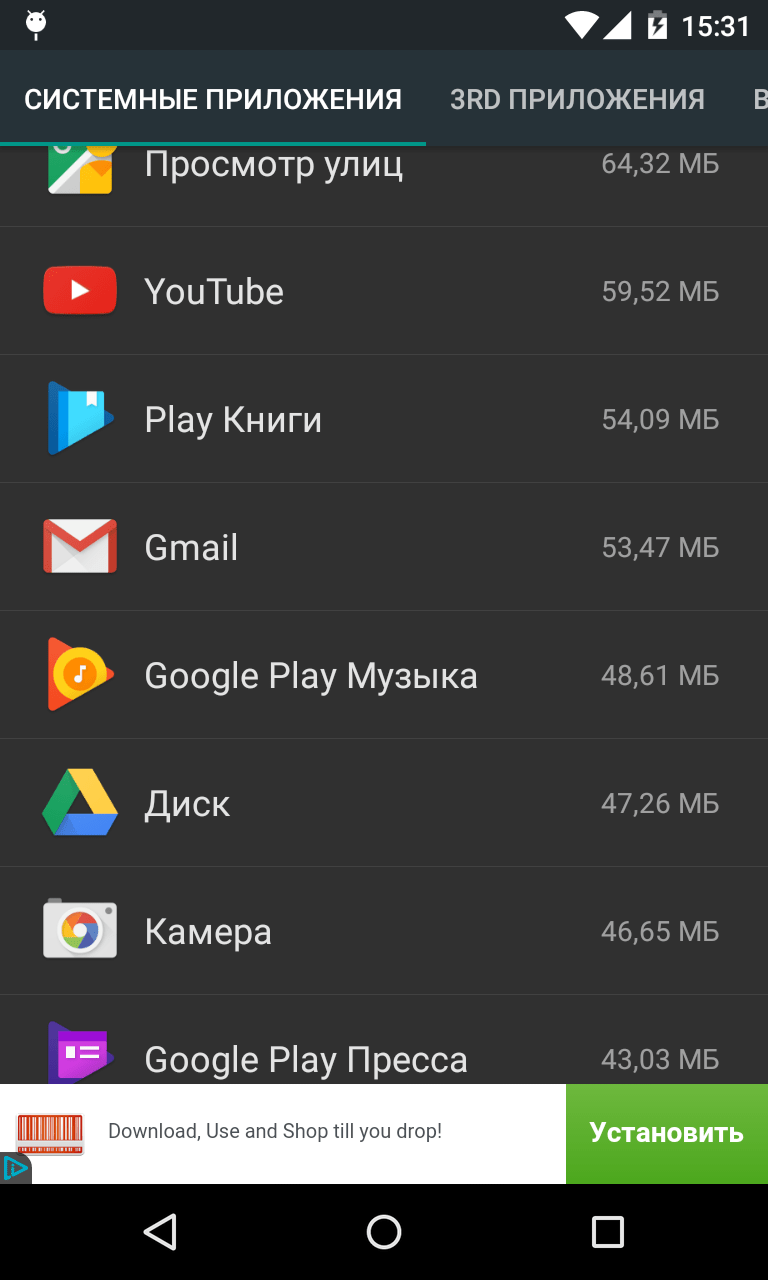
Majority Google applications You can safely disable it through the settings: “Applications -> ALL -> desired application -> Disable.”


Method number 2. Cleaning the official firmware
In the event that the stock firmware has root rights, you can get rid of Google Apps by simply deleting them from your smartphone. As I already said, they are all stored in the /system/app and /system/priv-app directories. For example, in the case of KitKat, the list of Google applications in the first directory will be like this:
- Books.apk - Google Books;
- CalendarGoogle.apk - Google Calendar;
- Chrome.apk - Google Chrome;
- CloudPrint.apk - cloud printing system;
- Drive.apk - Google Drive;
- GenieWidget.apk - news and weather widget;
- Gmail2.apk - Gmail;
- GoogleContactsSyncAdapter.apk - contact synchronization;
- GoogleEars.apk - Google Ears (similar to Shazam);
- GoogleEarth.apk - Google Earth;
- GoogleHome.apk - home screen with integrated Google Now;
- GoogleTTS.apk - speech synthesis system;
- Hangouts.apk - Google Hangouts;
- Keep.apk - Google Keep;
- LatinImeGoogle.apk - keyboard with gesture support;
- Magazines.apk - Google Magazines;
- Maps.apk - Google Maps;
- Music2.apk - Google Music;
- PlayGames.apk - Google PlayGames;
- PlusOne.apk - Google+;
- QuickOffice.apk - QuickOffice;
- Street.apk - Google Street;
- SunBeam.apk - SunBeam live wallpaper;
- Videos.apk - Google Movies;
- YouTube.apk - YouTube.
The /system/priv-app directory, in addition to those listed earlier, also contains the following files:
- CalendarProvider.apk - stores calendar data;
- GoogleFeedback.apk - sends a report on the use of Google Play;
- GoogleOneTimeInitilalizer.apk - installation wizard for additional Google applications;
- SetupWizard.apk - setup wizard on first launch;
- Wallet.apk - Google Wallet;
- talkback.apk - voice notification about events on the device.
The Gapps kit for KitKat, among other things, also includes a proprietary camera with support for spherical shooting and a proprietary desktop with integrated Google Now.
But that is not all. Google Apps depends on several frameworks, which are located in the /system/framework directory. These files are com.google.android.maps.jar, com.google.android.media.effects.jar and com.google.widevine.software.drm.jar. There are also many libraries in the /system/lib directory that are used exclusively by Google applications. It is not at all necessary to remove them, but it is possible. Just to clean up the trash. You can find their list in the comments.
In previous (and future) versions of the system, the contents of Google Apps are different, so before deleting, I recommend downloading gapps of the required version from the site goo.im/gapps, unpacking it using WinRar and viewing the contents. You should also take into account the dependence of some applications from the market on Google applications, I will talk more about this later.

Method number 3. Custom firmware without gapps
The previous method can be significantly simplified if you simply install custom firmware on your smartphone without Google Apps. In this case, the smartphone/tablet will be crystal clear without any connection to Google. The disadvantage of this method is the absence of Google Play, but you can either replace it with a third-party application store (more on that below), or use next way, which includes installing a stripped-down version of Google Apps.
Method number 4. Google Play and nothing else
This method of partially decoupling from Google is a kind of compromise. It does not solve the problem of surveillance - at least without the settings from the first method - but it allows you to avoid cluttering the system with a bunch of useless software that will hang in the background and eat up memory. The idea is simple - install custom firmware and upload a minimalist version of gapps on top of it, which includes only Google Play.
There are many such minimal gapps assemblies on the Internet, but I would recommend using the time-tested BaNkS Gapps, namely the “month-date” file GApps Core 4.4.2 signed.zip". They work on any smartphone, are ART compatible and include only the basic gapps files, a list of which is given in the "What are Gapps" section, framework files, as well as several libraries. Essentially, it's Google Play, synchronization tools and nothing else.
Changing the search engine to DuckDuckGo
Even after completely disabling synchronization, the “built-in” Google search bar will remain on the home screen. In the stock firmware of some manufacturers (Samsung, for example), this is just a widget that can be easily removed from the screen. In pure Android and devices from many other manufacturers, it is “built into” the home screen, but it can be removed by disabling all search from Google (along with Google Now) using the menu “Settings -> Applications -> All -> Google search-> Disable" or by installing a third-party launcher. Next, just download DuckDuckGo from the market or another application store and add the widget of the same name to your home screen.
Third party market
The second and third methods involve completely getting rid of Google Apps, including Google Play and the ability to log in using a Google account, so we must find a simple and convenient installation applications that would not force us to download them ourselves, and then dump them onto a memory card and install them manually. One such way is to install a third-party market.
On this moment There are three more or less viable alternatives to Google Play. These are Amazon Appstore, Yandex.Store and 1Mobile Market. Each of them has its own advantages and disadvantages, which mainly come down to the number of applications and payment methods:
- Amazon Appstore is the most famous application store after Google Play. Contains more than 75 thousand applications (compared to 800 thousand on Google Play), the quality of each of which is manually checked, just like iTunes for iOS. You can pay using credit card or Amazon Coins, which are given as a gift for purchasing a Kindle Fire tablet or as a gift from another user. One of the most interesting features of the store is the daily free distribution of one of the paid applications.
- Yandex.Store is a store from the Yandex company. Contains more than 85 thousand applications, each of which is scanned by Kaspersky antivirus. It doesn’t particularly stand out, but it has a killer feature in the form of the ability to pay for purchases using the Yandex.Money service or a mobile phone account.
- 1Mobile Market is the largest third-party repository of Android applications, including more than 500 thousand software. It differs from others by the presence of exclusively free applications (not to be confused with pirated ones), which is why it allows you not to go through the account registration stage and maintain anonymity.
Applications in all three markets have original digital signatures application developers, allowing them to be used simultaneously. An application installed from one market can be updated without problems from another, and if deleted, it will disappear from the list of installed ones in all of them. However, you will have to buy them separately.
 . It is completely anonymous and contains only free software distributed under licenses approved by the FSF. There are only a thousand applications in F-Droid, but all of them are guaranteed to not contain backdoors or other systems for disclosing personal data. It is F-Droid that is used as the default market in the free Android firmware Replicant.

Solving the problem of application dependence on Google Apps
Even though gapps components are not part of the official Android API, some applications still expect to see them on the system, which can cause a number of problems - from the application not working at all to losing some of its functionality. Some applications will refuse to install due to lack of Google Maps API, others crash immediately after launch without detecting it, others include direct links to Google Play, which can lead to crashes and incorrect operation.
To address these issues, XDA user MaR-V-iN started the NOGAPPS project, which is developing a set of open source components to replace the original Google Apps functionality. There are currently three replacement components available:
- Network Location is a Wi-Fi based geolocation service and base stations GSM. Based on Apple's IP address database and open base station database;
- Maps API - replacement of the interface to Google Maps based on OpenStreetMap;
- BlankStore is an open alternative to the Play Store client. Allows you to install free apps from the Google store, but is not recommended for use due to possible sanctions from the search engine (this is prohibited by their rules).
The components are installed separately and different ways. You just need to manually copy the Network Location to the /system/app/ directory in Android 2.3–4.3 or to the /system/priv-app/ directory in KitKat (in this case you should use the NetworkLocation-gms.apk file). Maps API is installed by flashing the nogapps-maps.zip file via the recovery console. To install the market you will have to not only copy the file, but also generate an Android ID on big car, but since this is not recommended, I will not talk about it and will limit myself to a link to the instructions.
After all the manipulations, the software should work correctly.
conclusions
For the company Google Android without its own applications it is useless, so it is not surprising that the company takes out the most delicious parts of the system in them and leaves the code closed. However, in this article I showed that there is life without gapps and it can be even easier and more convenient than with Google.
Last updated by at January 27, 2017.
Many manufacturers of Android devices also make money by installing so-called bloatware - almost useless applications like a news aggregator or an office document viewer. Most of these programs can be removed in the usual way, but some of them are system ones, and standard means they cannot be removed.
However, advanced users have found methods to remove such firmware using third-party tools. Today we want to introduce you to them.
Third-party tools that have the option to remove bloatware (and system applications in general) are divided into two groups: the first do this in automatic mode, the latter require manual intervention.
To manipulate the system partition, you must have root rights!
Method 1: Titanium Backup
Famous app for Reserve copy programs also allows you to remove built-in components that the user does not need. In addition, the backup function will help you avoid annoying mistakes when, instead of a garbage application, you deleted something critical.
- Open the application. In the main window, go to the tab "Backups" single tap.
- IN "Backups" tap on "Change filters".
- IN "Filter by type" just mark "Syst.".
- Now in the tab "Backups" Only built-in applications will be displayed. In them, find the one you want to delete or disable. Tap on it once.
- An options menu will open. It gives you several options for what to do with the application.

Delete an application (button "Delete") is a radical measure, practically irreversible. Therefore, if the application just bothers you with notifications, you can turn it off with the button "Freeze"(Please note that this feature is only available in the paid version of Titanium Backup).
If you want to free up memory or use the free version of Titanium Backup, then choose the option "Delete". We recommend that you make a backup copy first so that if problems arise, you can roll back the changes. You can do this with the button "Save".
It also doesn't hurt to make a backup copy of your entire system. - If you have chosen to freeze, then when it is finished, the application in the list will be highlighted in blue.

It can be defrosted or removed permanently at any time. If you decide to delete it, a warning will appear in front of you.
Click "Yes". - Once the app is uninstalled, it will appear crossed out in the list.

Once you exit Titanium Backup, it will disappear from the list.


Before any manipulations with the system partition, we strongly recommend that you familiarize yourself with the list of applications that can be safely removed from the firmware! As a rule, this list can be easily found on the Internet!
Despite its simplicity and convenience, there are limitations free version Titanium Backup may cause you to choose a different option to disable built-in applications.
Method 2: File managers with root access (uninstall only)
This method involves manually removing software located along the path /system/app. Suitable for this purpose are, for example, Root Explorer or . For example, we will use the latter.
- Once logged into the application, go to its menu. You can do this by clicking on the button with stripes in the upper left corner.

In the list that appears, scroll down and activate the switch "Root Explorer". - Return to the file display. Then click on the inscription to the right of the menu button - it may be called "sdcard" or "Inner memory".

In the pop-up window, select "Device"(may also be called "root"). - The system root directory will open. Find the folder in it "system"- as a rule, it is located at the very end.

Enter this folder with a single tap. - The next item is the folder "app". Usually she is the first in a row.

Go to this folder. - Users of Android 5.0 and above will see a list of folders containing both APK files and additional ODEX documents.

Those who use older versions of Android will see APK files and ODEX components separately. - To remove a built-in system application on Android 5.0+, simply select the folder with a long tap, then click on the button with the image of a trash can on the toolbar.

Then in the warning dialog, confirm the deletion by pressing "OK". - On Android 4.4 and below, you need to find both APK and ODEX components. As a rule, the names of these files are identical. The sequence for removing them does not differ from that described in step 6 of this method.
- Done – the unnecessary application has been removed.


There are others that can use root privileges, so choose any option that suits you. The disadvantages of this method are the need to know exactly the technical name of the software being removed, as well as a high probability of error.
Method 3: System Tools (disable only)
If you do not intend to remove the application, you can disable it in the system settings. This is done very simply.

As you can see, the task of removing system applications is completely solvable, even if it is associated with a number of difficulties.


